WLI-CB-G54S specifications
The Buffalo Technology WLI-CB-G54S is a high-performance wireless LAN card designed to provide seamless connectivity for notebook computers. This card stands out in its category due to its advanced features and robust performance, making it ideal for users looking to enhance their mobile computing experience.One of the key features of the WLI-CB-G54S is its adherence to the IEEE 802.11g standard, which enables data transfer rates of up to 54 Mbps. This allows for high-speed wireless access to networks, enabling users to stream videos, download files, and engage in online gaming without significant lag. Additionally, the card is backward compatible with the earlier IEEE 802.11b standard, ensuring that it can connect to a variety of existing wireless networks.
The WLI-CB-G54S incorporates Buffalo's AirStation technology, which enhances wireless signal reliability and coverage. This technology optimizes the connection by adjusting to environmental factors, thus providing a stable and consistent wireless experience. Users can enjoy a longer range and better performance in both open spaces and environments with many obstacles.
Security is another crucial aspect of the Buffalo WLI-CB-G54S. It supports advanced encryption protocols such as WPA2 and WPA-PSK, ensuring that data transmitted over the network remains secure and protected from unauthorized access. This focus on security is particularly important in today's digital age, where users are increasingly concerned about their personal information.
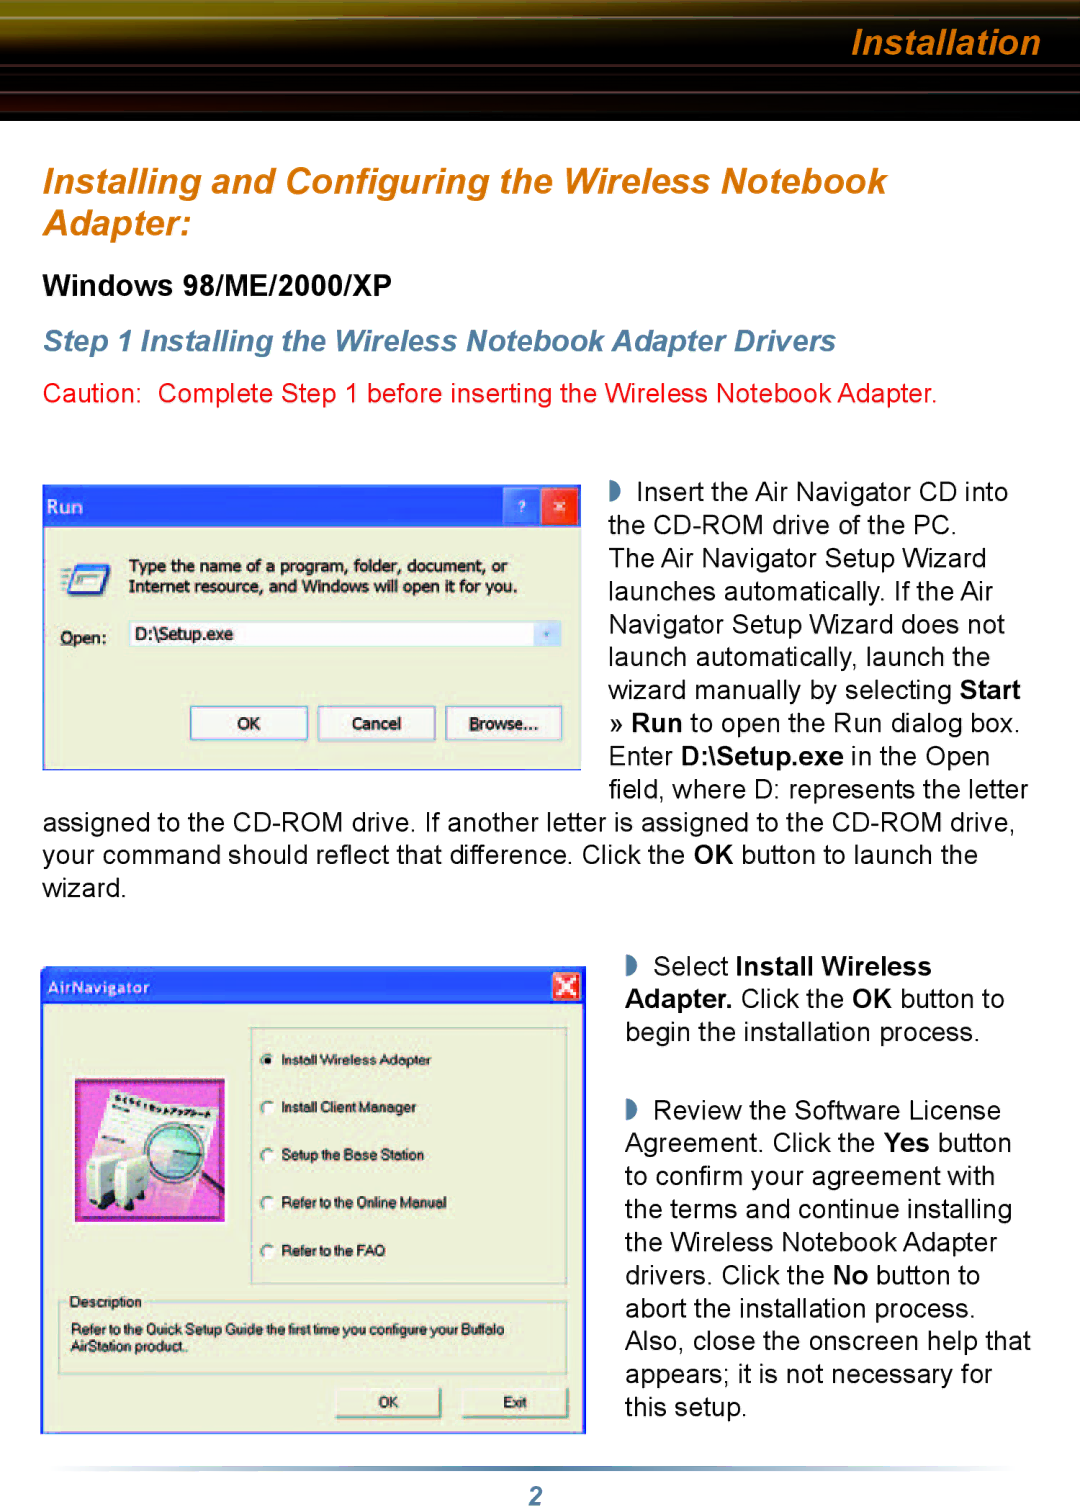
Additionally, the WLI-CB-G54S features an intuitive setup process, complete with an easy-to-use installation guide. This ensures that users can quickly and efficiently configure their wireless settings without requiring extensive technical knowledge. The plug-and-play functionality allows users to install the card and start using it almost immediately.
Another characteristic that makes the Buffalo WLI-CB-G54S appealing is its compact design. The card is lightweight and portable, which is essential for users who frequently travel with their laptops. It fits snugly into the PC card slot without adding unnecessary bulk.
In conclusion, the Buffalo Technology WLI-CB-G54S is an excellent choice for anyone seeking high-speed wireless connectivity for their notebook computer. With its adherence to the latest wireless standards, robust security features, and user-friendly setup, it delivers performance that meets the demands of modern mobile computing. Whether for work or leisure, this wireless LAN card is engineered to provide reliable connectivity wherever users may go.

