
DPF801/DPF1001 specifications
The Bush DPF801 and DPF1001 are innovative digital photo frames that cater to the modern user's need for displaying precious memories in a stylish and convenient manner. These frames stand out not only for their classic aesthetics but also for their advanced features, appealing to a diverse audience from photography enthusiasts to families wanting to showcase their best moments.One of the standout features of both models is their ability to display high-resolution images. The DPF801 and DPF1001 are equipped with vibrant LCD screens that ensure colors are vivid and details are sharp. This clarity enhances the viewing experience, making photos come to life and allowing users to appreciate every detail in their cherished images.
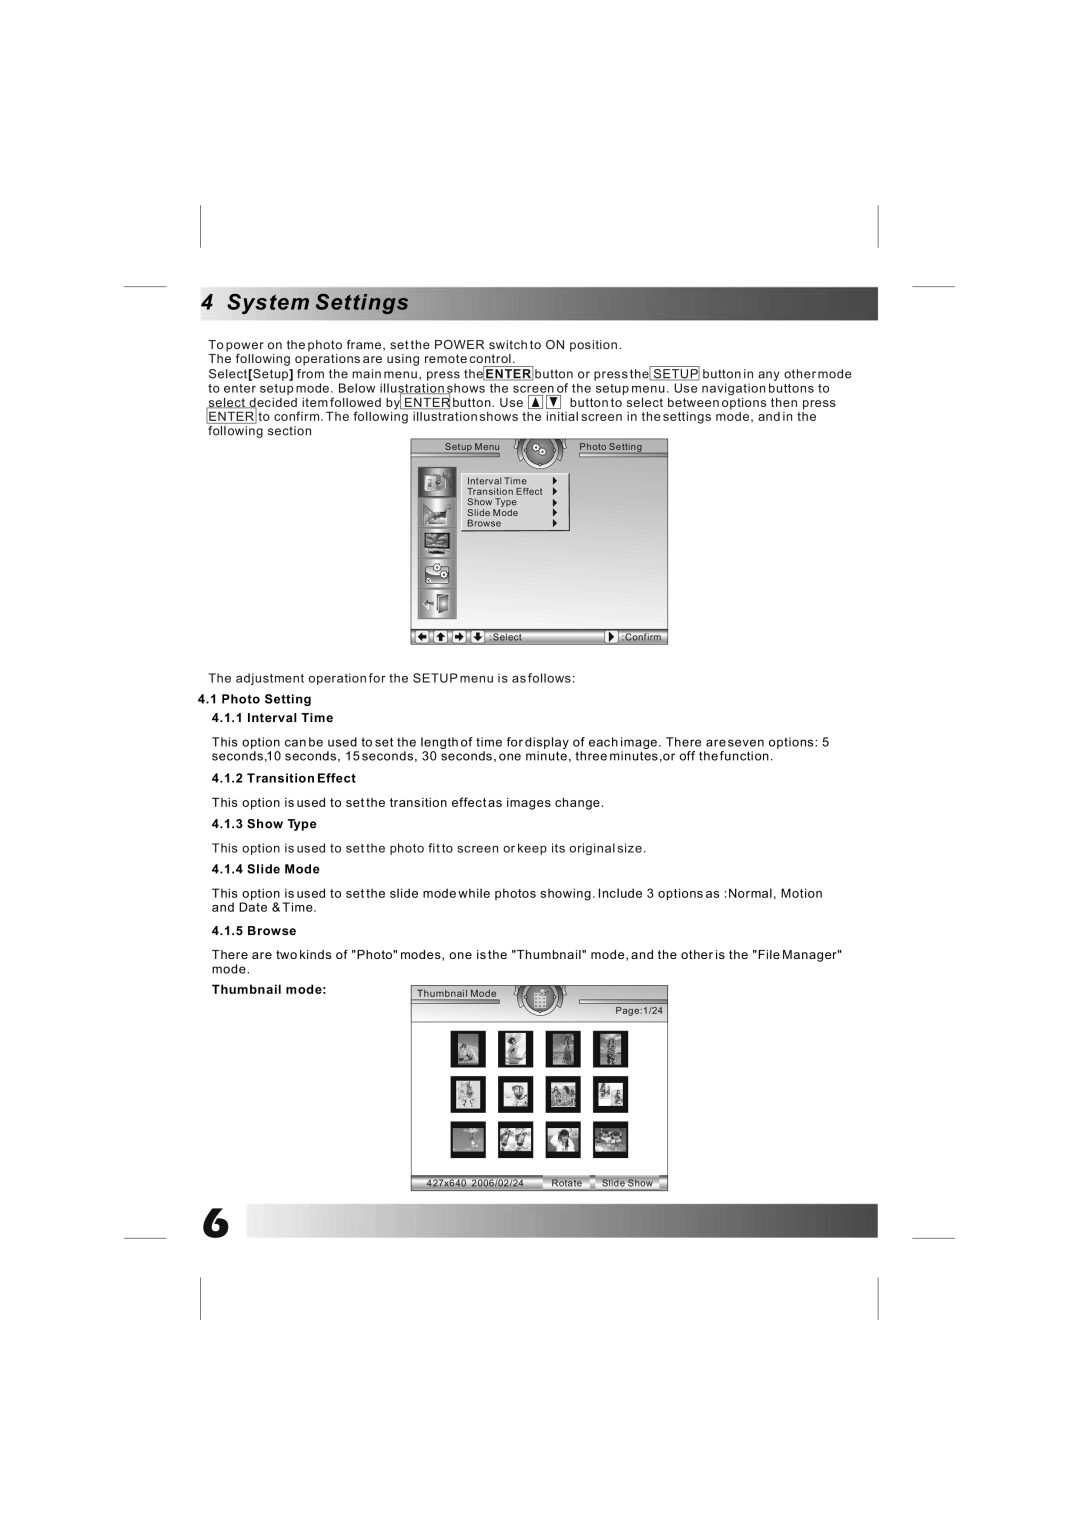
In terms of capacity, both frames support a variety of image formats, including JPEG and BMP, making it easy for users to upload and display their favorite photos. The ability to manage and transfer images via USB and SD card slots adds to the convenience. Users can easily share their memories without the hassle of a computer, simply by inserting a memory card or USB drive.
One of the noteworthy technologies featured in the DPF801 and DPF1001 is the slideshow functionality. This feature allows users to create dynamic displays of their images, which can be customized with different transition effects. It enhances the visual experience, as users can enjoy a continuous flow of memories, specially tailored to their preferences.
Both models come with built-in speakers, allowing users to add an audio element to their displays. They can play background music or sound recordings, creating a multisensory experience that enriches the storytelling of their photos. This feature is particularly appealing for special occasions and celebrations.
Ease of use is emphasized in both digital frames, with intuitive interfaces that are user-friendly. The inclusion of remote controls allows users to switch images, adjust settings or play music from a distance, adding convenience to the overall experience.
Battery life is another significant characteristic, especially for those who prefer portability. The rechargeable battery ensures that users can enjoy their digital frames anywhere, whether it's at home, during a family gathering, or while traveling.
In conclusion, the Bush DPF801 and DPF1001 digital photo frames combine contemporary design with cutting-edge technologies. With high-resolution displays, versatile image management, engaging slideshow features, and audio capabilities, they provide a unique way to relive cherished memories. These frames are not merely decorative items; they are a modern solution for celebrating life's moments in an engaging and innovative way.