ASSEMBLY
Dismounting Loader and Mounting Loader to Tractor
Dismounting Loader
To avoid injury during installation of loader:
•Place loader bucket against barrier to restrict forward movement of loader.
•Do not permit bystanders within 10 feet of loader.
Loader must be equipped with a bucket or other optional attachment to dismount from tractor.
When dismounting loader, maintain clearance between loader side frames and tractor hood and front axle.
1.Locate tractor and loader on firm level ground.
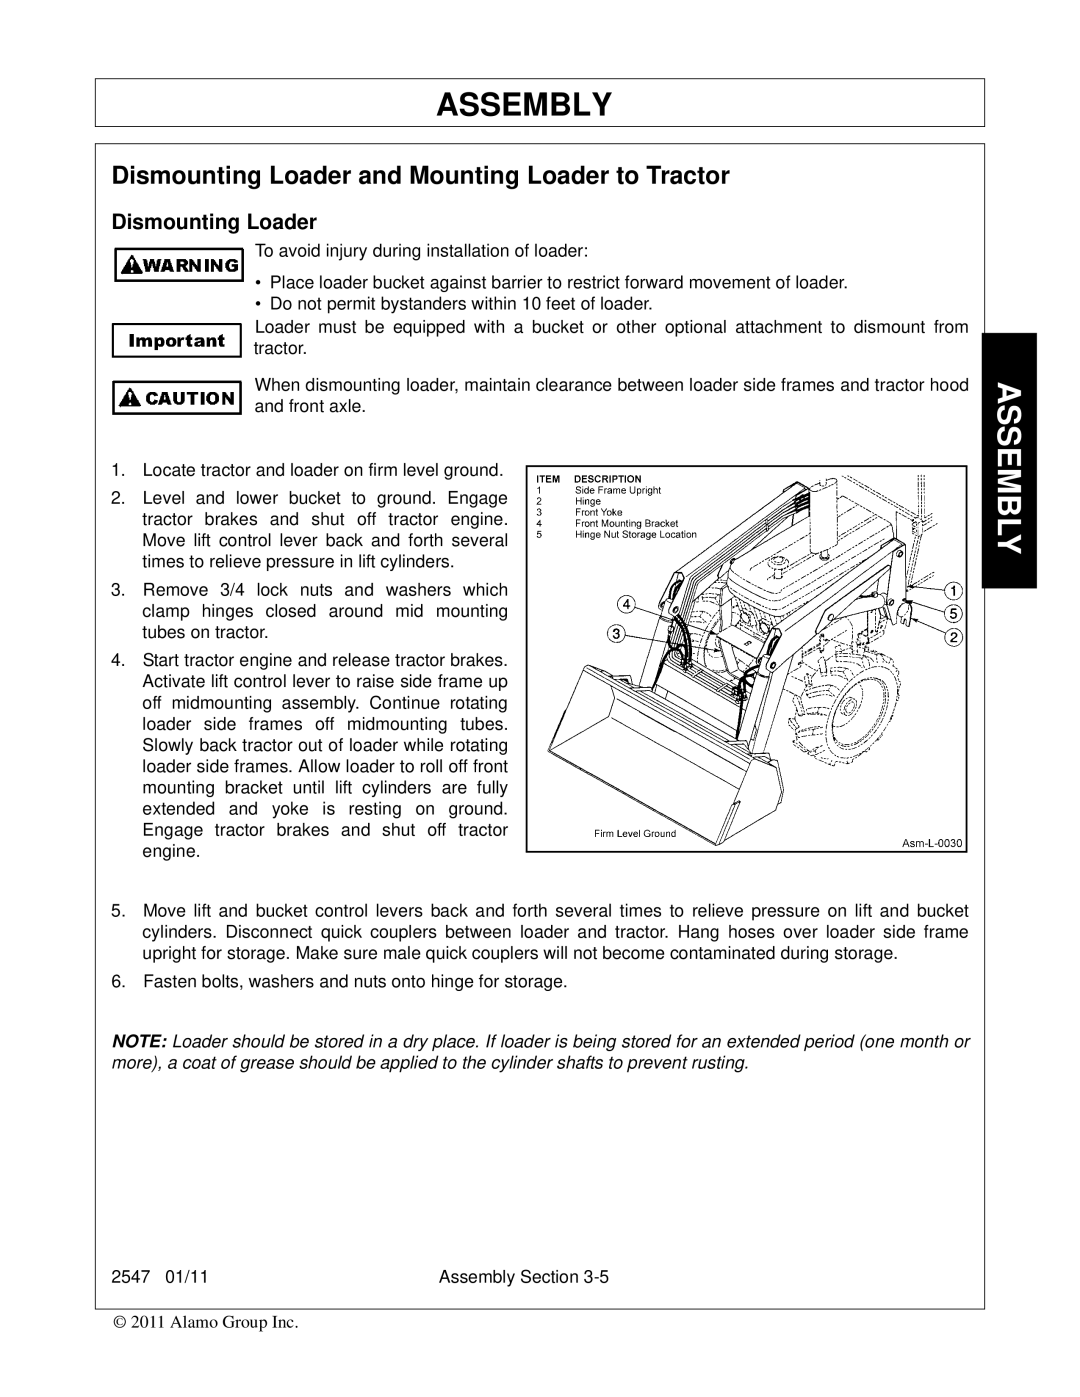
2.Level and lower bucket to ground. Engage tractor brakes and shut off tractor engine. Move lift control lever back and forth several times to relieve pressure in lift cylinders.
3.Remove 3/4 lock nuts and washers which clamp hinges closed around mid mounting tubes on tractor.
4.Start tractor engine and release tractor brakes. Activate lift control lever to raise side frame up off midmounting assembly. Continue rotating loader side frames off midmounting tubes. Slowly back tractor out of loader while rotating loader side frames. Allow loader to roll off front mounting bracket until lift cylinders are fully extended and yoke is resting on ground. Engage tractor brakes and shut off tractor engine.
5.Move lift and bucket control levers back and forth several times to relieve pressure on lift and bucket cylinders. Disconnect quick couplers between loader and tractor. Hang hoses over loader side frame upright for storage. Make sure male quick couplers will not become contaminated during storage.
6.Fasten bolts, washers and nuts onto hinge for storage.
NOTE: Loader should be stored in a dry place. If loader is being stored for an extended period (one month or more), a coat of grease should be applied to the cylinder shafts to prevent rusting.
ASSEMBLY
2547 01/11 | Assembly Section |
© 2011 Alamo Group Inc.
