|
|
Belt tensions should be checked every 40 hours to get maximum life from drive belts and best perfor- mance from the cutter. Belt tension is adjusted by increasing or decreasing the length of the spring on the moveable idlers. For proper belt tension on the mower, the spring lengths should be set at
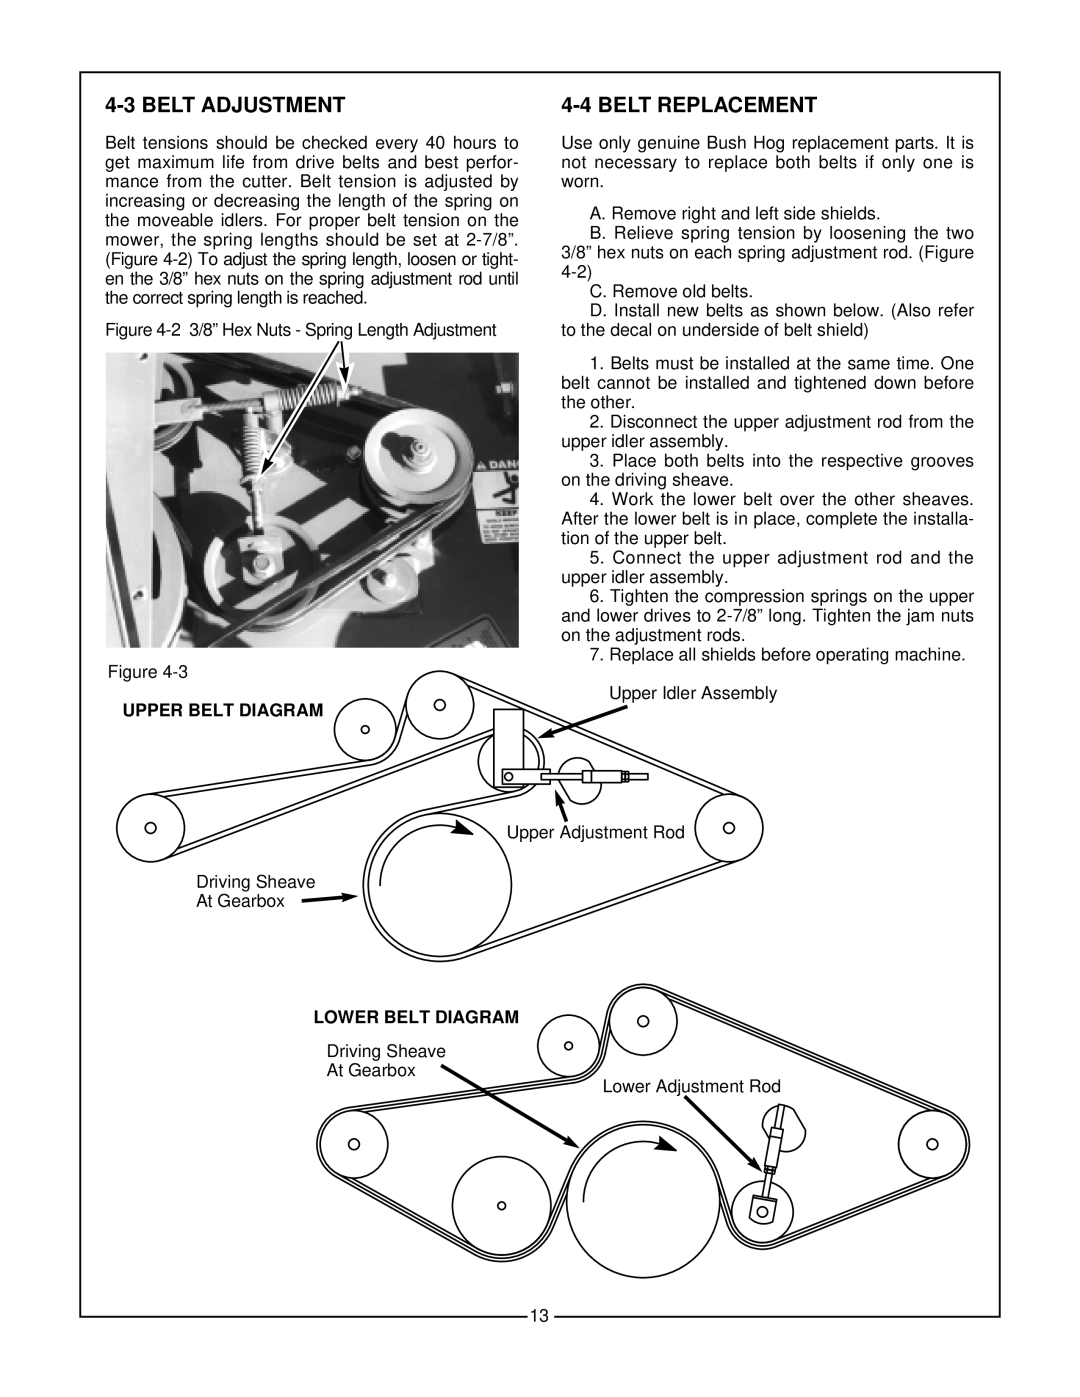
Figure 4-2 3/8” Hex Nuts - Spring Length Adjustment
Figure
Use only genuine Bush Hog replacement parts. It is not necessary to replace both belts if only one is worn.
A. Remove right and left side shields.
B. Relieve spring tension by loosening the two 3/8” hex nuts on each spring adjustment rod. (Figure 4-2)
C. Remove old belts.
D. Install new belts as shown below. (Also refer to the decal on underside of belt shield)
1.Belts must be installed at the same time. One belt cannot be installed and tightened down before the other.
2.Disconnect the upper adjustment rod from the upper idler assembly.
3.Place both belts into the respective grooves on the driving sheave.
4.Work the lower belt over the other sheaves. After the lower belt is in place, complete the installa- tion of the upper belt.
5.Connect the upper adjustment rod and the upper idler assembly.
6.Tighten the compression springs on the upper and lower drives to 2-7/8” long. Tighten the jam nuts on the adjustment rods.
7.Replace all shields before operating machine. Upper Idler Assembly
UPPER BELT DIAGRAM
Upper Adjustment Rod
Driving Sheave
At Gearbox
LOWER BELT DIAGRAM
Driving Sheave
At Gearbox
Lower Adjustment Rod
13