SECTION III
OPERATING INSTRUCTIONS
|
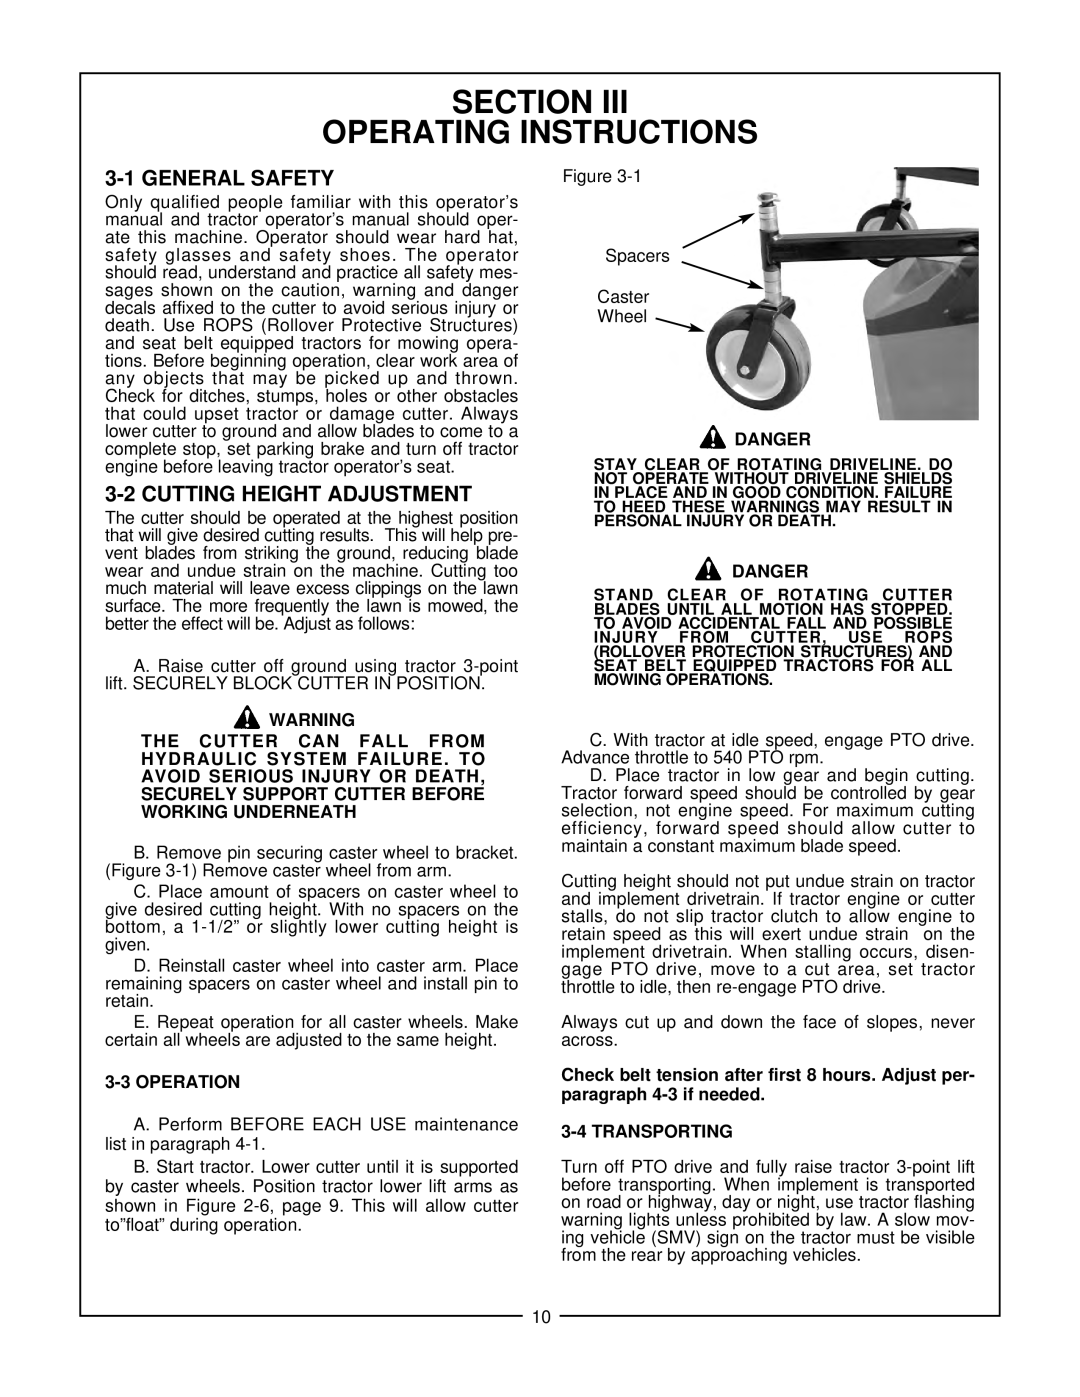
| Figure |
| ||||||||||||
Only qualified people familiar with this operator’s |
|
|
|
|
|
|
|
|
| ||||||
manual and tractor operator’s manual should oper- |
|
|
|
|
|
|
|
|
| ||||||
ate this machine. Operator should wear hard hat, |
|
|
|
|
|
|
|
|
| ||||||
safety glasses and safety shoes. The operator |
|
| Spacers |
| |||||||||||
should read, understand and practice all safety mes- |
|
|
|
|
|
|
|
|
| ||||||
sages shown on the caution, warning and danger |
|
|
|
|
|
|
|
|
| ||||||
|
| Caster |
|
|
|
|
|
| |||||||
decals affixed to the cutter to avoid serious injury or |
|
|
|
| |||||||||||
death. Use ROPS (Rollover Protective Structures) |
|
| Wheel |
|
| ||||||||||
and seat belt equipped tractors for mowing opera- |
|
|
|
|
|
|
|
|
| ||||||
|
|
|
|
|
|
|
|
| |||||||
tions. Before beginning operation, clear work area of |
|
|
|
|
|
|
|
|
| ||||||
any objects that may be picked up and thrown. |
|
|
|
|
|
|
|
|
| ||||||
Check for ditches, stumps, holes or other obstacles |
|
|
|
|
|
|
|
|
| ||||||
that could upset tractor or damage cutter. Always |
|
|
|
|
|
|
|
|
| ||||||
lower cutter to ground and allow blades to come to a |
|
|
|
|
|
|
|
|
| ||||||
|
|
|
|
|
| DANGER |
| ||||||||
complete stop, set parking brake and turn off tractor |
|
|
|
|
|
|
| ||||||||
|
|
|
|
|
|
| |||||||||
engine before leaving tractor operator’s seat. |
| STAY CLEAR OF ROTATING DRIVELINE. DO | |||||||||||||
| NOT OPERATE WITHOUT DRIVELINE SHIELDS | ||||||||||||||
|
| IN PLACE AND IN GOOD CONDITION. FAILURE | |||||||||||||
The cutter should be operated at the highest position |
| TO HEED THESE WARNINGS MAY RESULT IN | |||||||||||||
that will give desired cutting results. This will help pre- |
| PERSONAL INJURY OR DEATH. | |||||||||||||
vent blades from striking the ground, reducing blade |
|
|
|
|
|
| DANGER |
|
| ||||||
wear and undue strain on the machine. Cutting too |
|
|
|
|
|
|
|
| |||||||
much material will leave excess clippings on the lawn |
| STAND CL | EAR | OF ROTATING CUTTER | |||||||||||
surface. The more frequently the lawn is mowed, the |
| BLADES UNTIL ALL MOTION HAS STOPPED. | |||||||||||||
better the effect will be. Adjust as follows: |
| TO AVOID ACCIDENTAL FALL AND POSSIBLE | |||||||||||||
|
|
|
|
|
|
| INJURY FROM CUTTER, USE ROPS | ||||||||
A. Raise cutter off ground using tractor |
| (ROLLOVER PROTECTION STRUCTURES) AND | |||||||||||||
| SEAT BELT EQUIPPED TRACTORS FOR ALL | ||||||||||||||
lift. SECURELY BLOCK CUTTER IN POSITION. |
| MOWING OPERATIONS. | |||||||||||||
|
|
| WARNING |
|
|
| C. With tractor at idle speed, engage PTO drive. | ||||||||
| THE CUT | TE | R CAN | FALL FROM |
|
| |||||||||
| HYDRAULIC SYSTEM FAILURE. TO |
| Advance throttle to 540 PTO rpm. | ||||||||||||
| AVOID SERIOUS INJURY OR DEATH, |
|
| D. Place tractor in low gear and begin cutting. | |||||||||||
| SECURELY SUPPORT CUTTER BEFORE |
| Tractor forward speed should be controlled by gear | ||||||||||||
| WORKING UNDERNEATH |
| selection, not engine speed. For maximum cutting | ||||||||||||
|
| efficiency, forward speed should allow cutter to | |||||||||||||
B. Remove pin securing caster wheel to bracket. | maintain a constant maximum blade speed. | ||||||||||||||
(Figure | Cutting height should not put undue strain on tractor | ||||||||||||||
C. Place amount of spacers on caster wheel to | and implement drivetrain. If tractor engine or cutter | ||||||||||||||
give desired cutting height. With no spacers on the | stalls, do not slip tractor clutch to allow engine to | ||||||||||||||
bottom, a | retain speed as this will exert undue strain on the | ||||||||||||||
given. | implement drivetrain. When stalling occurs, disen- | ||||||||||||||
D. Reinstall caster wheel into caster arm. Place | gage PTO drive, move to a cut area, set tractor | ||||||||||||||
remaining spacers on caster wheel and install pin to | throttle to idle, then | ||||||||||||||
retain. | |||||||||||||||
E. Repeat operation for all caster wheels. Make | Always cut up and down the face of slopes, never | ||||||||||||||
certain all wheels are adjusted to the same height. | across. | ||||||||||||||
| Check belt tension after first 8 hours. Adjust per- | ||||||||||||||
A. Perform BEFORE EACH USE maintenance | paragraph | ||||||||||||||
| |||||||||||||||
list in paragraph | |||||||||||||||
B. Start tractor. Lower cutter until it is supported | Turn off PTO drive and fully raise tractor | ||||||||||||||
by caster wheels. Position tractor lower lift arms as | before transporting. When implement is transported | ||||||||||||||
shown in Figure | on road or highway, day or night, use tractor flashing | ||||||||||||||
to”float” during operation. | warning lights unless prohibited by law. A slow mov- | ||||||||||||||
ing vehicle (SMV) sign on the tractor must be visible | |||||||||||||||
|
|
|
|
|
| from the rear by approaching vehicles. | |||||||||
10