40HOURS
7.Spindle Assembly - Apply 3 shots of multi- purpose grease with grease gun every 40 hours. Grease fittings for spindles are accessible through holes in the shields.
4-3 BELT ADJUSTMENT
Belt tensions should be checked every 40 hours to get maximum life from drive belts and best perfor- mance from the cutter. Belt tension is adjusted by Figure
|
|
|
(7) 40 Hours | Rod Extends |
|
increasing or decreasing the length of the spring on the moveable idler. For proper belt tension on the mower, the spring length should be
4-4 BELT REPLACEMENT
Use only genuine Bush Hog replacement parts. A. Remove right and left side shields.
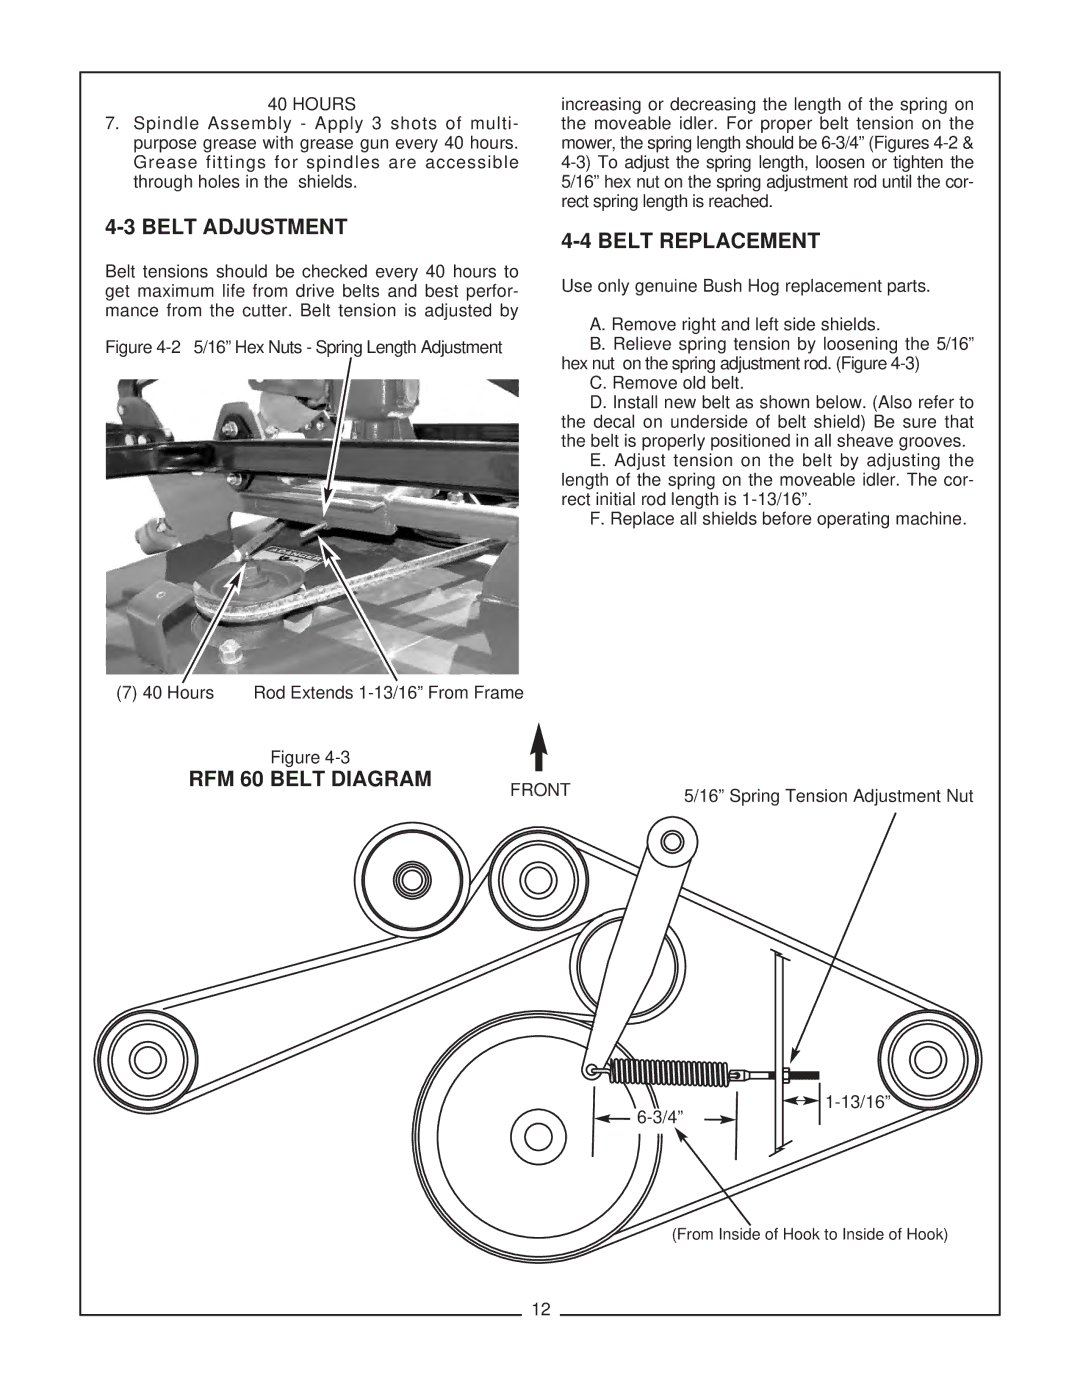
B. Relieve spring tension by loosening the 5/16” hex nut on the spring adjustment rod. (Figure
C. Remove old belt.
D. Install new belt as shown below. (Also refer to the decal on underside of belt shield) Be sure that the belt is properly positioned in all sheave grooves.
E. Adjust tension on the belt by adjusting the length of the spring on the moveable idler. The cor- rect initial rod length is
F. Replace all shields before operating machine.
Figure |
|
|
RFM 60 BELT DIAGRAM | FRONT | 5/16” Spring Tension Adjustment Nut |
|
(From Inside of Hook to Inside of Hook)
12
