ASSEMBLY
.... | is | . | Done |
Assembly requires two people Set the treadmlg In a cteared arsa and remove all packing maten_ |
|
|
dispose of the packing materials until assembly is completed. Refer to the drawings below to }denfify the parts
Used.in assembly: Assembly requires the fo!lowing tools: The include_ alien wtenchnch_ and your own
phghp" ._=rewdr,ver _ | and adjustable wrench _ | . |
U©
Handrail Washer (16)-2
Handrai_ Screw (32)-2
L_.tch Screw | Console pJate Screw | Extension Leg Screw |
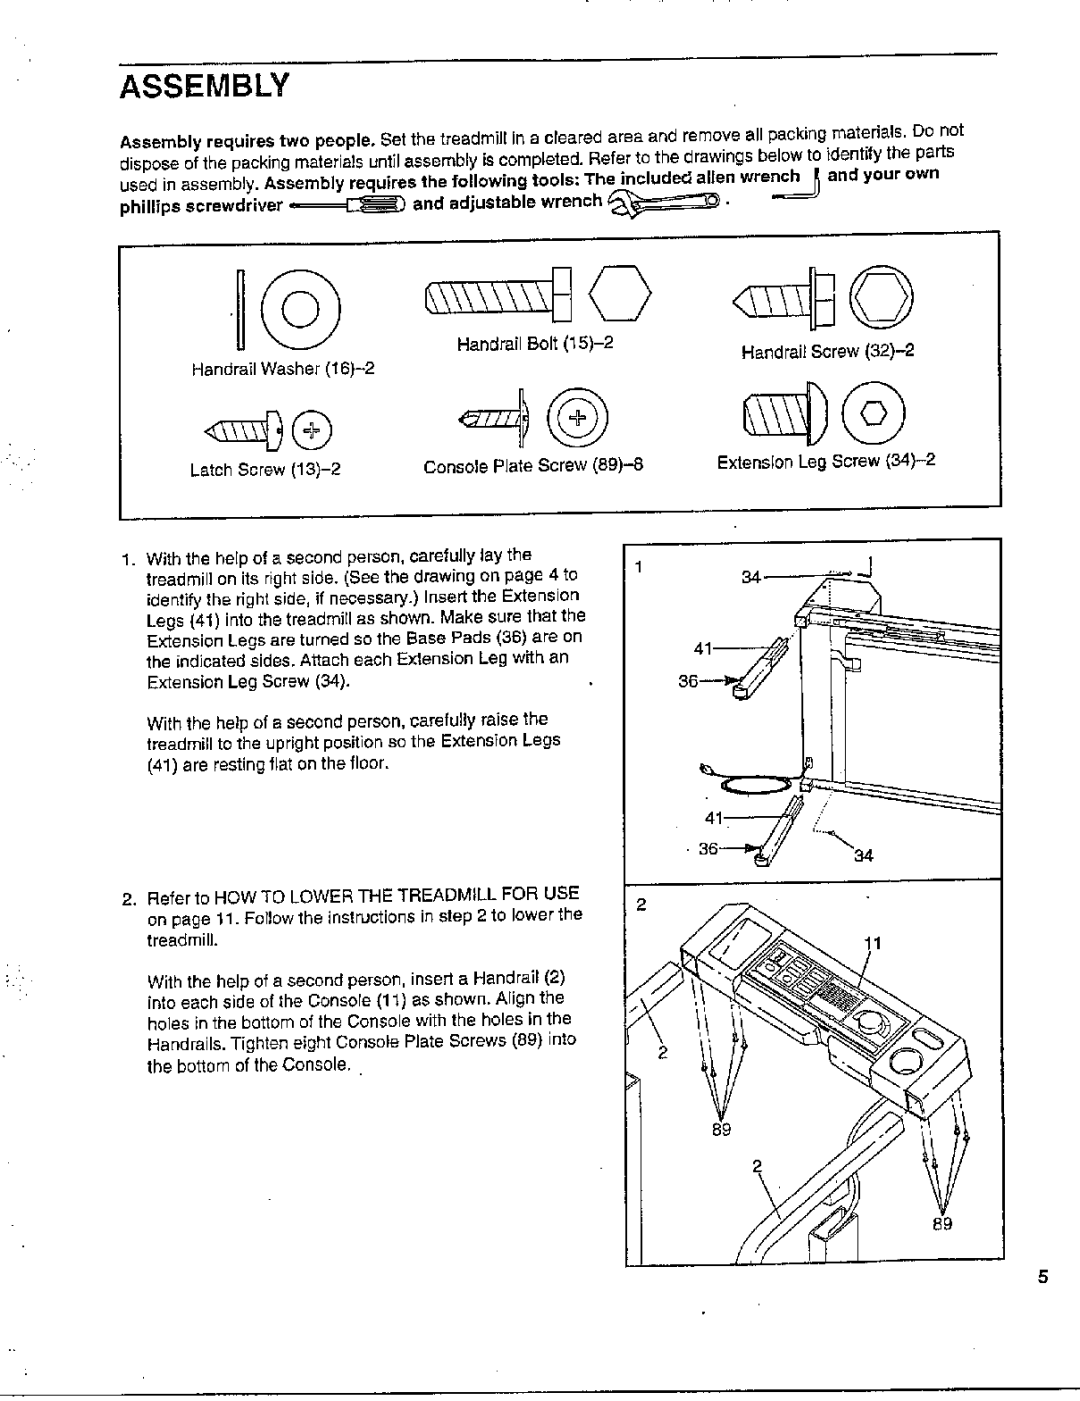
1. W_th the help of a second person, carefulfy Jay the treadmill on its right side. (See the drawing _n page 4 to identify the dghl side, if necessary.) Insert the Extension Legs (41) into the treadmill as shown. Make sure that the
Extension Legs are turned so the Base Pads (36) are on the indicated sides. Attach each Exlension Leg with an Extension Leg Screw (34).
With the help of B second person, carefully raise the treadmill to the upright position se the ExtensTon Legs (41) are resting flat on the floor.
2, Refer to HOW TO LOWER THE TREADMILL FOR USE
41
i •
on page 11. Foflow the irlstr_ctions in step 2 to lower the treadmill.
Wgh the help of a second person, insert a Henchalt (2) into each side of the Oonsore (11) as shown. Align the holes in the bottom of the Console with the holes in the Handrails. Tighten eight Console Plate Screws (89) into the bottom of the Console,
2
11