Inground Spa Light Installation In- structions
On spas ordered with inground lights, the factory installs the light niche for you. The next steps of installation should be performed by a qualified licensed electrician.
Always read and follow light manufacturer’s safety and installation instructions prior to installation and operation. Incorrect installation may damage the light and void its warranty.
The light circuit must be on a GFCI protected service (alone or with a switch).
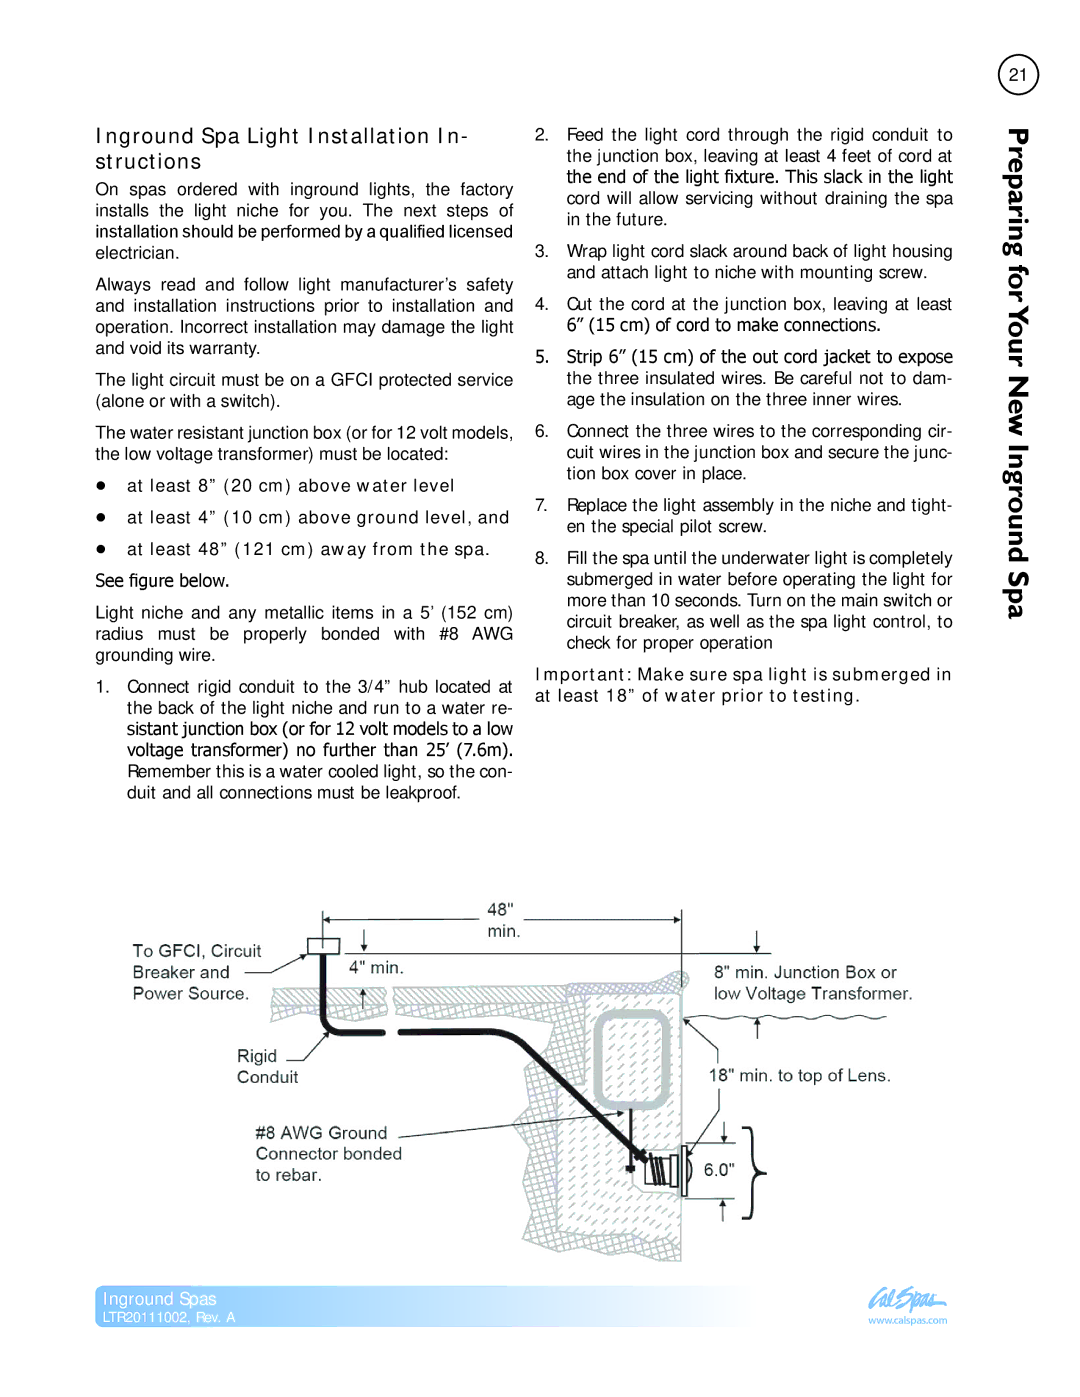
The water resistant junction box (or for 12 volt models, the low voltage transformer) must be located:
•at least 8” (20 cm) above water level
•at least 4” (10 cm) above ground level, and
•at least 48” (121 cm) away from the spa..
See figure below.
Light niche and any metallic items in a 5’ (152 cm) radius must be properly bonded with #8 AWG grounding wire.
1.Connect rigid conduit to the 3/4” hub located at the back of the light niche and run to a water re- sistant junction box (or for 12 volt models to a low voltage transformer) no further than 25’ (7.6m).
Remember this is a water cooled light, so the con- duit and all connections must be leakproof.
Inground Spas
2.Feed the light cord through the rigid conduit to the junction box, leaving at least 4 feet of cord at the end of the light fixture. This slack in the light cord will allow servicing without draining the spa in the future.
3.Wrap light cord slack around back of light housing and attach light to niche with mounting screw.
4.Cut the cord at the junction box, leaving at least
6” (15 cm) of cord to make connections.
5.Strip 6” (15 cm) of the out cord jacket to expose the three insulated wires. Be careful not to dam- age the insulation on the three inner wires.
6.Connect the three wires to the corresponding cir- cuit wires in the junction box and secure the junc- tion box cover in place.
7.Replace the light assembly in the niche and tight- en the special pilot screw.
8.Fill the spa until the underwater light is completely submerged in water before operating the light for more than 10 seconds. Turn on the main switch or circuit breaker, as well as the spa light control, to check for proper operation
Important: Make sure spa light is submerged in at least 18” of water prior to testing..
21 Preparingfor
Your New Inground Spa
LTR20111002, Rev. A | www.calspas.com |