3.8 Enabling the Guest Account
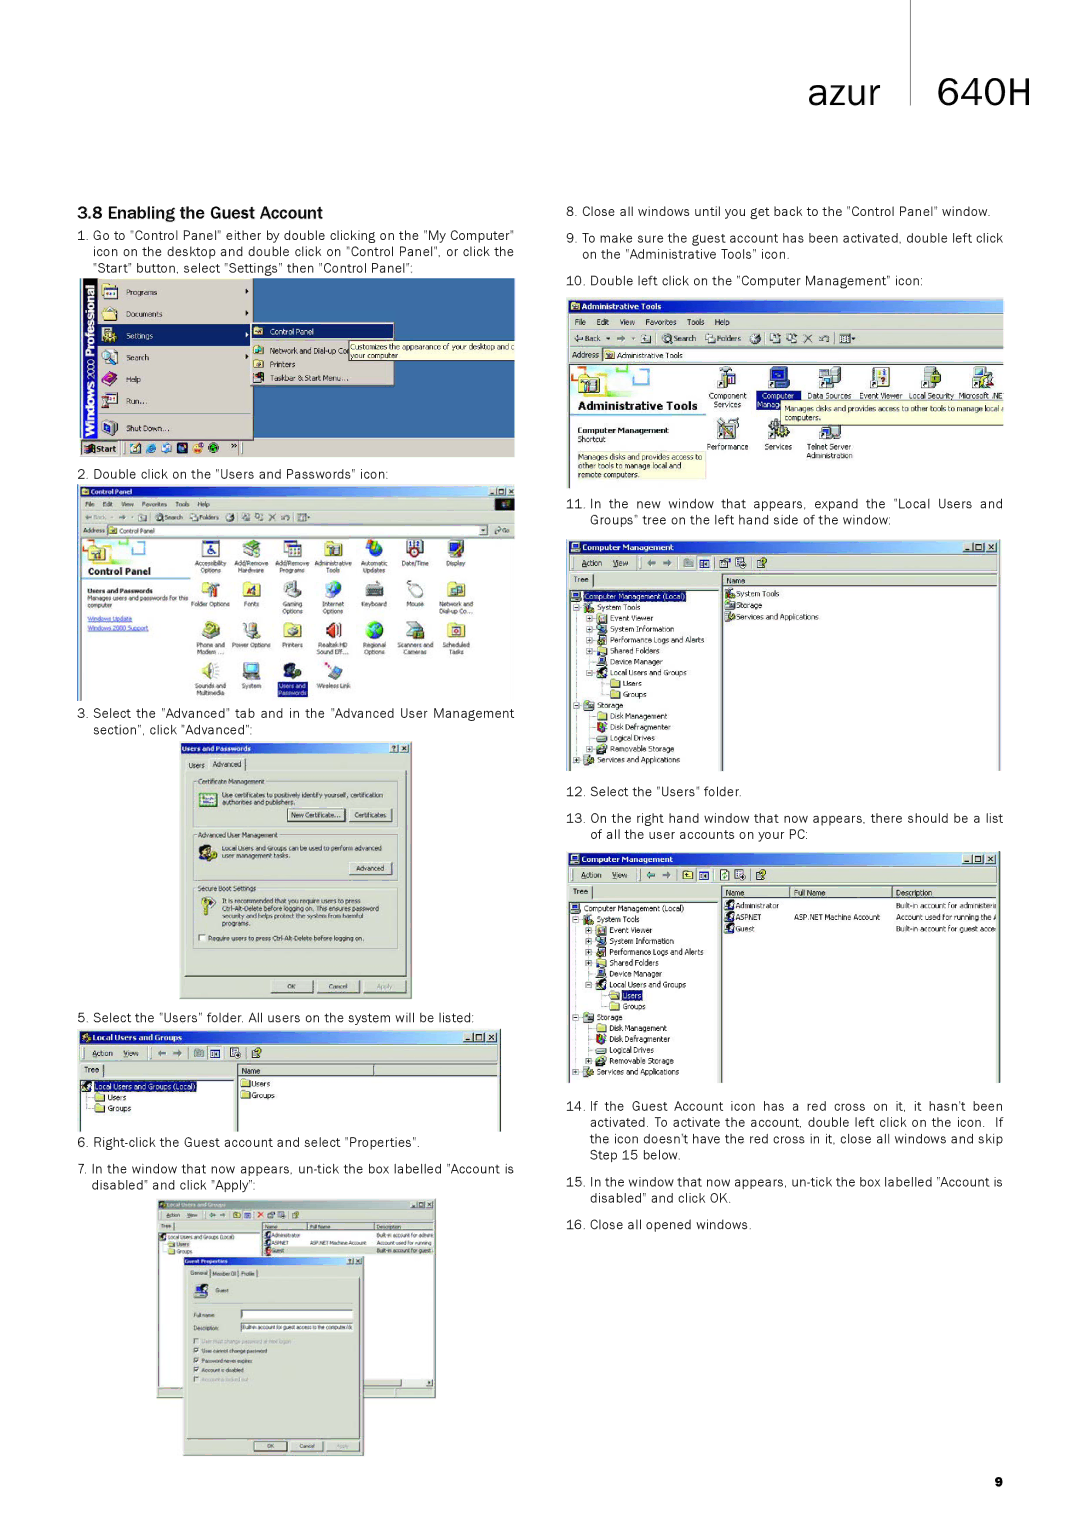
1.Go to "Control Panel" either by double clicking on the "My Computer" icon on the desktop and double click on "Control Panel", or click the "Start" button, select "Settings" then "Control Panel":
2. Double click on the "Users and Passwords" icon:
3.Select the "Advanced" tab and in the "Advanced User Management section", click "Advanced":
5. Select the "Users" folder. All users on the system will be listed:
azur 640H
8.Close all windows until you get back to the "Control Panel" window.
9.To make sure the guest account has been activated, double left click on the "Administrative Tools" icon.
10.Double left click on the "Computer Management" icon:
11.In the new window that appears, expand the "Local Users and Groups" tree on the left hand side of the window:
12.Select the "Users" folder.
13.On the right hand window that now appears, there should be a list of all the user accounts on your PC:
6.
7.In the window that now appears,
14.If the Guest Account icon has a red cross on it, it hasn't been activated. To activate the account, double left click on the icon. If the icon doesn't have the red cross in it, close all windows and skip Step 15 below.
15.In the window that now appears,
16.Close all opened windows.
9