This process is now complete.
azur 640H
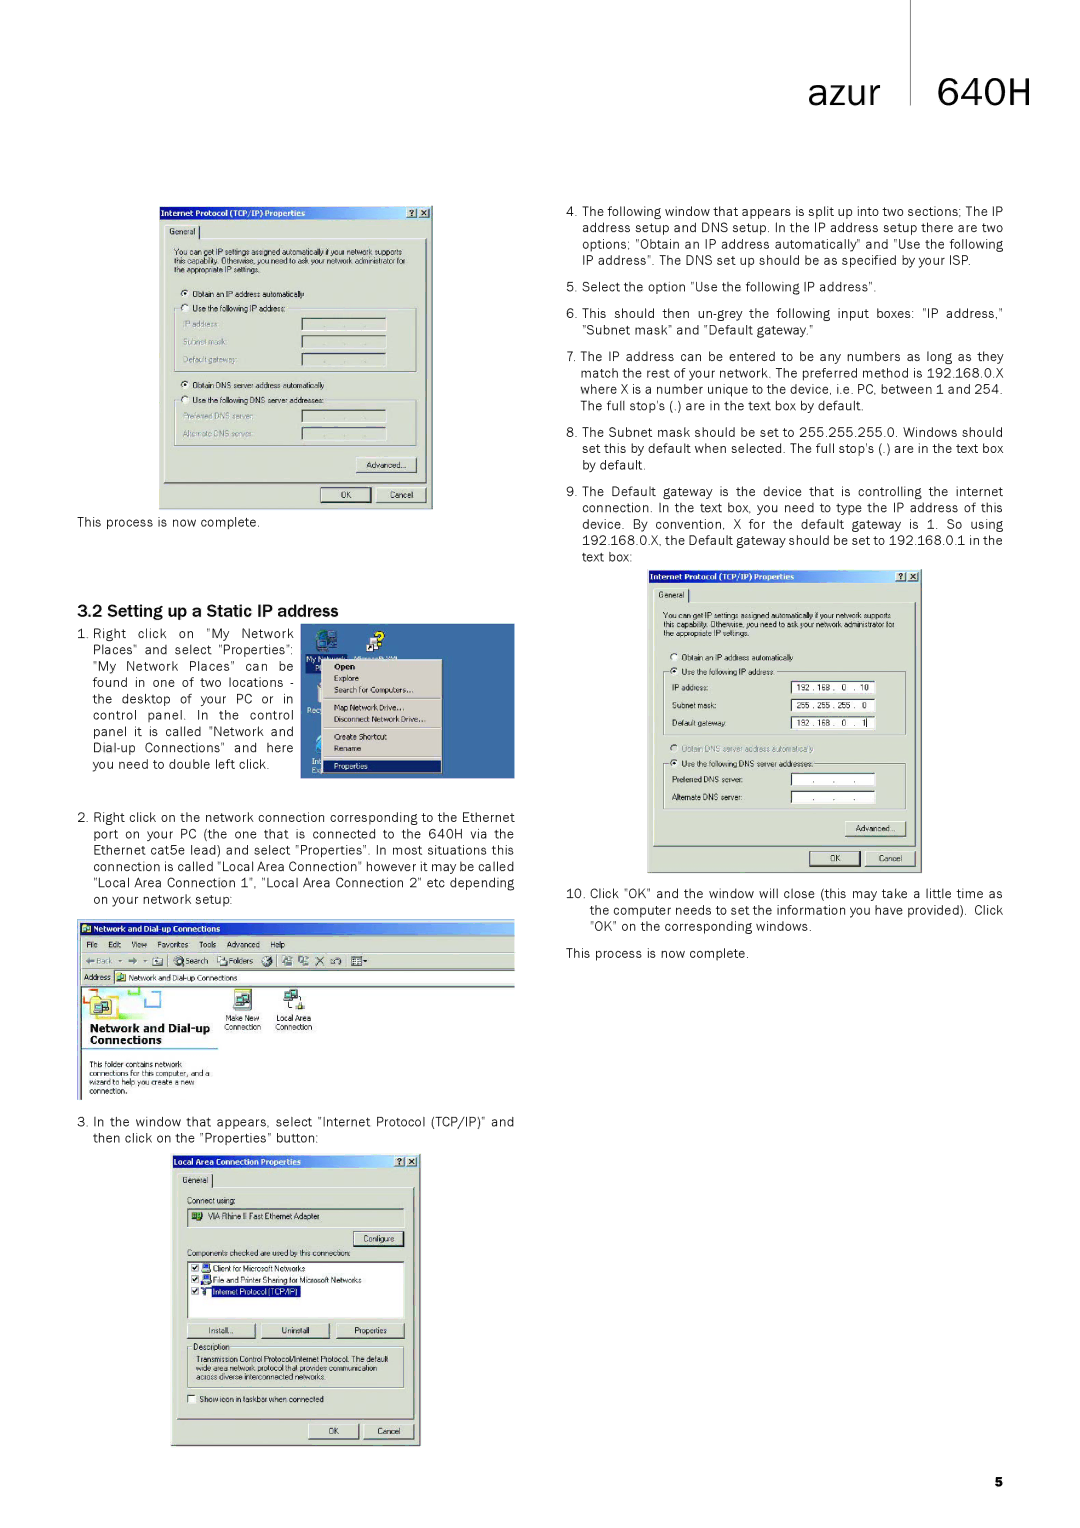
4.The following window that appears is split up into two sections; The IP address setup and DNS setup. In the IP address setup there are two options; "Obtain an IP address automatically" and "Use the following IP address". The DNS set up should be as specified by your ISP.
5.Select the option "Use the following IP address".
6.This should then
7.The IP address can be entered to be any numbers as long as they match the rest of your network. The preferred method is 192.168.0.X where X is a number unique to the device, i.e. PC, between 1 and 254. The full stop's (.) are in the text box by default.
8.The Subnet mask should be set to 255.255.255.0. Windows should set this by default when selected. The full stop's (.) are in the text box by default.
9.The Default gateway is the device that is controlling the internet connection. In the text box, you need to type the IP address of this device. By convention, X for the default gateway is 1. So using 192.168.0.X, the Default gateway should be set to 192.168.0.1 in the text box:
3.2 Setting up a Static IP address
1.Right click on "My Network Places" and select "Properties": "My Network Places" can be found in one of two locations - the desktop of your PC or in control panel. In the control panel it is called "Network and
2.Right click on the network connection corresponding to the Ethernet port on your PC (the one that is connected to the 640H via the Ethernet cat5e lead) and select "Properties". In most situations this connection is called "Local Area Connection" however it may be called "Local Area Connection 1", "Local Area Connection 2" etc depending on your network setup:
3.In the window that appears, select "Internet Protocol (TCP/IP)" and then click on the "Properties" button:
10.Click "OK" and the window will close (this may take a little time as the computer needs to set the information you have provided). Click "OK" on the corresponding windows.
This process is now complete.
5