2. Setting up IP addresses for network devices
Once your network connections have been made, for the connected devices to communicate to each other you will need to specify the unique "IP address" for the device (i.e. like a house number, and street name so the house can be identified for posting letters).
There are two types of IP address; DHCP (Dynamic Host Configuration Protocol), which is more commonly known as dynamic addressing, and static. Dynamic is used when you have a router,
Note: With a DHCP assigned IP address, it is possible that the 640H will have a different IP address assigned to it, if left switched off over night. This is normal and will not cause a problem.
We recommend using static IP addressing for
3. Setting up your PC - Windows 2000
These instructions are for setting up your 640H network with a PC using Windows 2000.
If your network is connected to a Domain (Domain Name Controller - i.e. when you are required to state a domain name when you log on to a Windows PC) you need to turn to the "640H network advice" (4.) section before continuing.
Note: If you are using a wireless network, please consult the manual of your wireless network adaptor for setting up an IP address for your PC and skip to the "Testing your Network configuration" (3.4) section.
3.1 Setting up a Dynamic IP address
1.Right click on "My Network Places" and select "Properties": "My Network Places" can be found in one of two locations - the desktop of your PC or in control panel. In the control panel it is called "Network and
2.Right click on the network connection corresponding to the Ethernet port on your PC (the one that is connected to the 640H via the Ethernet cat5e lead) and select "Properties". In most situations this connection is called "Local Area Connection" however it may be called "Local Area Connection 1", "Local Area Connection 2" etc depending on your network setup:
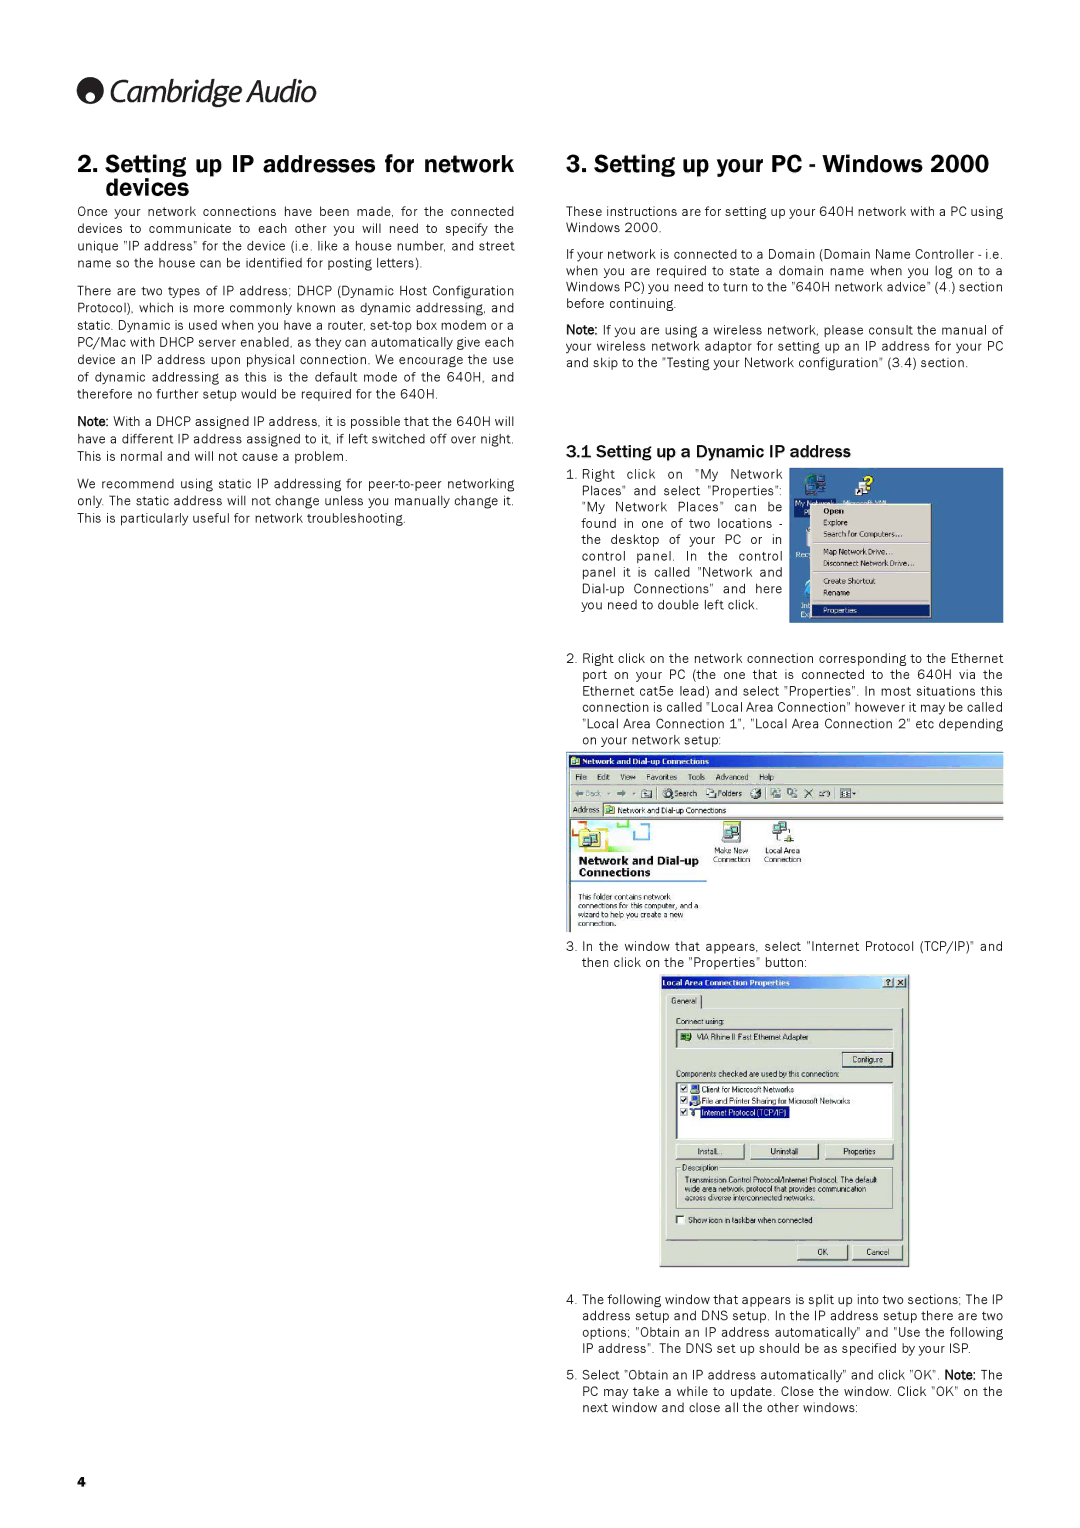
3.In the window that appears, select "Internet Protocol (TCP/IP)" and then click on the "Properties" button:
4.The following window that appears is split up into two sections; The IP address setup and DNS setup. In the IP address setup there are two options; "Obtain an IP address automatically" and "Use the following IP address". The DNS set up should be as specified by your ISP.
5.Select "Obtain an IP address automatically" and click "OK". Note: The PC may take a while to update. Close the window. Click "OK" on the next window and close all the other windows:
4
