S E T U P M E N U O P T I O N S
The preceding diagram should give a good description of the various elements and their context. In this screen we could, for example, instruct you to set the Auto Play Mode parameter to Off in the Playback Setup section. To indicate where we were, you would see the following: Playback Setup > Auto Play Mode > Off.
NOTE
It is possible that some setup items are
To access the player’s Setup Menu simply press the SETUP button on the remote control. Since some Setup Menu options can become inaccessible when the player is playing a disc, it is recommended that you operate the Setup Menu when playback is fully stopped or when there is no disc in the player.
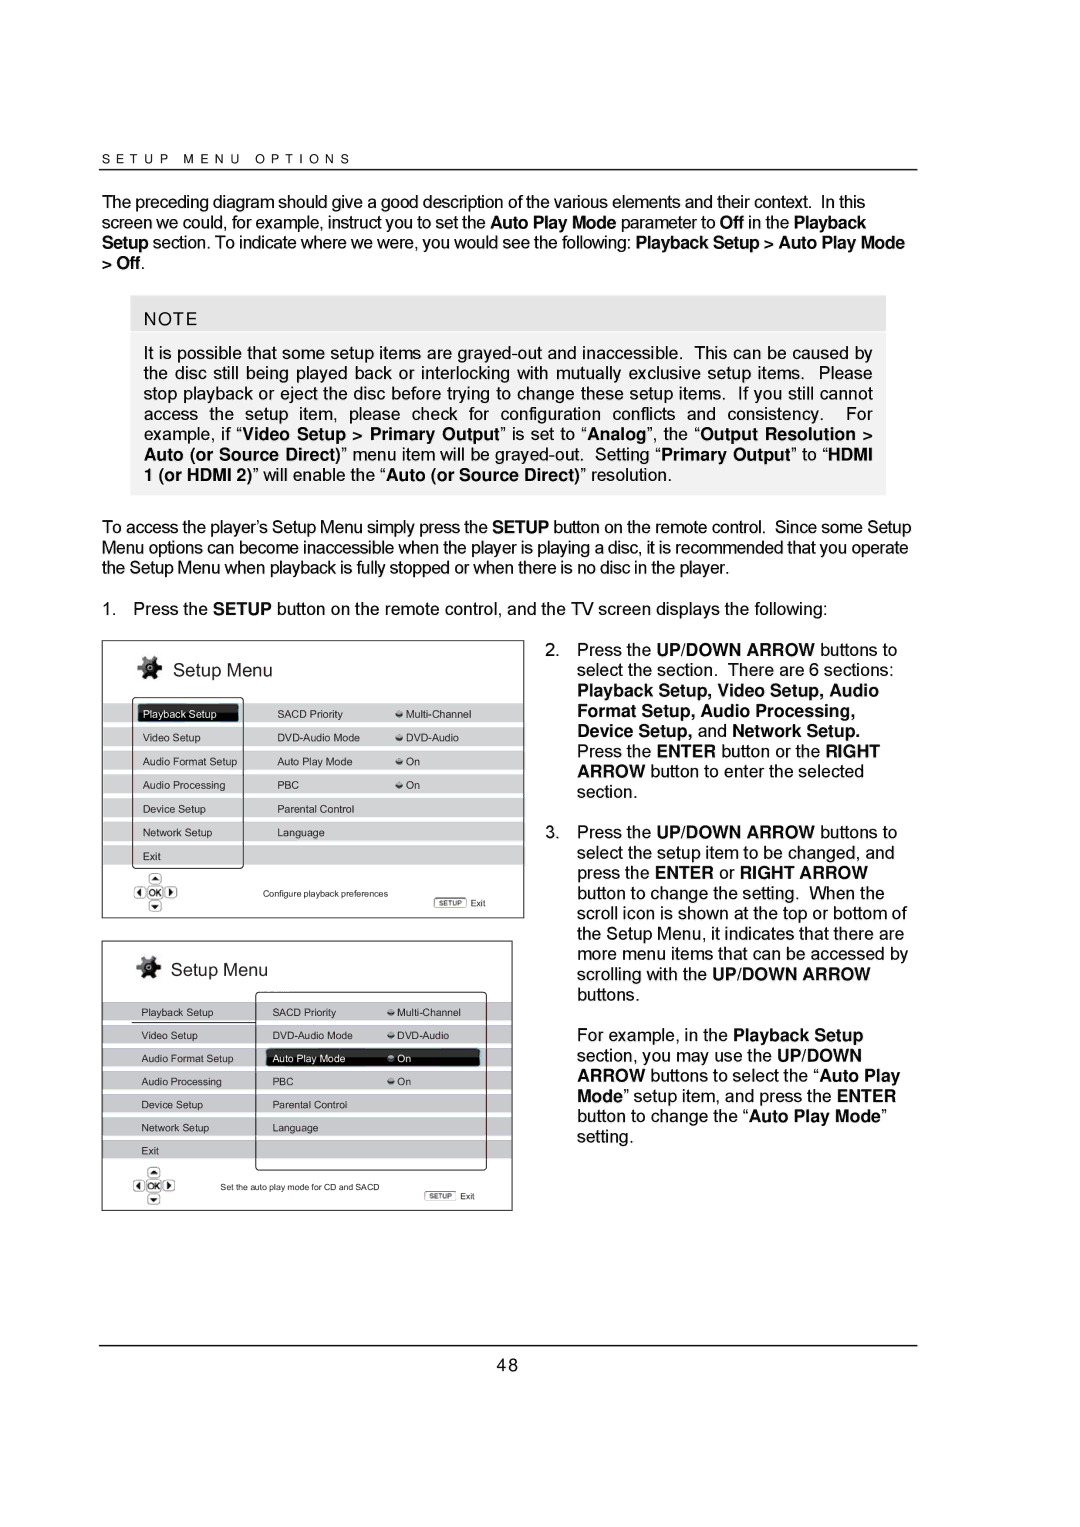
1. Press the SETUP button on the remote control, and the TV screen displays the following:
 Setup Menu
Playback Setup | SACD Priority | |
Video Setup | ||
Audio Format Setup | Auto Play Mode | On |
Audio Processing | PBC | On |
|
|
|
Device Setup | Parental Control |
|
|
|
|
Network Setup | Language |
|
Exit
Configure playback preferences
![]() Exit
Exit
 Setup Menu
| Playback Setup | SACD Priority | |
|
| ||
| Video Setup | ||
| Audio Format Setup | Auto Play Mode | On |
| Audio Processing | PBC | On |
|
|
|
|
| Device Setup | Parental Control |
|
|
|
|
|
| Network Setup | Language |
|
Exit
Set the auto play mode for CD and SACD
![]() Exit
Exit
2.Press the UP/DOWN ARROW buttons to select the section. There are 6 sections:
Playback Setup, Video Setup, Audio Format Setup, Audio Processing, Device Setup, and Network Setup. Press the ENTER button or the RIGHT ARROW button to enter the selected section.
3.Press the UP/DOWN ARROW buttons to select the setup item to be changed, and press the ENTER or RIGHT ARROW button to change the setting. When the scroll icon is shown at the top or bottom of the Setup Menu, it indicates that there are more menu items that can be accessed by scrolling with the UP/DOWN ARROW buttons.
For example, in the Playback Setup section, you may use the UP/DOWN ARROW buttons to select the “Auto Play Mode” setup item, and press the ENTER button to change the “Auto Play Mode” setting.
48