Control Panel
|
|
|
|
|
|
|
|
|
|
|
|
|
|
|
|
|
|
|
|
|
|
|
|
|
|
|
|
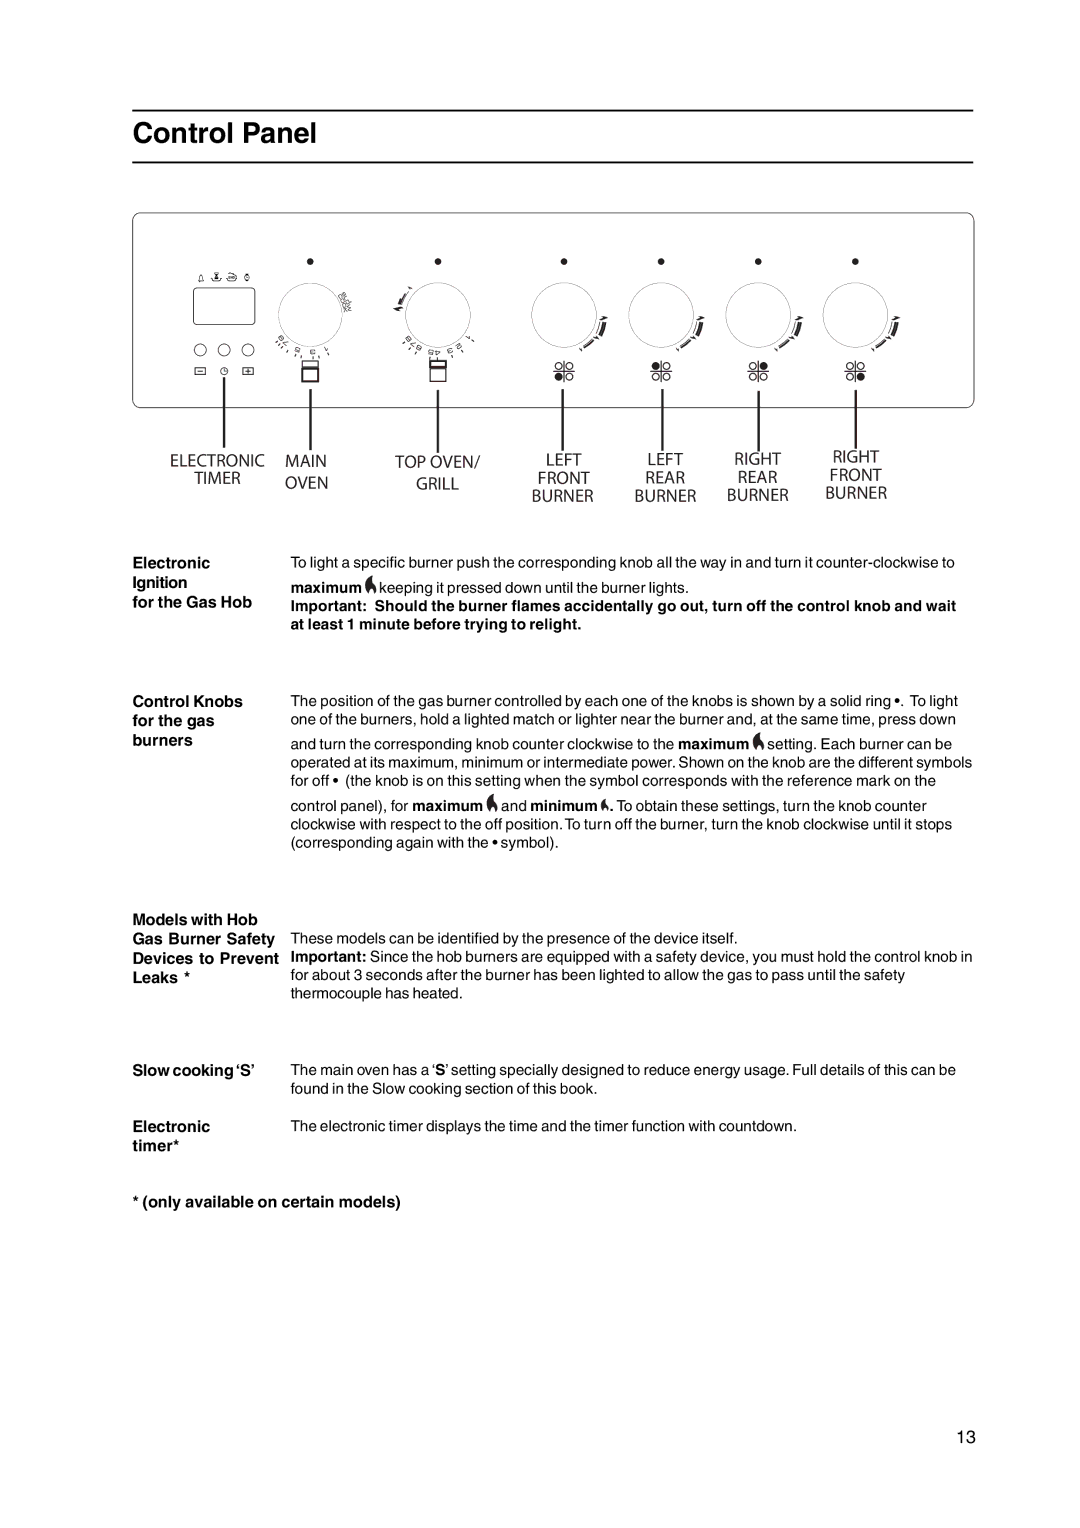
ELECTRONIC MAIN | TOP OVEN/ | LEFT | LEFT | RIGHT | RIGHT | ||||||||
TIMER | OVEN | GRILL | FRONT | REAR | REAR | FRONT | |||||||
|
| BURNER | BURNER | BURNER | BURNER | ||||||||
|
|
|
|
|
| ||||||||
Electronic Ignition
for the Gas Hob
Control Knobs for the gas burners
To light a specific burner push the corresponding knob all the way in and turn it ![]() keeping it pressed down until the burner lights.
keeping it pressed down until the burner lights.
Important: Should the burner flames accidentally go out, turn off the control knob and wait at least 1 minute before trying to relight.
The position of the gas burner controlled by each one of the knobs is shown by a solid ring •. To light one of the burners, hold a lighted match or lighter near the burner and, at the same time, press down
and turn the corresponding knob counter clockwise to the maximum ![]() setting. Each burner can be operated at its maximum, minimum or intermediate power. Shown on the knob are the different symbols for off • (the knob is on this setting when the symbol corresponds with the reference mark on the
setting. Each burner can be operated at its maximum, minimum or intermediate power. Shown on the knob are the different symbols for off • (the knob is on this setting when the symbol corresponds with the reference mark on the
control panel), for maximum ![]() and minimum
and minimum ![]() . To obtain these settings, turn the knob counter clockwise with respect to the off position. To turn off the burner, turn the knob clockwise until it stops (corresponding again with the • symbol).
. To obtain these settings, turn the knob counter clockwise with respect to the off position. To turn off the burner, turn the knob clockwise until it stops (corresponding again with the • symbol).
Models with Hob Gas Burner Safety Devices to Prevent Leaks *
Slow cooking ‘S’
Electronic timer*
These models can be identified by the presence of the device itself.
Important: Since the hob burners are equipped with a safety device, you must hold the control knob in for about 3 seconds after the burner has been lighted to allow the gas to pass until the safety thermocouple has heated.
The main oven has a ‘S’ setting specially designed to reduce energy usage. Full details of this can be found in the Slow cooking section of this book.
The electronic timer displays the time and the timer function with countdown.
* (only available on certain models)
13
