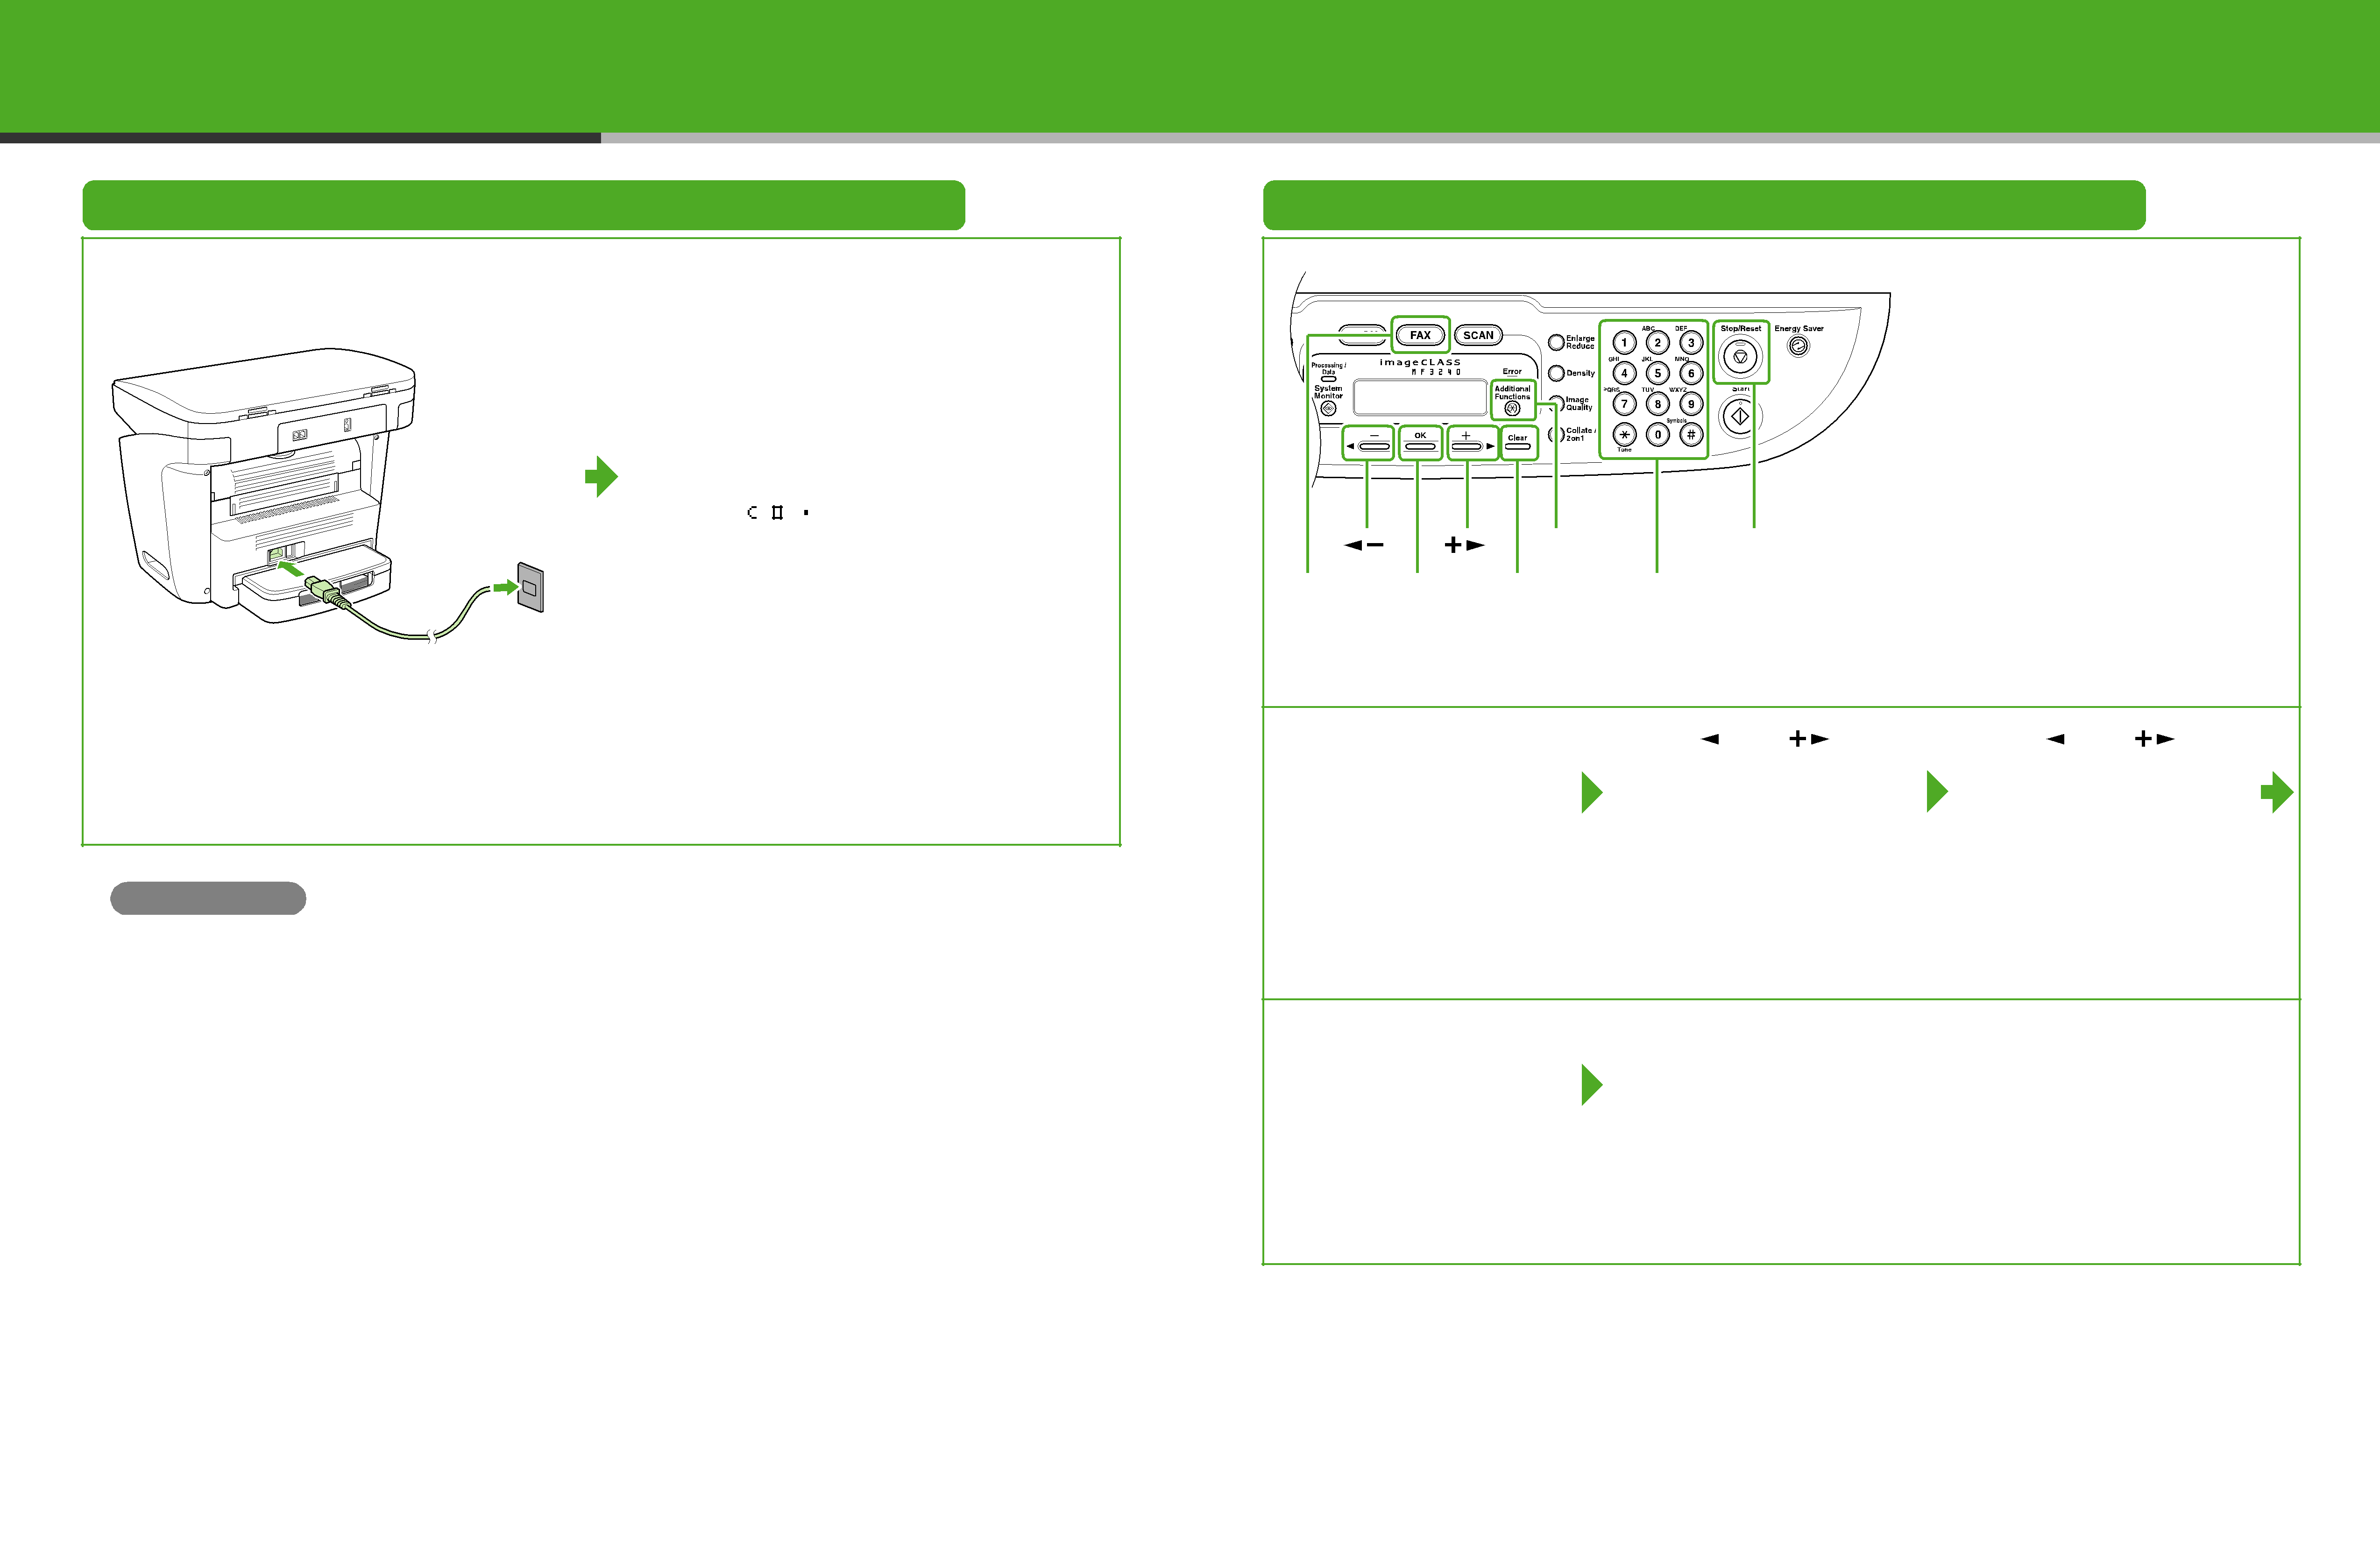
Connect the Power Cord
1 | 2 |
Ex.
1 0 0 % |
|
| L T R | |||
|
|
|
|
| T E X T | 1 |
|
|
|
|
| ||
|
|
|
|
|
|
|
Connect the power cord into the rear socket and the wall | The machine enters standby mode. |
outlet. |
|
 NOTE
NOTE
There is no power switch.
What if...●<CLOSE COVER/FRONT COVER> is displayed: Make sure that the front cover is closed properly.
(See “Install Toner Cartridge,” on p. 5.)
●<TONER IS NOT SET/INSERT THE TONER> is displayed: Make sure that the toner cartridge is installed properly.
(See “Install Toner Cartridge,” on p. 5.)
●<LOAD PAPER> is displayed:
Make sure that paper is loaded in the machine. (See “Set Up the Paper Cassette and Load Paper,” on p. 7.)
Set the Date and Time
● Entering Information
– Numeric keys: Enters letters and numbers.
– [
 ] or [
 ]: Move the cursor position.
– [Clear]: Deletes the character at the cursor position, or the entire entry if held for more than one second.
[ | ] | [ | ] | [Additional | [Stop/Reset] | |
|
|
|
| Functions] |
| |
[FAX] |
| [OK] | [Clear] | Numeric Keys | ||
1 Press [Additional |
| 2 Use [ |
| ] or [ | ] to |
| 3 Use [ |
| ] or [ | ] to |
|
|
| ||||||||
Functions]. |
| select <3 TIMER |
|
| select <2 DATE&TIME | |||||
|
| SETTINGS>, then press |
| SETTING>, then press | ||||||
|
|
| ||||||||
|
| [OK]. |
|
|
|
| [OK]. |
|
|
|
4 Use the numeric keys to |
|
| 5 Press [Stop/Reset] to | |
enter the time (in |
|
| return to standby mode. | |
format) and date (year/ |
|
|
| |
|
|
| ||
month/day), then press |
|
|
| |
[OK]. |
|
|
|
|
Ex. |
|
|
|
|
D A T E & T I M E S E T T I N G |
|
|
| |
1 1 : 1 9 | 1 2 3 1 ´ 0 5 |
|
|
|
|
|
|
|
|
13 | 14 |