
50PG03-07 specifications
The Carrier 50PG03-07 is a cutting-edge rooftop unit designed to provide exceptional heating and cooling capabilities for commercial spaces. Known for its durability and efficiency, this model is part of Carrier's renowned line of packaged rooftop units, combining advanced technologies with a user-friendly design.One of the standout features of the 50PG03-07 is its energy efficiency. This unit is equipped with a high-efficiency compressor that maximizes performance while minimizing energy consumption. The unit often boasts a high SEER (Seasonal Energy Efficiency Ratio) rating, making it an environmentally friendly choice for businesses looking to reduce their operating costs and carbon footprint.
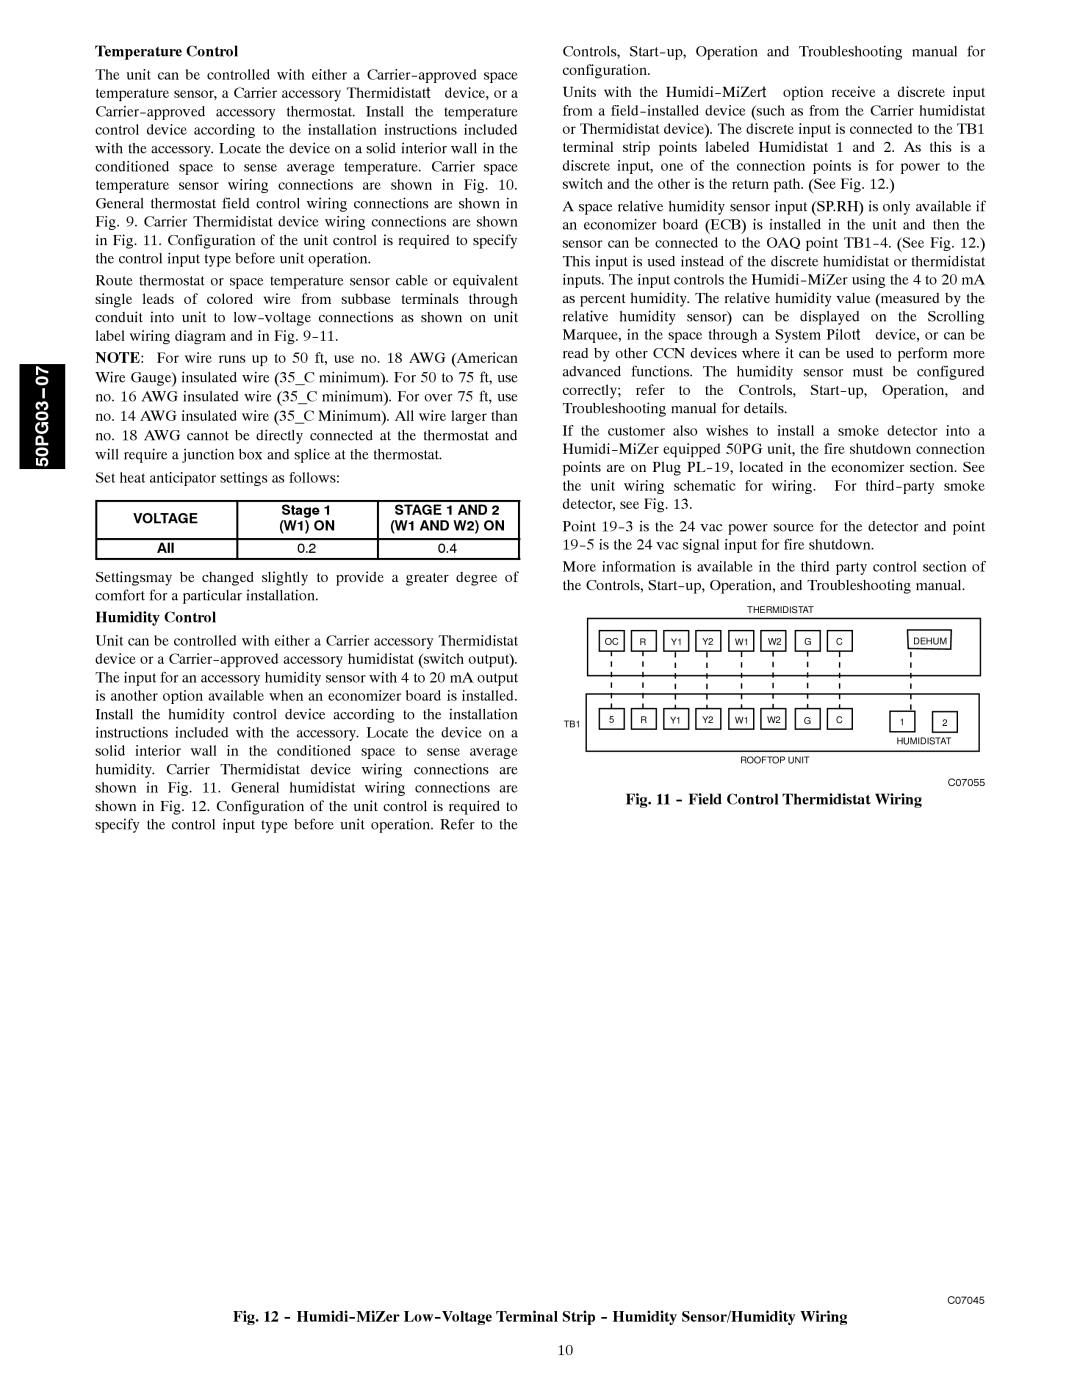
The 50PG03-07 incorporates advanced controls, including a microprocessor-based control system that allows for precise temperature management and monitoring. This system not only enhances user comfort but also provides diagnostic capabilities, ensuring the unit operates at peak performance and identifying any potential issues early on.
In terms of design, the Carrier 50PG03-07 features a compact and robust structure that is built to withstand various weather conditions, ensuring longevity and reliability. The unit’s easy access panels simplify maintenance, allowing technicians to perform routine checks and repairs without cumbersome disassembly.
The air distribution system of the 50PG03-07 is engineered for optimal airflow, enhancing comfort across different areas of a building. It features multiple options for air handling, including variable air volume controls, which allows for customized air delivery to suit specific space requirements.
Noise reduction technology is also a priority in this model. The unit is designed to operate quietly, minimizing disruptions in office environments, retail settings, or other commercial spaces. This ensures that occupants can focus on their tasks without being disturbed by mechanical sounds.
Furthermore, the Carrier 50PG03-07 is adaptable with various accessories that can enhance its functionality, such as economizers for improved ventilation and humidity control. By integrating these components, businesses can create an efficient and effective HVAC system tailored to their specific needs.
Finally, the Carrier 50PG03-07 meets stringent industry standards for safety and performance, providing users with peace of mind. With its blend of innovative technology, energy efficiency, and construction resilience, the 50PG03-07 remains a popular choice for businesses seeking reliable climate control solutions.