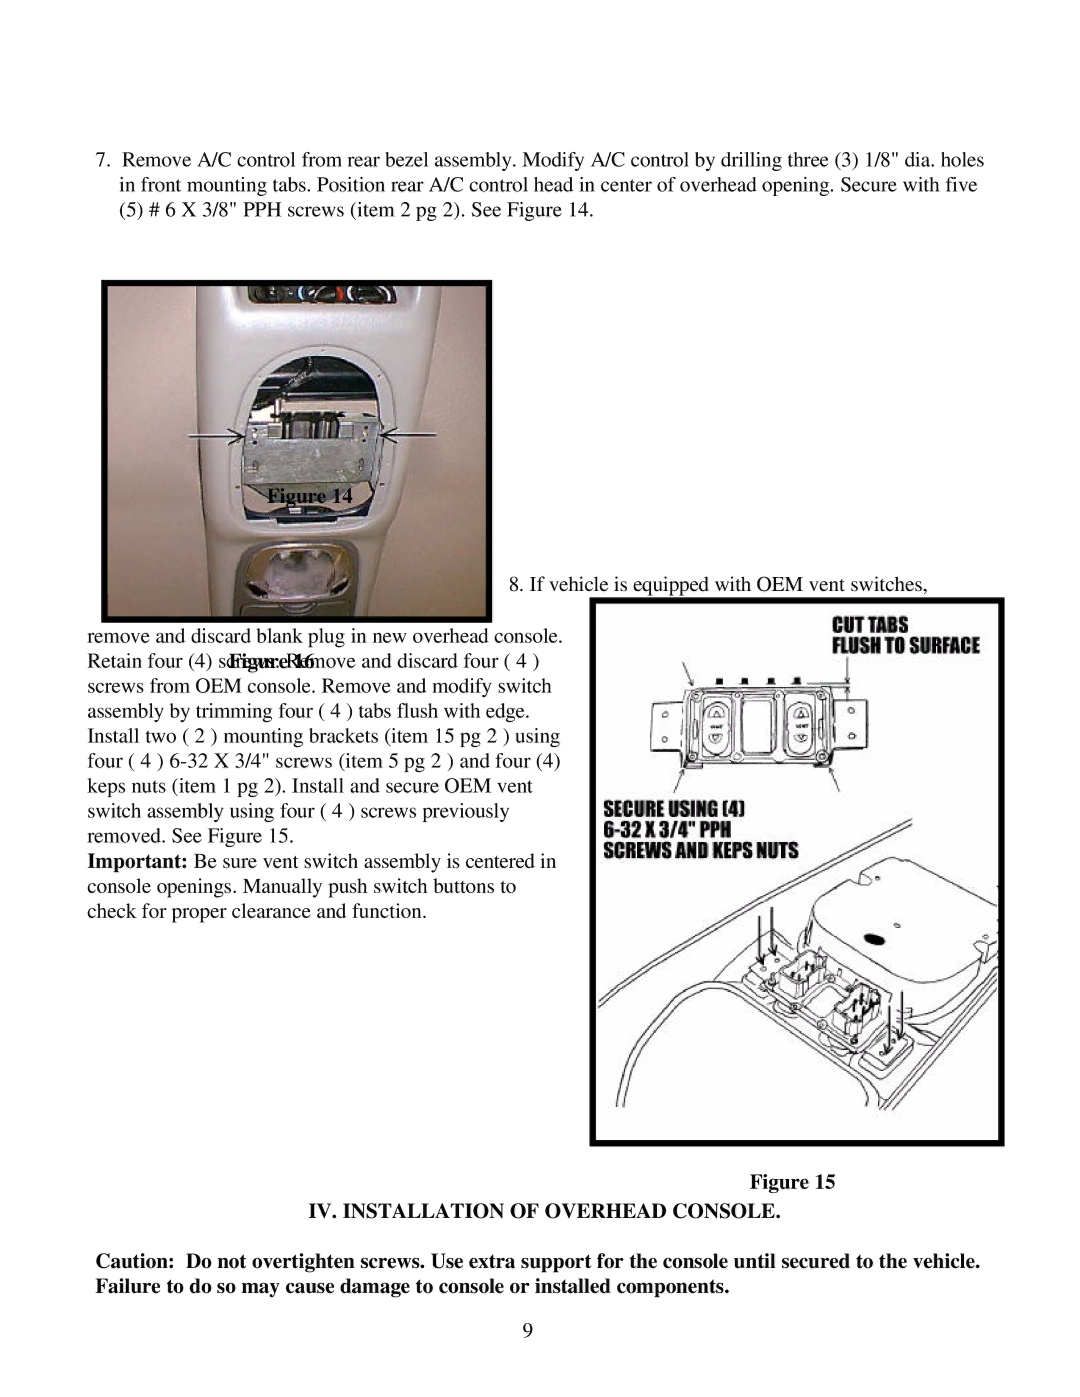
7.Remove A/C control from rear bezel assembly. Modify A/C control by drilling three (3) 1/8" dia. holes in front mounting tabs. Position rear A/C control head in center of overhead opening. Secure with five
(5) # 6 X 3/8" PPH screws (item 2 pg 2). See Figure 14.
Figure 14
8. If vehicle is equipped with OEM vent switches,
remove and discard blank plug in new overhead console.
Retain four (4) screwsFigure. Remove16 and discard four ( 4 ) screws from OEM console. Remove and modify switch assembly by trimming four ( 4 ) tabs flush with edge. Install two ( 2 ) mounting brackets (item 15 pg 2 ) using four ( 4 )
Important: Be sure vent switch assembly is centered in console openings. Manually push switch buttons to check for proper clearance and function.
Figure 15
IV. INSTALLATION OF OVERHEAD CONSOLE.
Caution: Do not overtighten screws. Use extra support for the console until secured to the vehicle. Failure to do so may cause damage to console or installed components.
9