Star™ / Starlet™
INSTALLING THE HALOGEN BULB
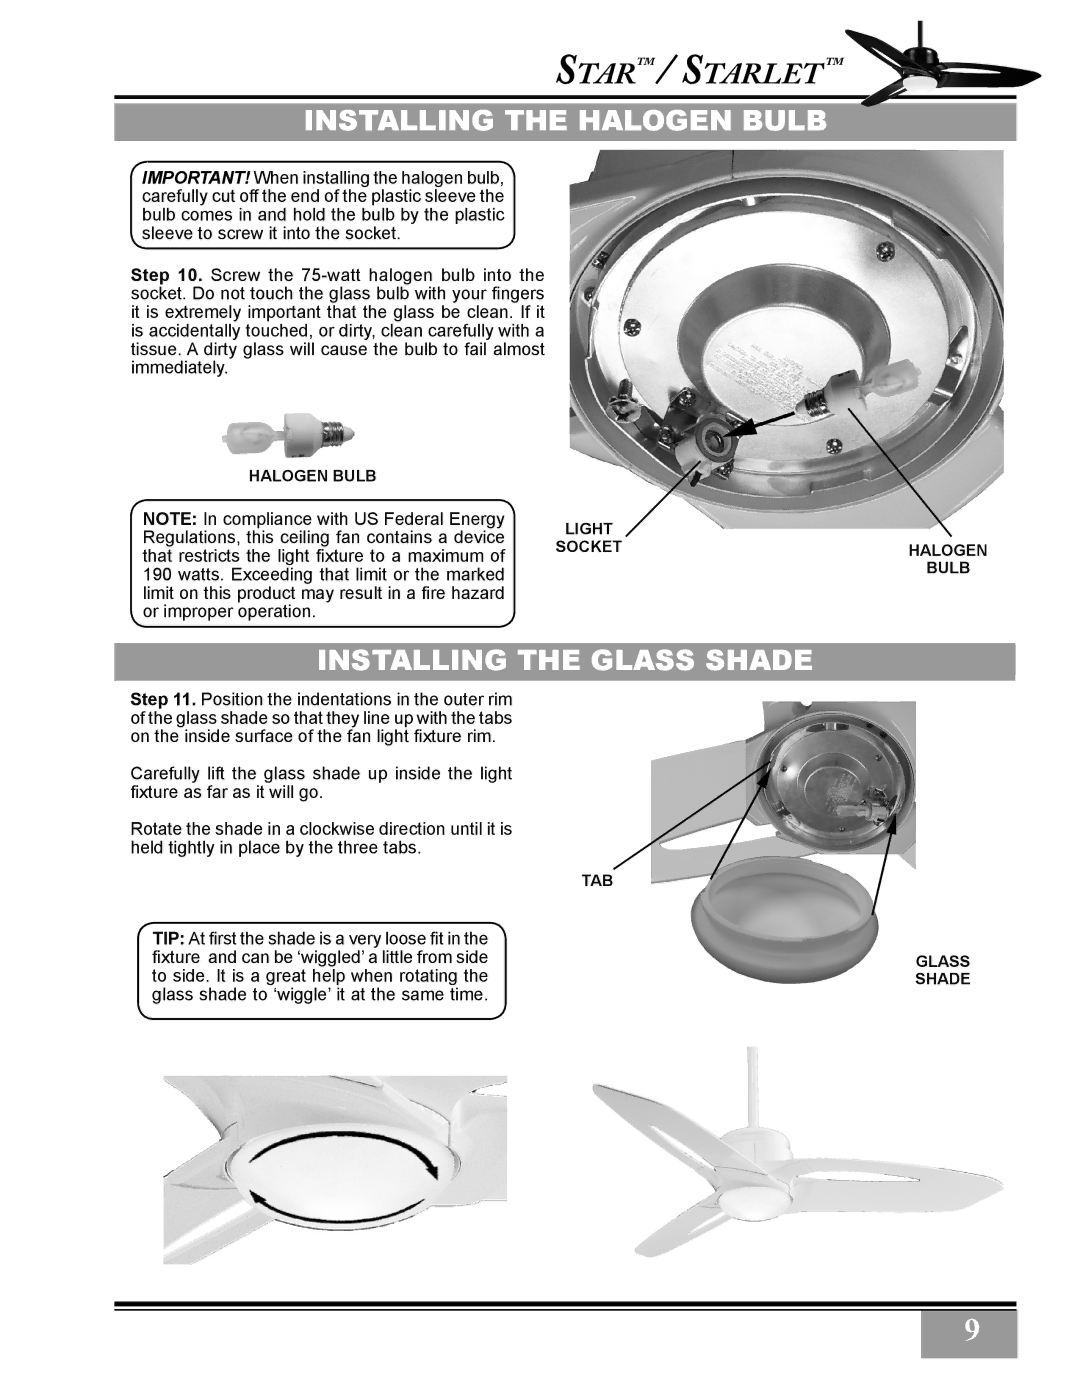
IMPORTANT! When installing the halogen bulb, carefully cut off the end of the plastic sleeve the bulb comes in and hold the bulb by the plastic sleeve to screw it into the socket.
Step 10. Screw the
HALOGEN BULB
NOTE: In compliance with US Federal Energy Regulations, this ceiling fan contains a device that restricts the light fixture to a maximum of 190 watts. Exceeding that limit or the marked limit on this product may result in a fire hazard or improper operation.
LIGHT
SOCKET
HALOGEN
BULB
INSTALLING THE GLASS SHADE
Step 11. Position the indentations in the outer rim of the glass shade so that they line up with the tabs on the inside surface of the fan light fixture rim.
Carefully lift the glass shade up inside the light fixture as far as it will go.
Rotate the shade in a clockwise direction until it is held tightly in place by the three tabs.
TAB
TIP: At first the shade is a very loose fit in the fixture and can be ‘wiggled’ a little from side to side. It is a great help when rotating the glass shade to ‘wiggle’ it at the same time.
GLASS SHADE
GLASS SHADE INDENTATION
9
