Attaching Text to an Image
You can use the following procedure to attach up to 24 characters of text for each image.
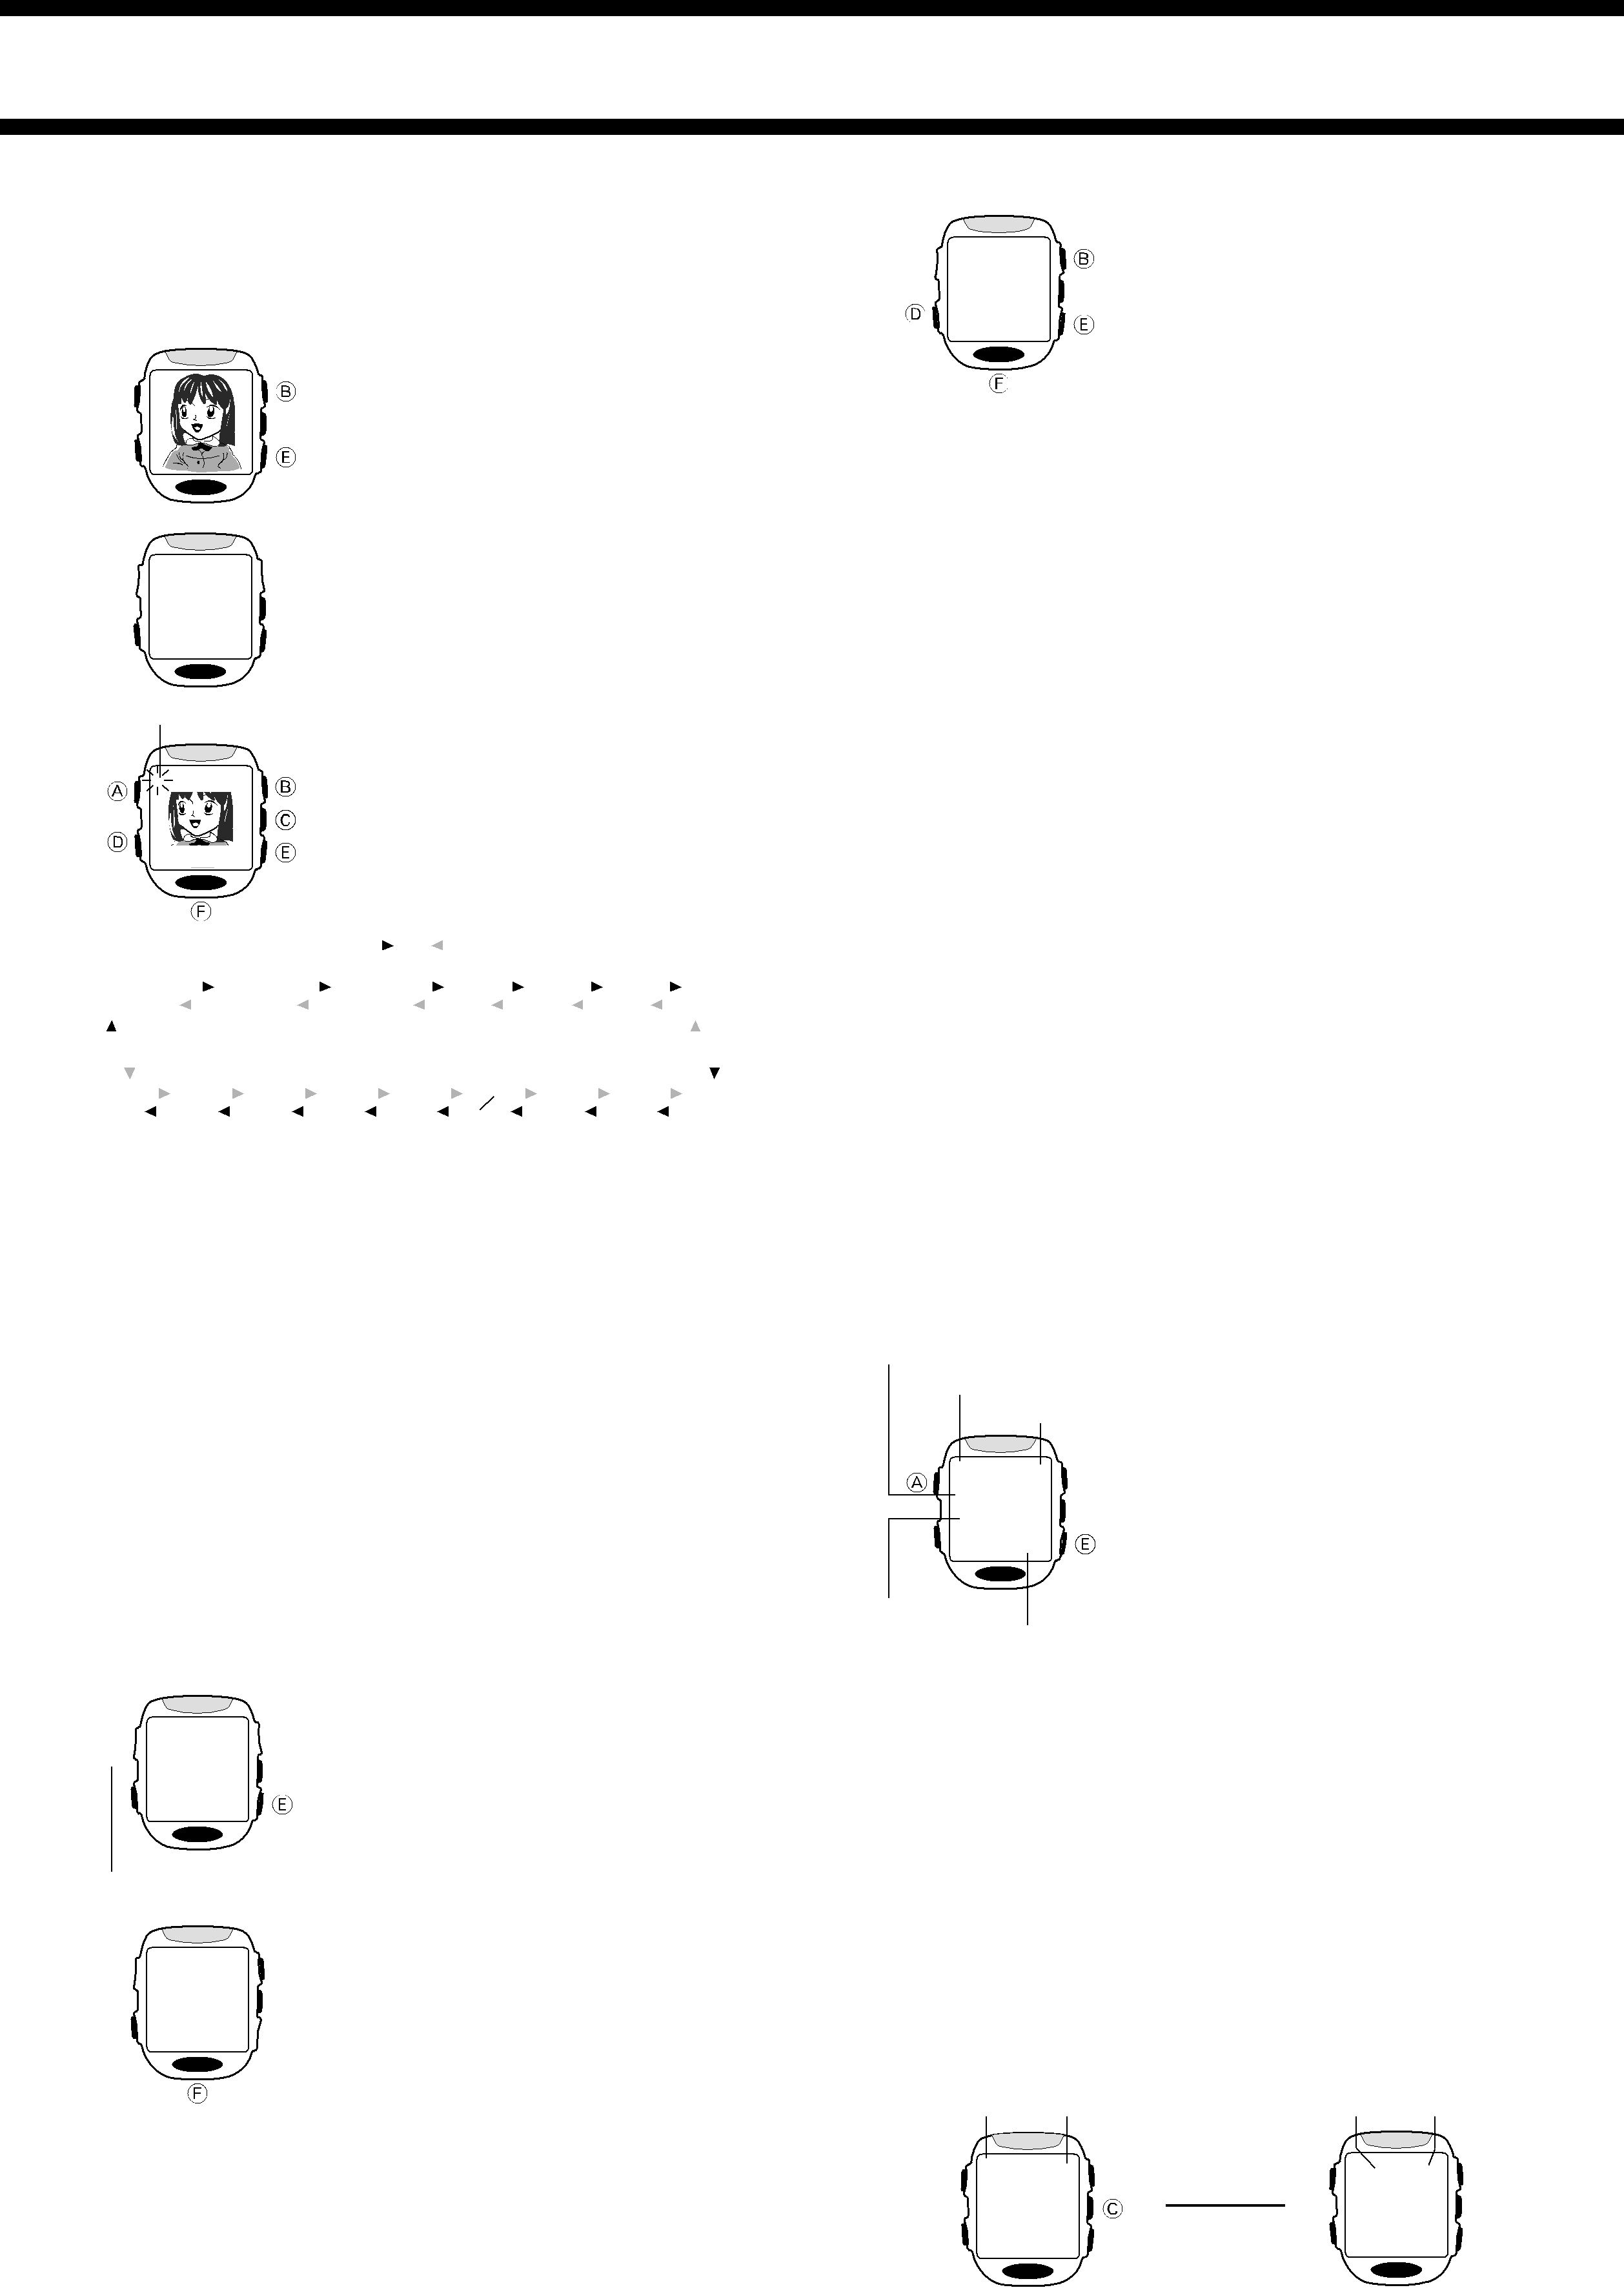
To attach text to an image
1. In the VISUAL DATABANK Mode, use E
(+) and

 ALL
ALL  NO
NO
YES
4.Press Fand a confirmation message appears on the display.
5.If you really want to delete all images in memory, press E to move the pointer to
YES and then press F. To clear the confirmation message without deleting anything, leave the pointer at NO and press F.
•The message WAIT DEL ALL remains on the display as the delete operation is in progress. The message EMPTY appears after the delete operation is complete.
6. After the EMPTY message appears, press Dto enter the Alarm Mode or

 SET
SET 

 NAME
NAME
DEL
Cursor
_ 


2000. 6.30.  PM 10:05
2. Hold down Afor about one second until the SET menu appears.
•Make sure the pointer is next to NAME on the menu.
3.Press Fto display the text input screen.
4.Input the text you want.
•Use E(+) and
•Holding down either button scrolls at high speed.
Fto enter the Camera Mode.
•If you do not perform any operation for about two minutes while the SET, DEL, or ALL menu is on the display, the watch automatically exits the menu and returns to the VISUAL DATABANK screen.
Note
•You can return to the normal VISUAL DATABANK Mode during the above procedure by pressing the A button at any point before actually deleting the image in step 5.
To delete a specific image
1. | In the VISUAL DATABANK Mode, use E(+) and |
| image you want to delete. |
2. | Hold down Afor about one second until the SET menu appears. |
3. | Press Eto move the pointer to DEL. |
4. | Press Fto display the DEL (delete) menu. |
5. | Press Eto move the pointer to PAGE. |
6. | Press Fand a confirmation message appears on the display. |
|
|
|
|
|
|
| E |
|
|
| Press E. |
|
|
|
|
|
|
|
|
|
|
| Press B. |
|
|
|
|
|
|
|
|
|
|
|
|
| |||||||||||||||||
|
|
|
|
|
|
|
|
|
|
|
|
|
|
|
|
|
|
|
|
|
|
|
|
|
|
|
|
|
|
| |||||||||||||||||||||||
|
|
|
|
|
|
|
|
|
|
|
|
|
|
|
|
|
|
|
|
|
|
|
|
|
|
|
|
|
|
|
|
|
|
|
|
|
|
|
|
|
|
|
|
|
|
|
|
|
|
| |||
| Space |
|
|
|
| A to Z |
|
|
|
|
|
| 0 to 9 |
|
| & |
|
|
|
|
|
|
| ’ |
|
|
|
|
| ( |
|
|
|
|
|
| ) |
| |||||||||||||||
|
|
|
|
|
|
|
|
|
|
|
|
|
|
|
|
|
|
|
|
| |||||||||||||||||||||||||||||||||
|
|
|
|
|
|
| B |
|
|
|
|
|
|
|
|
|
|
|
|
|
|
|
|
|
|
|
|
|
|
|
|
|
|
|
|
|
|
|
|
|
|
|
|
|
|
|
|
|
|
|
| ||
|
|
|
|
|
|
|
|
|
|
|
|
|
|
|
|
|
|
|
|
|
|
|
|
|
|
|
|
|
|
|
|
|
|
|
|
|
|
|
|
|
|
|
|
|
|
|
|
|
|
| |||
|
|
|
|
|
|
|
|
|
|
|
|
|
|
|
|
|
|
|
|
|
|
|
|
|
|
|
|
|
|
|
|
|
|
|
|
|
|
|
|
|
|
|
|
|
|
|
|
|
|
|
|
|
|
| • |
|
|
|
| ~ |
|
|
|
| _ |
|
|
| ? |
|
|
|
| : |
|
|
|
|
|
|
|
|
|
|
| . |
|
|
|
|
|
| — |
|
|
|
|
| , |
| |||||||
|
|
|
|
|
|
|
|
|
|
|
|
|
|
|
|
|
|
|
|
|
| ||||||||||||||||||||||||||||||||
|
|
|
|
|
|
|
|
|
|
|
|
|
|
|
|
|
|
|
|
|
|
|
|
|
|
|
|
|
|
|
|
|
|
|
|
|
|
|
|
|
|
|
|
|
|
|
|
|
|
|
|
|
|
•Use D(right) and C(left) to move the cursor.
5. After the text is the way you want, press Aor Fto save it.
Note
•The watch automatically stores any input text and exits the text input screen if you do not perform any operation for about two minutes.
•See “To view recorded images” for information about showing and hiding text attached to images.
7. If you really want to delete the image, press Eto move the pointer to |
YES and then press F. To clear the confirmation message without |
deleting anything, leave the pointer at NO and press F. |
•The message WAIT DEL PAGE remains on the display as the delete operation is in progress. The watch automatically clears the message and returns to the normal VISUAL DATABANK Mode after the delete operation is complete.
Note
•You can return to the normal VISUAL DATABANK Mode during the above procedure by pressing the A button at any point before actually deleting the image in step 7.
TIMEKEEPING MODE
Image Sorting
Images in watch memory are automatically sorted according to the first two letters of their attached text (alpha characters → numbers → symbols). Images that do not have any attached text come last, sorted according to their recording dates (oldest first).
•If multiple images have text that start with the same two characters, those images are sorted according to their recording dates (oldest first).
Deleting Images
You can use the following procedures to delete a specific image or all images currently stored in watch memory.
To delete all images in watch memory
PM indicator
Day of the week
Day
FRI 3‰
P
1‰:58
35
Hour : Minutes
Seconds
The Timekeeping Mode is the default mode of the watch when you are not recording images, using the stopwatch, etc.
•You can use the Viewer Screen to view images in watch memory.
•See “To set the time and date” for information about setting the time and date, and for selecting either
 SET
SET 


 NAME
NAME
DEL
Pointer
 DEL
DEL

 ALL
ALL
PAGE 
1.In the VISUAL DATABANK Mode, hold down A for about one second until the SET menu appears.
2.Press Eto move the pointer to DEL.
3. Press Fto display the DEL (delete) menu.
To reset the seconds count to zero
1.In the Timekeeping Mode, hold down A for about one second until the seconds digits start to flash on the display. This indicates the setting screen.
2.Press Eto reset the seconds count to 00.
•Pressing E while the seconds count is in the range of 30 to 59 resets the seconds to 00 and add 1 to the minutes. In the range of 00 to 29, the
minutes count is unchanged.
3. Press Ato exit the setting screen and return to the Timekeeping Mode.
Note
•The watch automatically exits the setting screen if you do not perform any operation for about two minutes.
To switch between Timekeeping Mode screen formats
In the Timekeeping Mode, each press of Ctoggles between the two screen formats shown below.
Day of the week DayMonth Day
FRI 3‰ |
|
| |
P |
|
| P |
1‰:58 | ▲ | ▲ | 1‰:58 |
|
|
3535