E
MODE START/STOP
Fig.1
Left Button
SUB DISPLAY
T
D
Button Functions
Left Button (Mode Button)
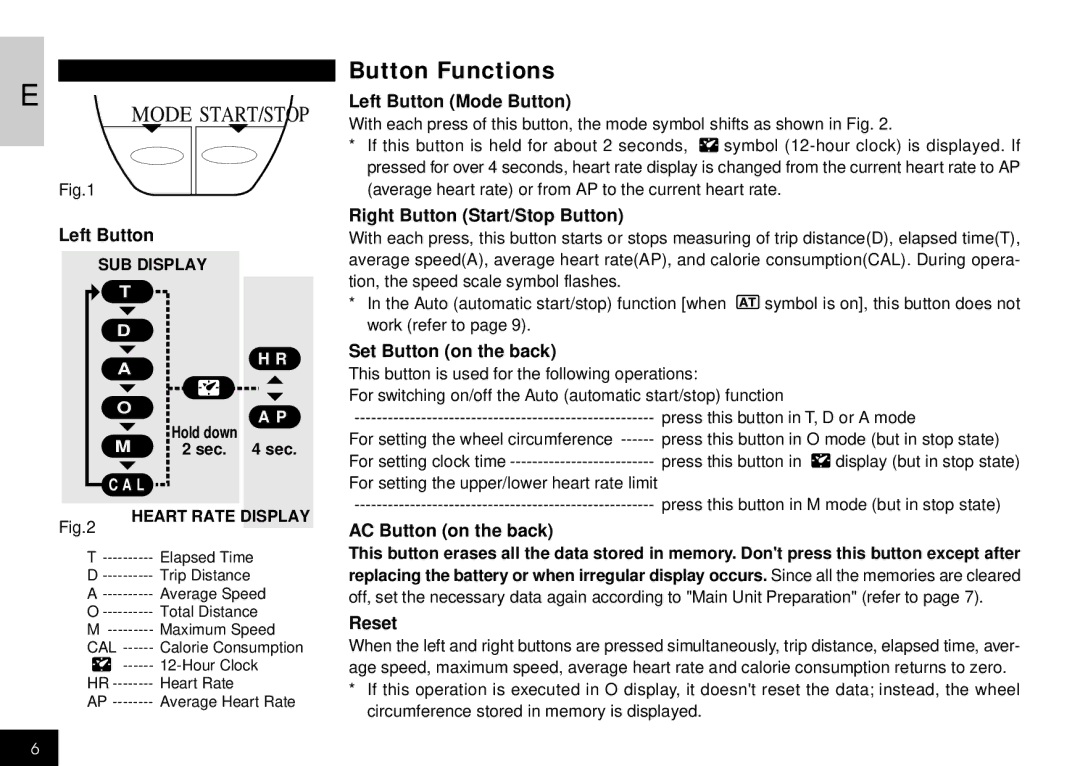
With each press of this button, the mode symbol shifts as shown in Fig. 2.
*If this button is held for about 2 seconds, ![]() symbol
symbol
Right Button (Start/Stop Button)
With each press, this button starts or stops measuring of trip distance(D), elapsed time(T), average speed(A), average heart rate(AP), and calorie consumption(CAL). During opera- tion, the speed scale symbol flashes.
*In the Auto (automatic start/stop) function [when ![]() symbol is on], this button does not work (refer to page 9).
symbol is on], this button does not work (refer to page 9).
A
HR
Set Button (on the back)
This button is used for the following operations: |
For switching on/off the Auto (automatic start/stop) function |
O
AP
Hold down
M2 sec. 4 sec.
CAL
press this button in T, D or A mode | ||
For setting the wheel circumference | press this button in O mode (but in stop state) | |
For setting clock time | press this button in | display (but in stop state) |
For setting the upper/lower heart rate limit |
|
|
press this button in M mode (but in stop state) | ||
Fig.2
HEART RATE DISPLAY
AC Button (on the back)
T | Elapsed Time |
D | Trip Distance |
A | Average Speed |
O | Total Distance |
M | Maximum Speed |
CAL | Calorie Consumption |
HR | Heart Rate |
AP | Average Heart Rate |
This button erases all the data stored in memory. Don't press this button except after
replacing the battery or when irregular display occurs. Since all the memories are cleared off, set the necessary data again according to "Main Unit Preparation" (refer to page 7).
Reset
When the left and right buttons are pressed simultaneously, trip distance, elapsed time, aver- age speed, maximum speed, average heart rate and calorie consumption returns to zero.
*If this operation is executed in O display, it doesn't reset the data; instead, the wheel circumference stored in memory is displayed.
6
