Manuals
/
Cavalry Storage
/
Computer Equipment
/
Computer Drive
Cavalry Storage
CADA-U3E4 Product Part Identification, Tool-Less Drive-Bay Installation, Chapter
Models:
CADA-U3E4
1
4
14
14
Download
14 pages
32.38 Kb
1
2
3
4
5
6
7
8
Troubleshooting
Install
Warranty
Precautionary Measures
Page 4
Image 4
Page 3
Page 5
Page 4
Image 4
Page 3
Page 5
Contents
CADA-U3E4
Instruction Manual
4-Bay USB 3.0 RAID EXTERNAL
Chapter 2. MODE SETUP AND ARRAY MANAGEMENT
Table of Contents
CHAPTER 4. Initializing and Formatting Your New Array
FEATURES
SPECIFICATIONS
PACKAGE CONTENTS
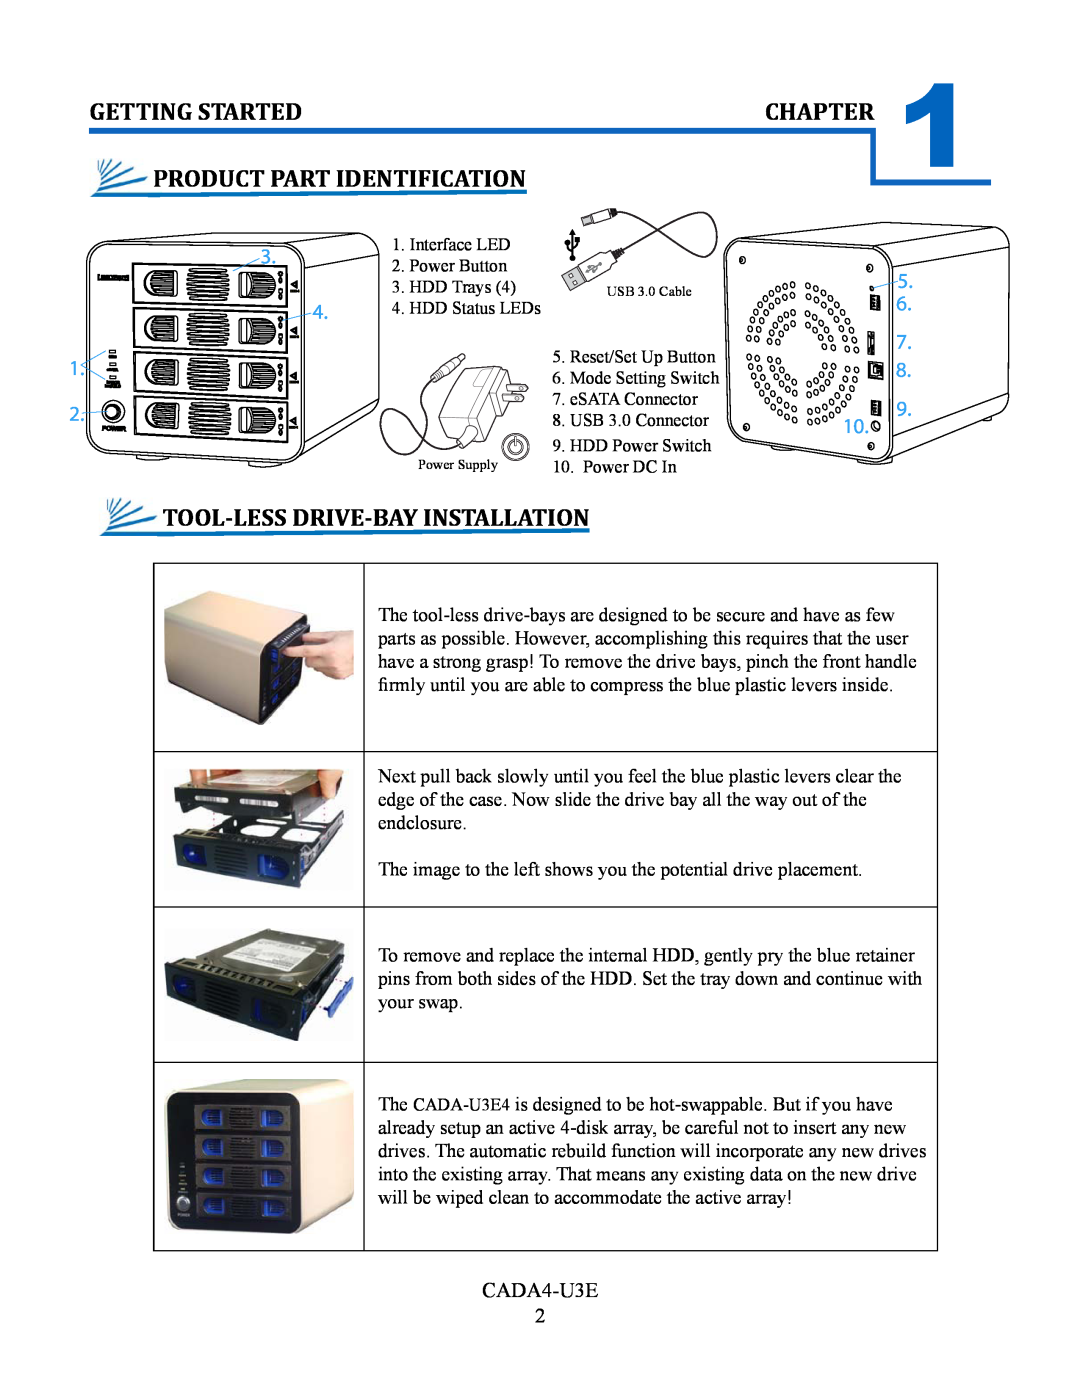
GETTING STARTED
PRODUCT PART IDENTIFICATION
TOOL-LESS DRIVE-BAY INSTALLATION
The image to the left shows you the potential drive placement
DESCRIPTION OF RAID-MODES
RAID 3 Mode
RAID 5 Mode
RAID 10 Mode
SOFTWARE MODE-SETUP METHOD PC Users
MODE SETUP AND ARRAY MANAGEMENT
1. INSTALL THE SOFTWARE
SOFTWARE MODE-SETUP METHOD BASIC
Once you have installed the application and reviewed the basic functions of BackupQ, you are half-way to mastering your RAID-array! Open BackupQ and click the ‘Basic Mode’ and ‘RAID and Disk Information’ tabs. This will show you the model number of every drive you
SOFTWARE MODE-SETUP METHOD ADVANCED
Initializing Your New Array
SWITCH MODE-SETUP METHOD MAC Users or PC Users
JBOD
Clone
RAID
How to Find Your Disk Management Utility
YOUR DISK MANAGEMENT UTILITY
“Seeing” Your New Disk in the Disk Management Utility
CHAPTER
Initializing and Formatting Your New Array
Windows
Mac OS X 10.4.0+
PRECAUTIONARY MEASURES
ADDITIONAL FEATURES
SUPPORT
AFTER THE STORM REBUILDING A DAMAGED ARRAY
HDD LED STATUS CODES
TROUBLE SHOOTING
Solid Green A healthy, functioning HDD
CONTACT INFORMATION
WARRANTY INFORMATION
Cavalry Storage Inc. “Cavalry Storage” warrants all new equipment manufactured by Cavalry Storage including any accessories in- cluded with its products and sold by an authorized distributor or authorized reseller against defects in material or workmanship for one 1 year from the product’s original date of purchase as follows
Top
Page
Image
Contents