##NOTE: Use this feature with caution. Deactivating automatic switching and then forgetting it can make it hard for you to receive DSC calls.
If you have unread incoming DSC calls, the radio displays a message icon. You will be able to review who has called. The radio displays the last 10 distress calls and the last 20 non- distress calls it received (see the receive log on page 24).
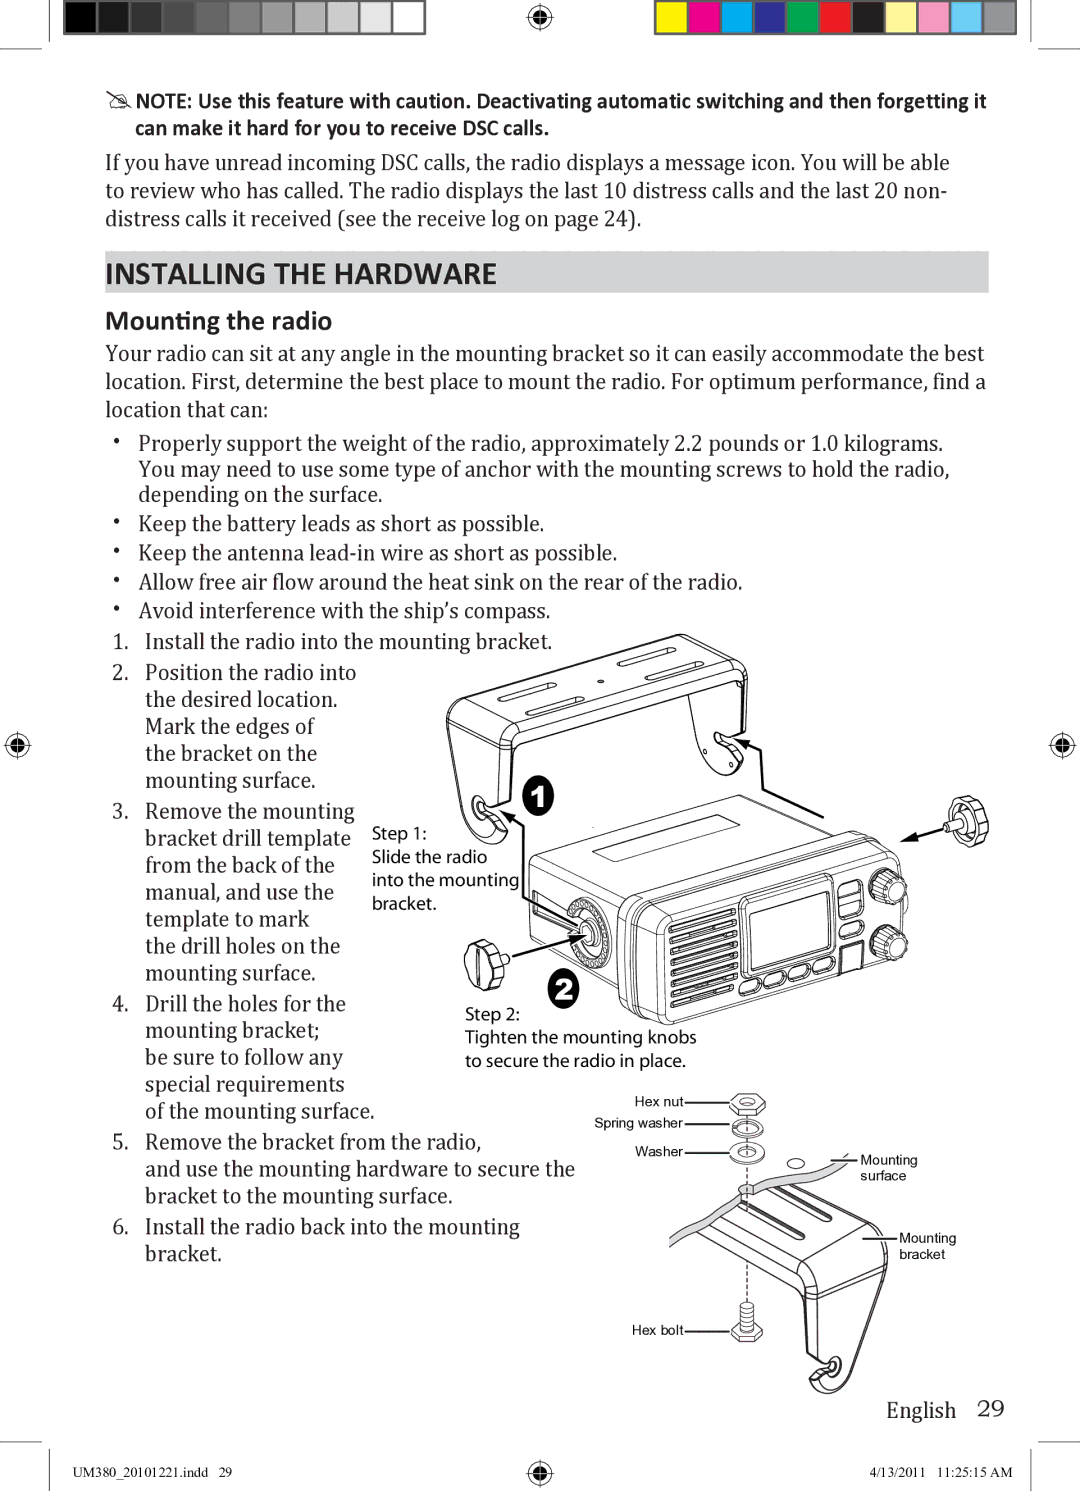
Installing the Hardware
Mounting the radio
Your radio can sit at any angle in the mounting bracket so it can easily accommodate the best location. First, determine the best place to mount the radio. For optimum performance, find a location that can:
xx | Properly support the weight of the radio, approximately 2.2 pounds or 1.0 kilograms. | ||||
| You may need to use some type of anchor with the mounting screws to hold the radio, | ||||
| depending on the surface. |
|
| ||
xx | Keep the battery leads as short as possible. |
|
| ||
xx | Keep the antenna |
| |||
xx | Allow free air flow around the heat sink on the rear of the radio. |
| |||
xx | Avoid interference with the ship’s compass. |
|
| ||
1. Install the radio into the mounting bracket. |
|
| |||
2. Position the radio into |
|
|
| ||
| the desired location. |
|
|
| |
| Mark the edges of |
|
|
| |
| the bracket on the |
|
|
| |
| mounting surface. | 1 |
|
| |
3. | Remove the mounting |
|
| ||
Step 1: |
|
| |||
| bracket drill template |
|
| ||
| from the back of the | Slide the radio |
|
| |
| into the mounting |
|
| ||
| manual, and use the |
|
| ||
| bracket. |
|
| ||
| template to mark |
|
| ||
|
|
|
| ||
| the drill holes on the |
|
|
| |
| mounting surface. | 2 |
|
| |
4. Drill the holes for the |
|
| |||
Step 2: |
|
| |||
| mounting bracket; |
|
| ||
| Tighten the mounting knobs |
| |||
| be sure to follow any | to secure the radio in place. |
| ||
| special requirements |
| Hex nut |
| |
| of the mounting surface. |
| |||
| Spring washer |
| |||
5. Remove the bracket from the radio, |
| ||||
Washer | Mounting | ||||
| and use the mounting hardware to secure the | ||||
|
| ||||
|
| surface | |||
| bracket to the mounting surface. |
|
| ||
6. Install the radio back into the mounting |
| Mounting | |||
| bracket. |
|
| ||
|
|
| bracket | ||
29
UM380_20101221.indd 29
4/13/2011 11:25:15 AM