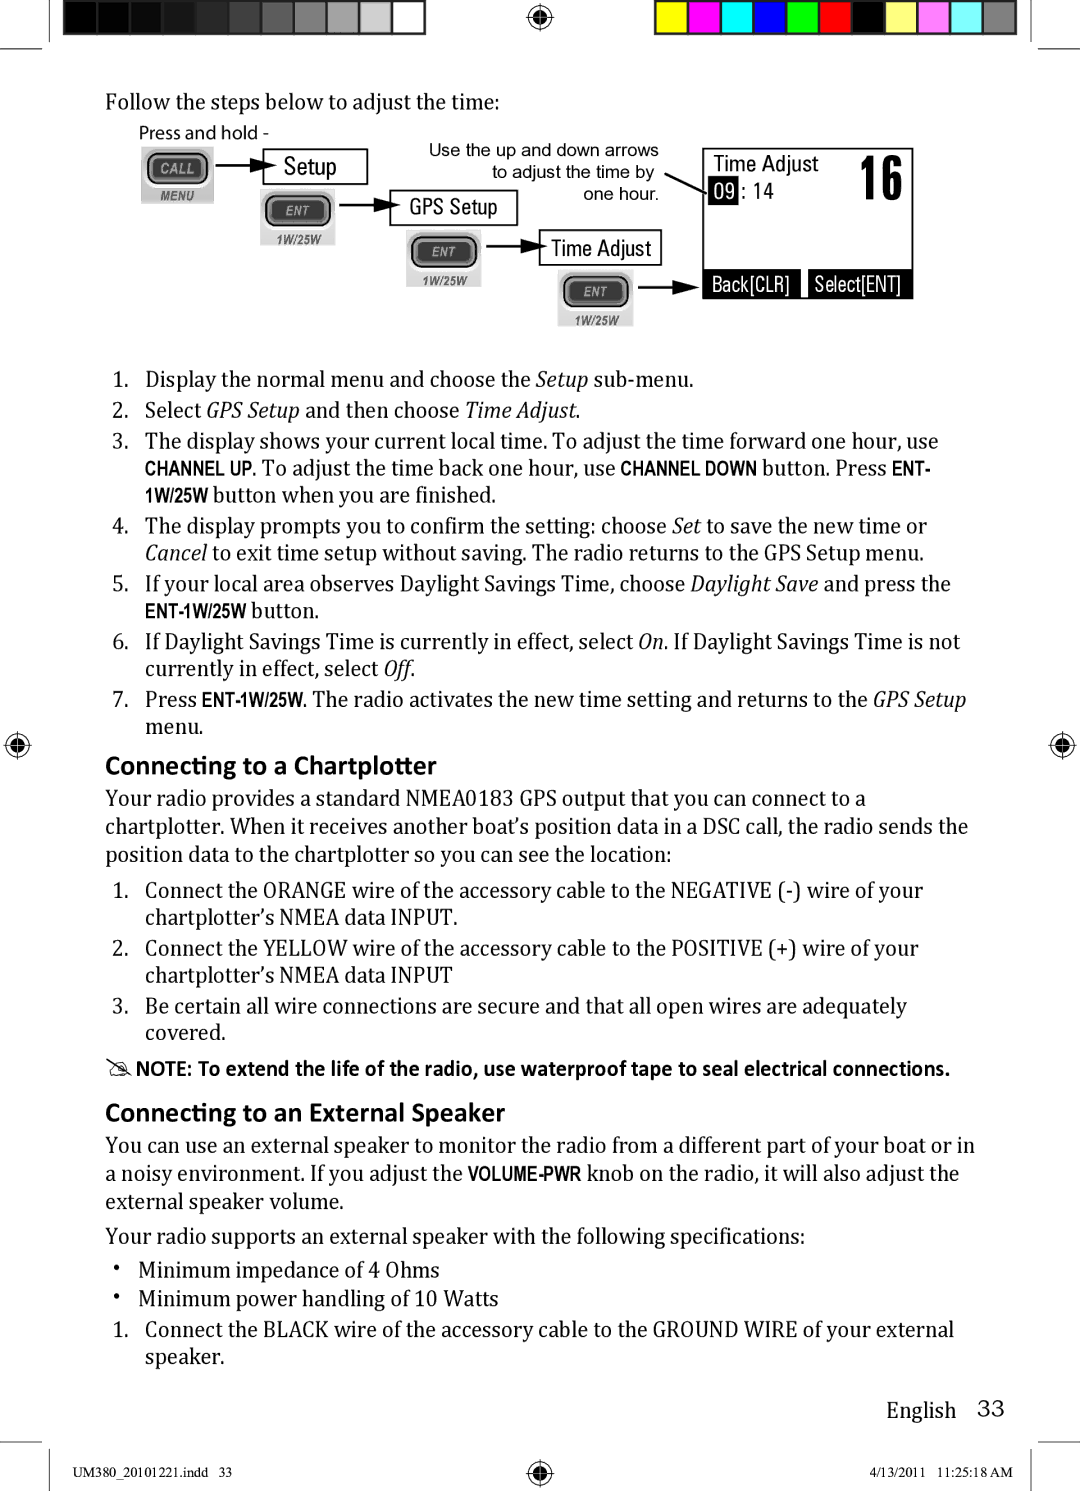
Follow the steps below to adjust the time:
Press and hold -
Setup
Use the up and down arrows |
|
|
|
| ||
| Time Adjust | 16 | ||||
to adjust the time by | ||||||
09 | : 14 | |||||
| one hour. | |||||
GPS Setup | ||||||
|
| |||||
![]()
![]() Time Adjust
Time Adjust
![]() Back[CLR] Select[ENT]
Back[CLR] Select[ENT]
1.Display the normal menu and choose the Setup
2.Select GPS Setup and then choose Time Adjust.
3.The display shows your current local time. To adjust the time forward one hour, use CHANNEL UP. To adjust the time back one hour, use CHANNEL DOWN button. Press ENT- 1W/25W button when you are finished.
4.The display prompts you to confirm the setting: choose Set to save the new time or Cancel to exit time setup without saving. The radio returns to the GPS Setup menu.
5.If your local area observes Daylight Savings Time, choose Daylight Save and press the
6.If Daylight Savings Time is currently in effect, select On. If Daylight Savings Time is not currently in effect, select Off.
7.Press
Connecting to a Chartplotter
Your radio provides a standard NMEA0183 GPS output that you can connect to a chartplotter. When it receives another boat’s position data in a DSC call, the radio sends the position data to the chartplotter so you can see the location:
1.Connect the ORANGE wire of the accessory cable to the NEGATIVE
2.Connect the YELLOW wire of the accessory cable to the POSITIVE (+) wire of your chartplotter’s NMEA data INPUT
3.Be certain all wire connections are secure and that all open wires are adequately covered.
##NOTE: To extend the life of the radio, use waterproof tape to seal electrical connections.
Connecting to an External Speaker
You can use an external speaker to monitor the radio from a different part of your boat or in a noisy environment. If you adjust the
Your radio supports an external speaker with the following specifications: xx Minimum impedance of 4 Ohms
xx Minimum power handling of 10 Watts
1.Connect the BLACK wire of the accessory cable to the GROUND WIRE of your external speaker.
English 33
UM380_20101221.indd 33
4/13/2011 11:25:18 AM