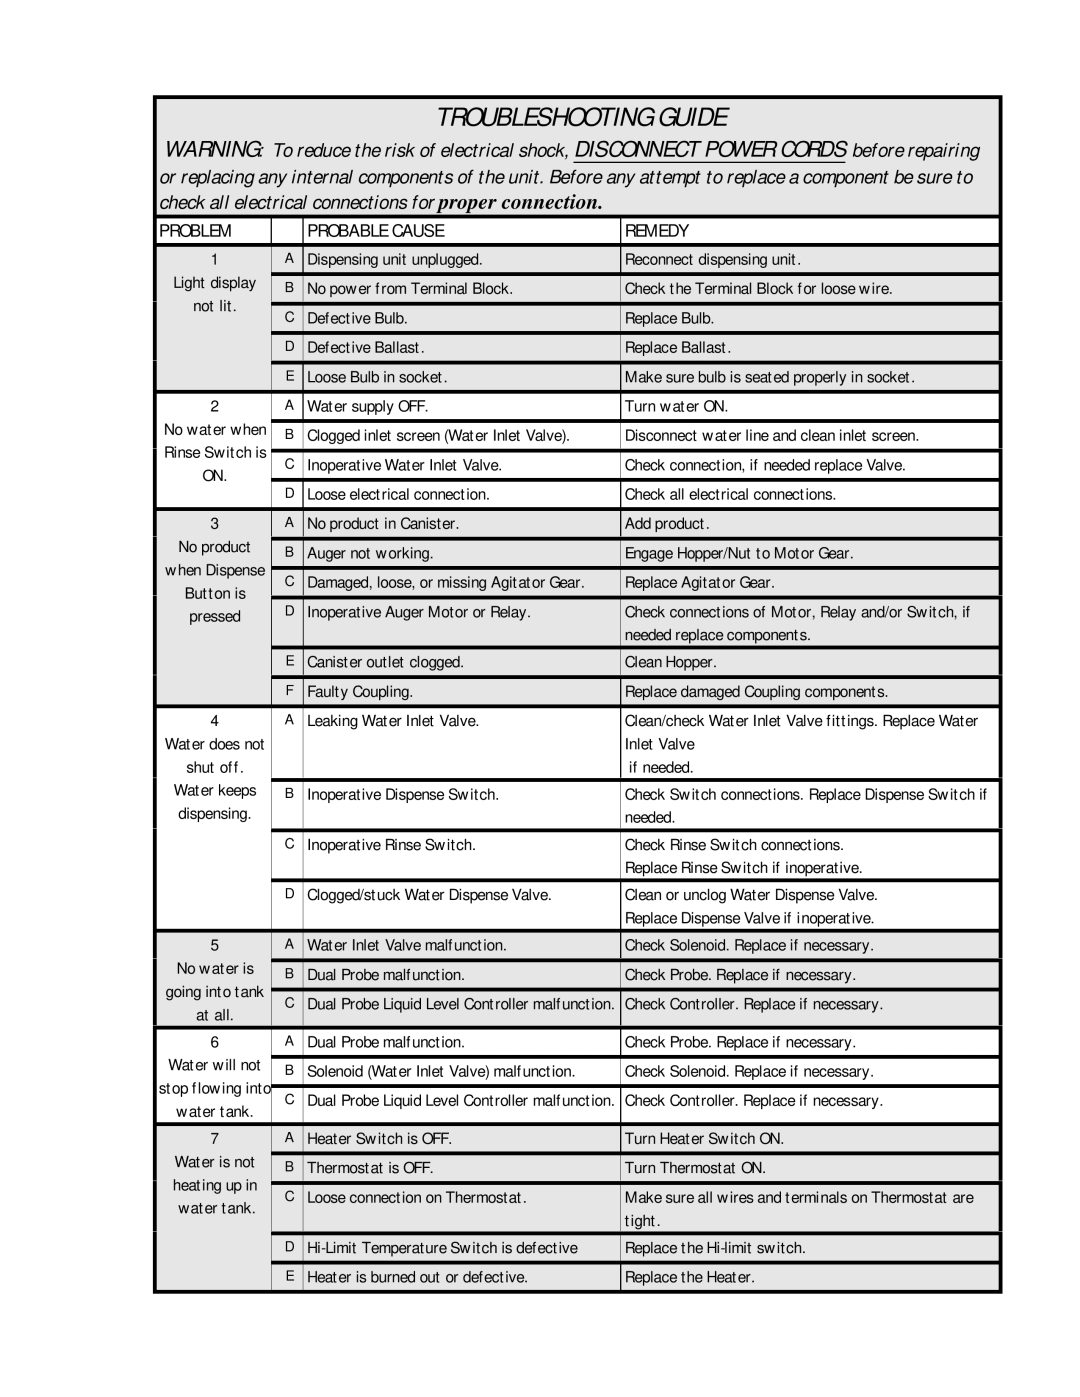
TROUBLESHOOTING GUIDE
WARNING: To reduce the risk of electrical shock, DISCONNECT POWER CORDS before repairing or replacing any internal components of the unit. Before any attempt to replace a component be sure to check all electrical connections for proper connection.
| PROBLEM |
|
| PROBABLE CAUSE |
| REMEDY |
|
| 1 | A |
| Dispensing unit unplugged. |
| Reconnect dispensing unit. |
|
| Light display | B |
| No power from Terminal Block. |
| Check the Terminal Block for loose wire. |
|
| not lit. |
|
|
|
|
|
|
| C |
| Defective Bulb. |
| Replace Bulb. |
| |
|
|
|
|
| |||
|
| D |
| Defective Ballast. |
| Replace Ballast. |
|
|
| E |
| Loose Bulb in socket. |
| Make sure bulb is seated properly in socket. |
|
| 2 | A |
| Water supply OFF. |
| Turn water ON. |
|
| No water when |
|
|
|
|
|
|
| B |
| Clogged inlet screen (Water Inlet Valve). |
| Disconnect water line and clean inlet screen. |
| |
| Rinse Switch is |
|
|
|
|
|
|
| C |
| Inoperative Water Inlet Valve. |
| Check connection, if needed replace Valve. |
| |
| ON. |
|
|
| |||
|
| D |
| Loose electrical connection. |
| Check all electrical connections. |
|
| 3 | A |
| No product in Canister. |
| Add product. |
|
| No product | B |
| Auger not working. |
| Engage Hopper/Nut to Motor Gear. |
|
| when Dispense |
|
|
| |||
| C |
| Damaged, loose, or missing Agitator Gear. |
| Replace Agitator Gear. |
| |
| Button is |
|
|
| |||
| pressed | D |
| Inoperative Auger Motor or Relay. |
| Check connections of Motor, Relay and/or Switch, if |
|
|
|
|
|
|
| needed replace components. |
|
|
| E |
| Canister outlet clogged. |
| Clean Hopper. |
|
|
| F |
| Faulty Coupling. |
| Replace damaged Coupling components. |
|
| 4 | A |
| Leaking Water Inlet Valve. |
| Clean/check Water Inlet Valve fittings. Replace Water |
|
| Water does not |
|
|
|
| Inlet Valve |
|
| shut off. |
|
|
|
| if needed. |
|
| Water keeps | B |
| Inoperative Dispense Switch. |
| Check Switch connections. Replace Dispense Switch if |
|
| dispensing. |
|
|
|
| needed. |
|
|
| C |
| Inoperative Rinse Switch. |
| Check Rinse Switch connections. |
|
|
|
|
|
|
| Replace Rinse Switch if inoperative. |
|
|
| D |
| Clogged/stuck Water Dispense Valve. |
| Clean or unclog Water Dispense Valve. |
|
|
|
|
|
|
| Replace Dispense Valve if inoperative. |
|
| 5 | A |
| Water Inlet Valve malfunction. |
| Check Solenoid. Replace if necessary. |
|
| No water is | B |
| Dual Probe malfunction. |
| Check Probe. Replace if necessary. |
|
| going into tank |
|
|
| |||
| C |
| Dual Probe Liquid Level Controller malfunction. |
| Check Controller. Replace if necessary. |
| |
| at all. |
|
|
| |||
|
|
|
|
|
|
| |
| 6 | A |
| Dual Probe malfunction. |
| Check Probe. Replace if necessary. |
|
| Water will not |
|
|
|
|
|
|
| B |
| Solenoid (Water Inlet Valve) malfunction. |
| Check Solenoid. Replace if necessary. |
| |
| stop flowing into |
|
|
| |||
| C |
| Dual Probe Liquid Level Controller malfunction. | Check Controller. Replace if necessary. |
| ||
| water tank. |
|
| ||||
|
|
|
|
|
|
| |
| 7 | A |
| Heater Switch is OFF. |
| Turn Heater Switch ON. |
|
| Water is not | B |
| Thermostat is OFF. |
| Turn Thermostat ON. |
|
| heating up in |
|
|
|
|
|
|
| C |
| Loose connection on Thermostat. |
| Make sure all wires and terminals on Thermostat are |
| |
| water tank. |
|
|
| |||
|
|
|
|
| tight. |
| |
|
|
|
|
|
|
| |
|
| D |
|
| Replace the |
| |
|
| E |
| Heater is burned out or defective. |
| Replace the Heater. |
|
|
|
|
|
|
|
|
|
