Since the fully assembled telescope can be quite heavy, position the mount so that the polar axis is pointing towards north before the tube assembly and counterweights are attached. This will make the polar alignment procedure much easier.
Installing the Counterweights
Each Omni mount comes with two counterweights (One weighs 7 lbs./3.2kg and the other weighs 4 lbs./1.8kg). To install the counterweights:
1.Orient the mount so that the counterweight bar points toward the ground.
2.Loosen the locking screw on the side of the counterweights (it doesn’t matter which counterweight you attach first) so that the threads do not protrude through the center hole of the counterweight.
3.Slide the counterweight onto the shaft (see Figure
4.Tighten the locking screw on the side of the weight to hold the counterweight in place.
5.Slide the second counterweight onto the shaft and tighten as in # 4.
6.Replace the counterweight safety screw.
Attaching the Slow Motion Control Knobs (Cables)
The Omni mount comes with two slow motion control knobs (cables) that allows you to make fine pointing adjustments to the telescope in both R.A. and Declination. To install the knobs:
1.Locate the two knobs (one is longer than the other and is for the R.A. axis). Make sure the screw on each knob does not protrude through the knob shaft
opening. Use the supplied Phillips head screwdriver.
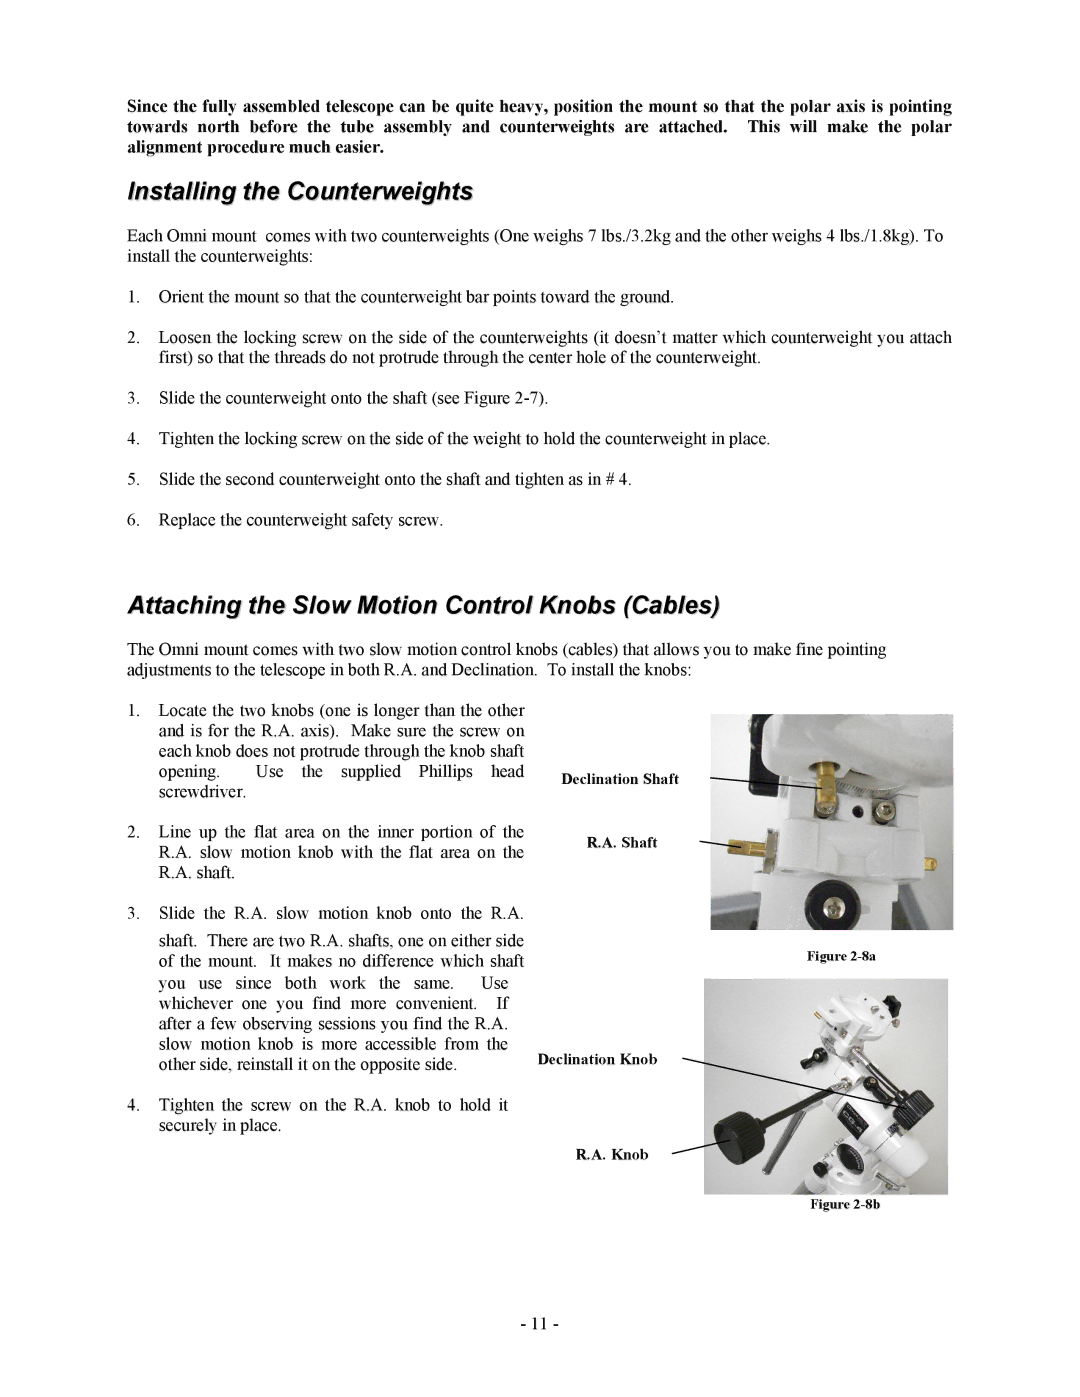
2.Line up the flat area on the inner portion of the R.A. slow motion knob with the flat area on the R.A. shaft.
3.Slide the R.A. slow motion knob onto the R.A.
shaft. There are two R.A. shafts, one on either side of the mount. It makes no difference which shaft you use since both work the same. Use whichever one you find more convenient. If after a few observing sessions you find the R.A. slow motion knob is more accessible from the other side, reinstall it on the opposite side.
4.Tighten the screw on the R.A. knob to hold it securely in place.
Declination Shaft
R.A. Shaft
Figure 2-8a
Declination Knob
R.A. Knob
Figure 2-8b
- 11 -