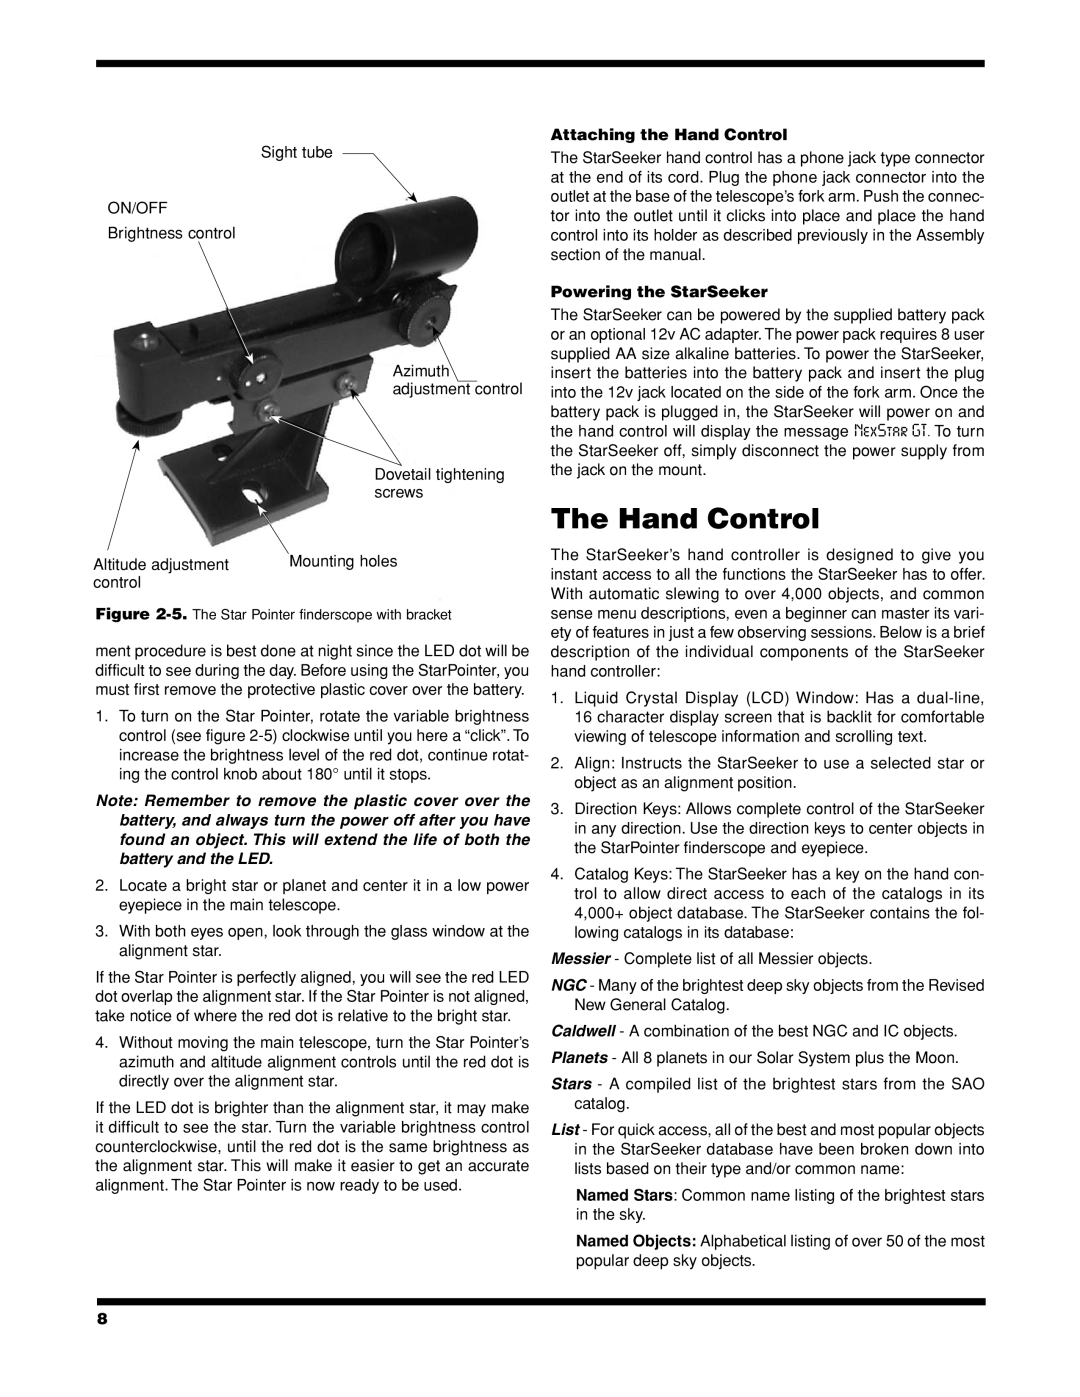
Sight tube
ON/OFF
Brightness control
Azimuth adjustment control
| Dovetail tightening |
| screws |
Altitude adjustment | Mounting holes |
control |
|
Figure 2-5. The Star Pointer finderscope with bracket
ment procedure is best done at night since the LED dot will be difficult to see during the day. Before using the StarPointer, you must first remove the protective plastic cover over the battery.
1.To turn on the Star Pointer, rotate the variable brightness control (see figure
Note: Remember to remove the plastic cover over the battery, and always turn the power off after you have found an object. This will extend the life of both the battery and the LED.
2.Locate a bright star or planet and center it in a low power eyepiece in the main telescope.
3.With both eyes open, look through the glass window at the alignment star.
If the Star Pointer is perfectly aligned, you will see the red LED dot overlap the alignment star. If the Star Pointer is not aligned, take notice of where the red dot is relative to the bright star.
4.Without moving the main telescope, turn the Star Pointer’s azimuth and altitude alignment controls until the red dot is directly over the alignment star.
If the LED dot is brighter than the alignment star, it may make it difficult to see the star. Turn the variable brightness control counterclockwise, until the red dot is the same brightness as the alignment star. This will make it easier to get an accurate alignment. The Star Pointer is now ready to be used.
Attaching the Hand Control
The StarSeeker hand control has a phone jack type connector at the end of its cord. Plug the phone jack connector into the outlet at the base of the telescope’s fork arm. Push the connec- tor into the outlet until it clicks into place and place the hand control into its holder as described previously in the Assembly section of the manual.
Powering the StarSeeker
The StarSeeker can be powered by the supplied battery pack or an optional 12v AC adapter. The power pack requires 8 user supplied AA size alkaline batteries. To power the StarSeeker, insert the batteries into the battery pack and insert the plug into the 12v jack located on the side of the fork arm. Once the battery pack is plugged in, the StarSeeker will power on and the hand control will display the message NexStar GT. To turn the StarSeeker off, simply disconnect the power supply from the jack on the mount.
The Hand Control
The StarSeeker’s hand controller is designed to give you instant access to all the functions the StarSeeker has to offer. With automatic slewing to over 4,000 objects, and common sense menu descriptions, even a beginner can master its vari- ety of features in just a few observing sessions. Below is a brief description of the individual components of the StarSeeker hand controller:
1.Liquid Crystal Display (LCD) Window: Has a
2.Align: Instructs the StarSeeker to use a selected star or object as an alignment position.
3.Direction Keys: Allows complete control of the StarSeeker in any direction. Use the direction keys to center objects in the StarPointer finderscope and eyepiece.
4.Catalog Keys: The StarSeeker has a key on the hand con- trol to allow direct access to each of the catalogs in its 4,000+ object database. The StarSeeker contains the fol- lowing catalogs in its database:
Messier - Complete list of all Messier objects.
NGC - Many of the brightest deep sky objects from the Revised New General Catalog.
Caldwell - A combination of the best NGC and IC objects.
Planets - All 8 planets in our Solar System plus the Moon.
Stars - A compiled list of the brightest stars from the SAO catalog.
List - For quick access, all of the best and most popular objects in the StarSeeker database have been broken down into lists based on their type and/or common name:
Named Stars: Common name listing of the brightest stars in the sky.
Named Objects: Alphabetical listing of over 50 of the most popular deep sky objects.
8