CHARIOT CARRIER CTS READY CHASSIS ASSEMBLY
Your Chariot Carrier is shipped 99% assembled. Initial assembly takes a few minutes. After that, folding and unfolding can be done in seconds.
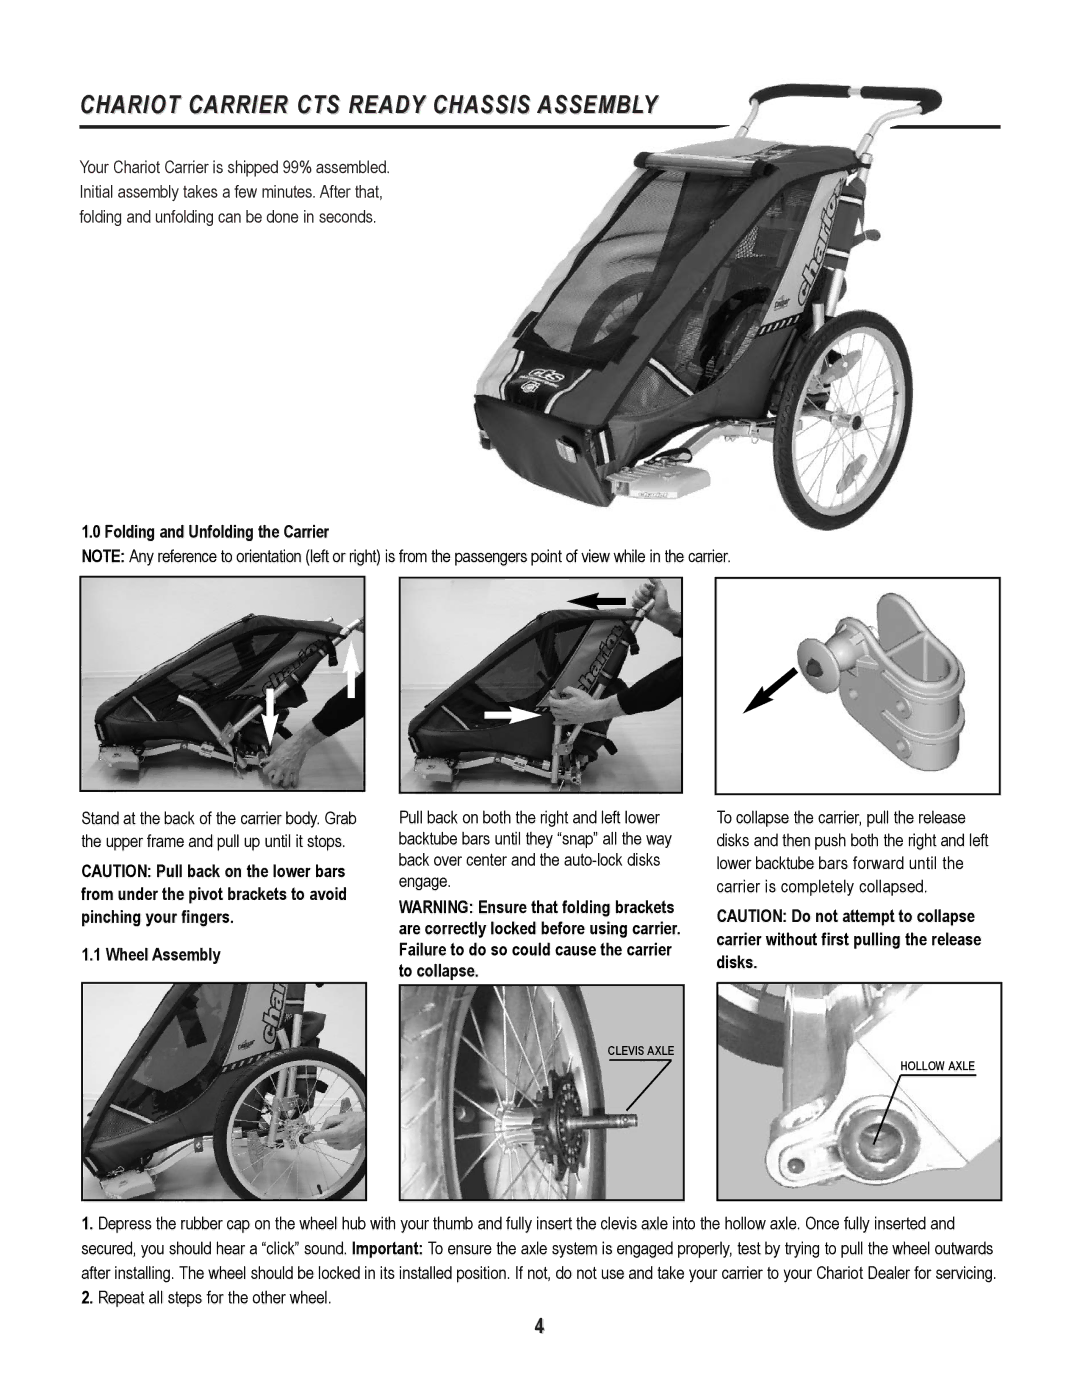
1.0 Folding and Unfolding the Carrier
NOTE: Any reference to orientation (left or right) is from the passengers point of view while in the carrier.
Stand at the back of the carrier body. Grab the upper frame and pull up until it stops.
CAUTION: Pull back on the lower bars from under the pivot brackets to avoid pinching your fingers.
1.1 Wheel Assembly
Pull back on both the right and left lower backtube bars until they “snap” all the way back over center and the
WARNING: Ensure that folding brackets are correctly locked before using carrier. Failure to do so could cause the carrier to collapse.
To collapse the carrier, pull the release disks and then push both the right and left lower backtube bars forward until the carrier is completely collapsed.
CAUTION: Do not attempt to collapse carrier without first pulling the release disks.
CLEVIS AXLE
HOLLOW AXLE
1.Depress the rubber cap on the wheel hub with your thumb and fully insert the clevis axle into the hollow axle. Once fully inserted and secured, you should hear a “click” sound. Important: To ensure the axle system is engaged properly, test by trying to pull the wheel outwards after installing. The wheel should be locked in its installed position. If not, do not use and take your carrier to your Chariot Dealer for servicing.
2.Repeat all steps for the other wheel.
4