Unpacking
When unpacking, check to make sure the following parts are included.
Electric Compressor with Spray Gun.
Air Pressure Hose
If any parts are missing or broken, please call Harbor Freight Tools at the number on the cover of this manual.
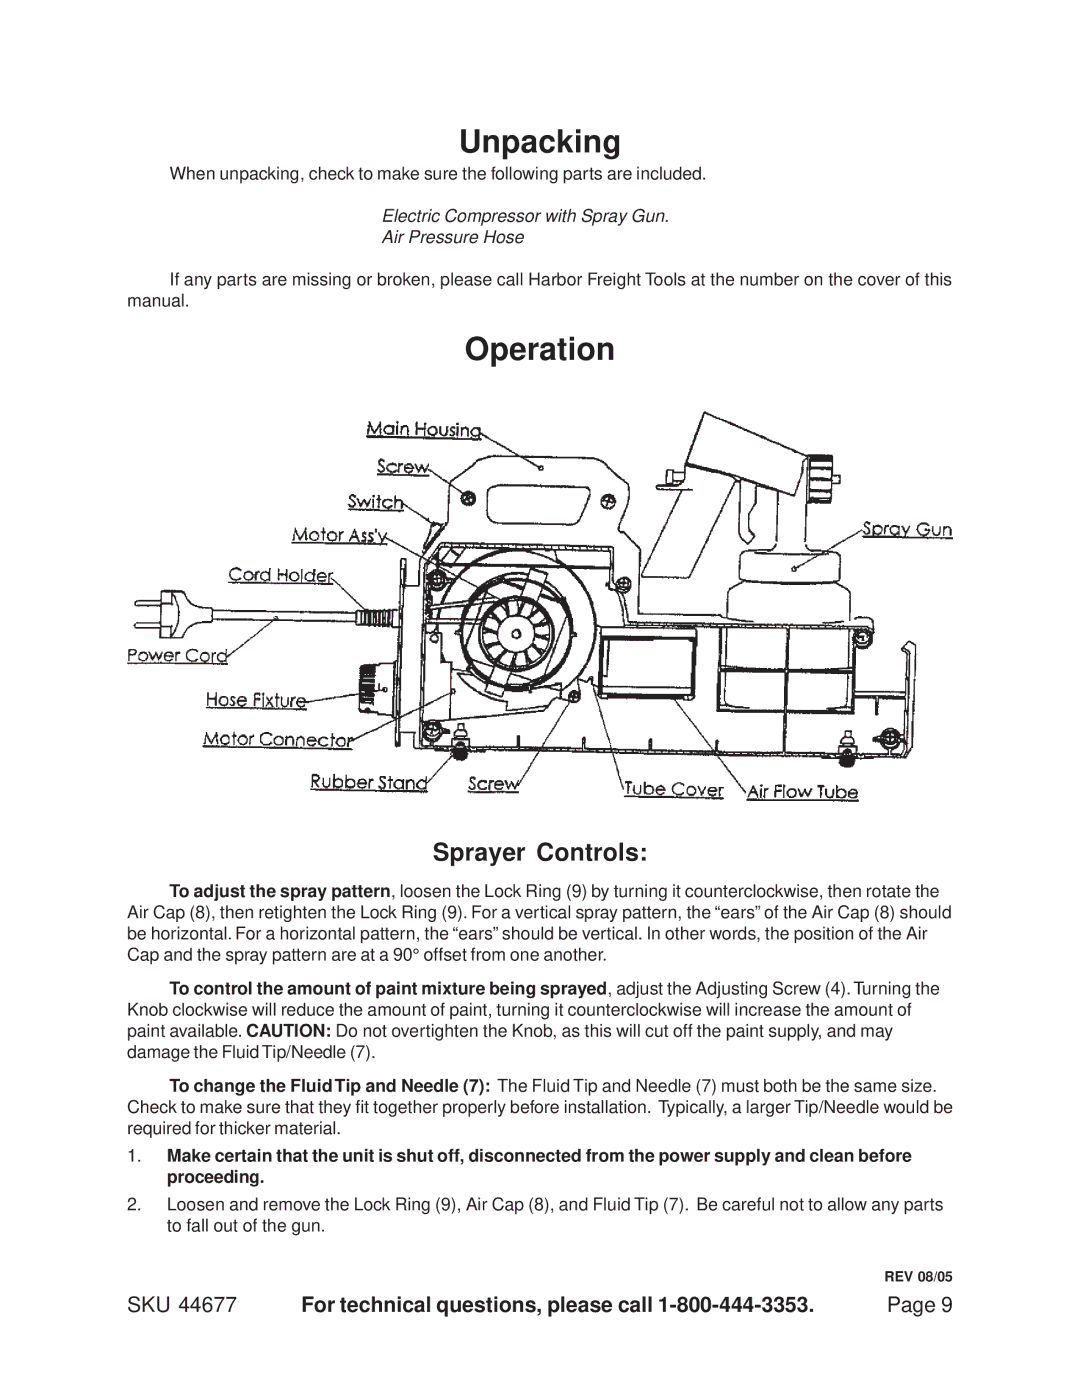
Operation
Sprayer Controls:
To adjust the spray pattern, loosen the Lock Ring (9) by turning it counterclockwise, then rotate the Air Cap (8), then retighten the Lock Ring (9). For a vertical spray pattern, the “ears” of the Air Cap (8) should be horizontal. For a horizontal pattern, the “ears” should be vertical. In other words, the position of the Air Cap and the spray pattern are at a 90° offset from one another.
To control the amount of paint mixture being sprayed, adjust the Adjusting Screw (4). Turning the Knob clockwise will reduce the amount of paint, turning it counterclockwise will increase the amount of paint available. CAUTION: Do not overtighten the Knob, as this will cut off the paint supply, and may damage the Fluid Tip/Needle (7).
To change the Fluid Tip and Needle (7): The Fluid Tip and Needle (7) must both be the same size. Check to make sure that they fit together properly before installation. Typically, a larger Tip/Needle would be required for thicker material.
1.Make certain that the unit is shut off, disconnected from the power supply and clean before proceeding.
2.Loosen and remove the Lock Ring (9), Air Cap (8), and Fluid Tip (7). Be careful not to allow any parts to fall out of the gun.
REV 08/05
SKU 44677 | For technical questions, please call | Page 9 |