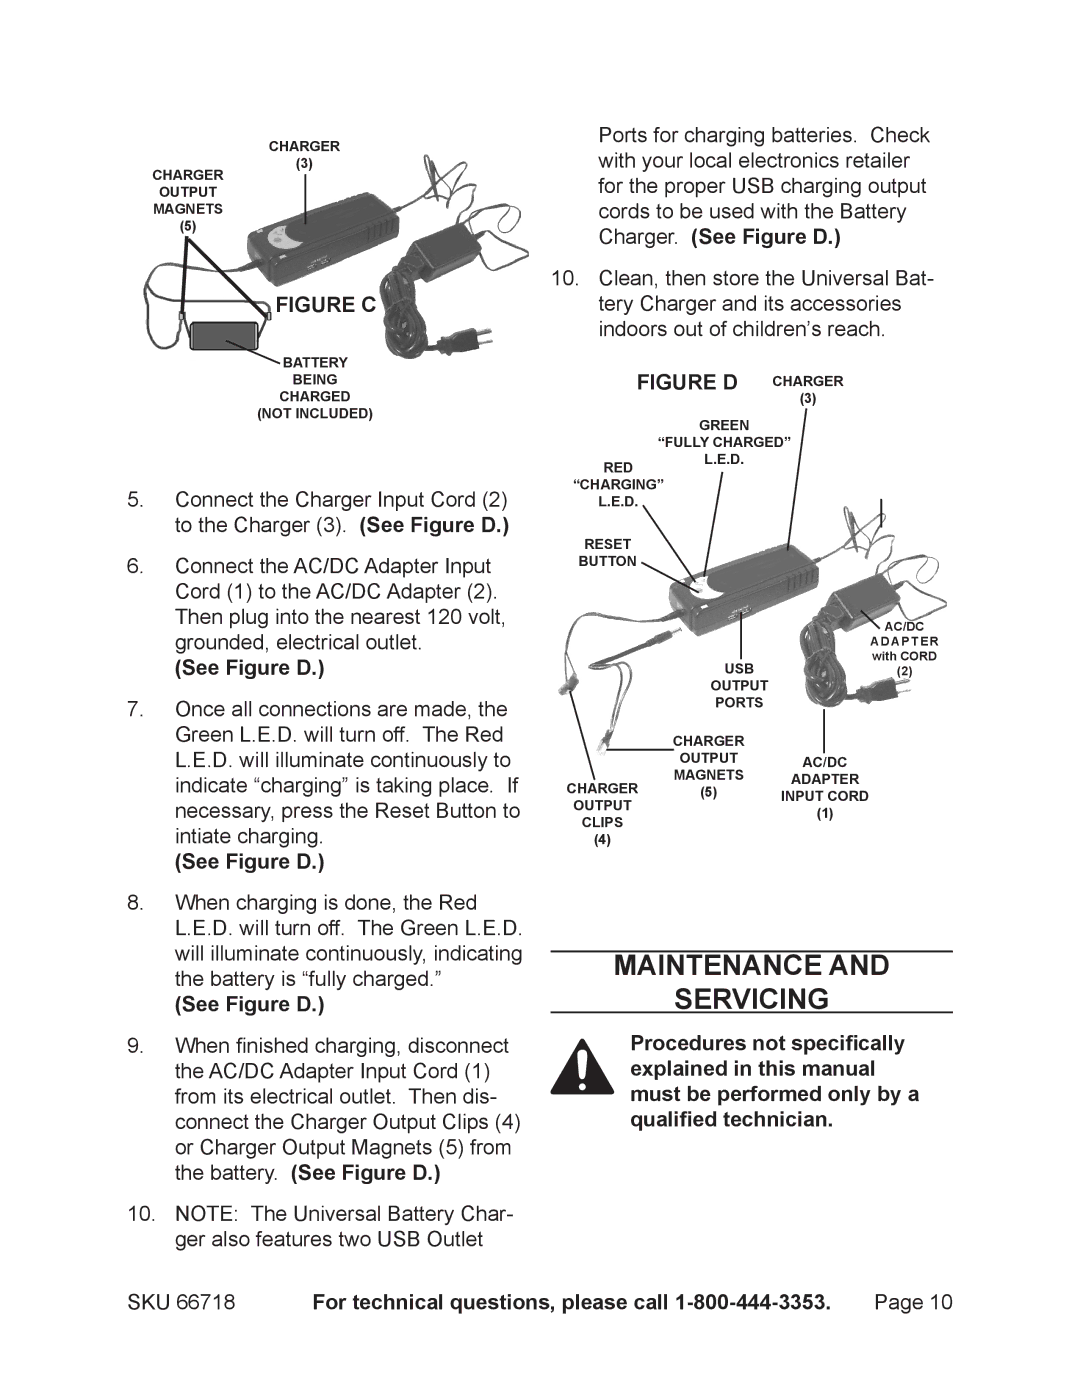
CHARGER
Ports for charging batteries. Check
CHARGER
OUTPUT
MAGNETS
(5)
(3)
with your local electronics retailer for the proper USB charging output cords to be used with the Battery Charger. (See Figure D.)
FIGURE C
![]() BATTERY BEING
BATTERY BEING
CHARGED
(NOT INCLUDED)
5.Connect the Charger Input Cord (2) to the Charger (3). (See Figure D.)
6.Connect the AC/DC Adapter Input Cord (1) to the AC/DC Adapter (2).
Then plug into the nearest 120 volt, grounded, electrical outlet.
(See Figure D.)
7.Once all connections are made, the Green L.E.D. will turn off. The Red L.E.D. will illuminate continuously to indicate “charging” is taking place. If necessary, press the Reset Button to intiate charging.
(See Figure D.)
8.When charging is done, the Red L.E.D. will turn off. The Green L.E.D. will illuminate continuously, indicating the battery is “fully charged.”
(See Figure D.)
9.When finished charging, disconnect the AC/DC Adapter Input Cord (1) from its electrical outlet. Then dis- connect the Charger Output Clips (4) or Charger Output Magnets (5) from the battery. (See Figure D.)
10.NOTE: The Universal Battery Char- ger also features two USB Outlet
10.Clean, then store the Universal Bat- tery Charger and its accessories indoors out of children’s reach.
FIGURE D | CHARGER |
| (3) |
GREEN
“FULLY CHARGED”
RED L.E.D. “CHARGING”
L.E.D.
RESET
BUTTON
![]() AC/DC
AC/DC
ADAPTER with CORD
USB(2)
OUTPUT
PORTS
|
| CHARGER |
|
| |
|
|
| OUTPUT |
|
|
|
| AC/DC | |||
CHARGER | MAGNETS | ADAPTER | |||
(5) | INPUT CORD | ||||
OUTPUT |
|
| (1) | ||
CLIPS |
|
| |||
|
|
|
| ||
(4) |
|
|
|
| |
Maintenance And
Servicing
Procedures not specifically explained in this manual must be performed only by a qualified technician.
SKU 66718 | For technical questions, please call | Page 10 |