
90599 specifications
The Chicago Electric 90599 is a highly regarded model in the realm of portable generators, bringing together performance, convenience, and reliability. Known for its durability and efficiency, this generator is an ideal solution for both home use and outdoor adventures. It caters to various power needs, making it a versatile choice for homeowners, campers, and professionals alike.One of the standout features of the Chicago Electric 90599 is its robust 800-watt output capability. This level of power is sufficient for running essential appliances during power outages, powering tools on job sites, or providing electricity for recreational activities such as camping and tailgating. The generator is equipped with a reliable gasoline engine, which ensures extended operation times while being easy to start and maintain.
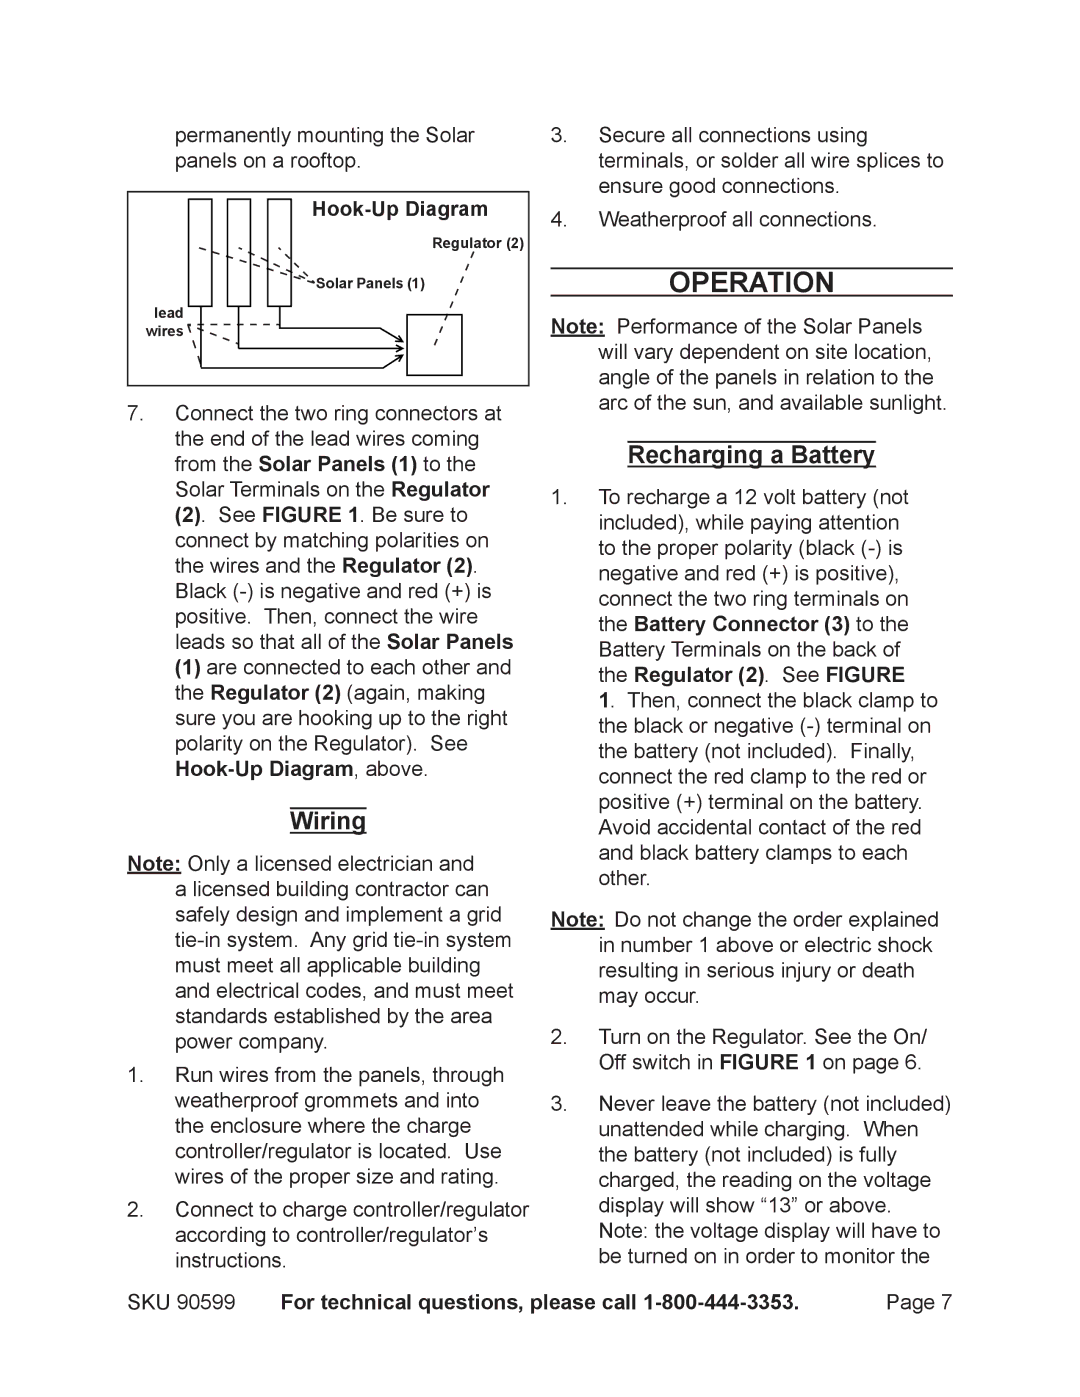
In terms of design, the Chicago Electric 90599 boasts a compact and portable construction. Its built-in handle and lightweight frame enable easy transportation, making it a perfect companion for outdoor activities or emergency preparedness. Despite its small size, it is designed to withstand the rigors of outdoor use, featuring a rugged housing that protects the internal components from environmental factors.
The generator is also designed with user-friendly controls, making it accessible even for those who are not tech-savvy. Its simple control panel includes multiple outlets, allowing users to connect various devices simultaneously. This feature is particularly beneficial in scenarios where multiple power sources are necessary, such as during family trips or large gatherings.
Moreover, the Chicago Electric 90599 incorporates silent operation technology, which minimizes noise levels during use. This characteristic makes it suitable for residential areas and campsites where excessive noise can be a disturbance. The relatively quiet operation does not compromise on power output, ensuring users receive reliable energy without the annoying sounds commonly associated with generators.
Safety features are a key priority in the Chicago Electric 90599 design. It includes automatic low oil shut-off and overload protection, giving users peace of mind, knowing that the generator will protect itself while in operation. This attention to safety and reliability is critical, especially when using the generator for essential appliances or during emergencies.
In summary, the Chicago Electric 90599 stands out with its powerful performance, user-friendly design, and essential safety features. Whether for home backup power or outdoor activities, its combination of portability, efficiency, and durability makes it an excellent choice for anyone in need of a dependable generator solution.