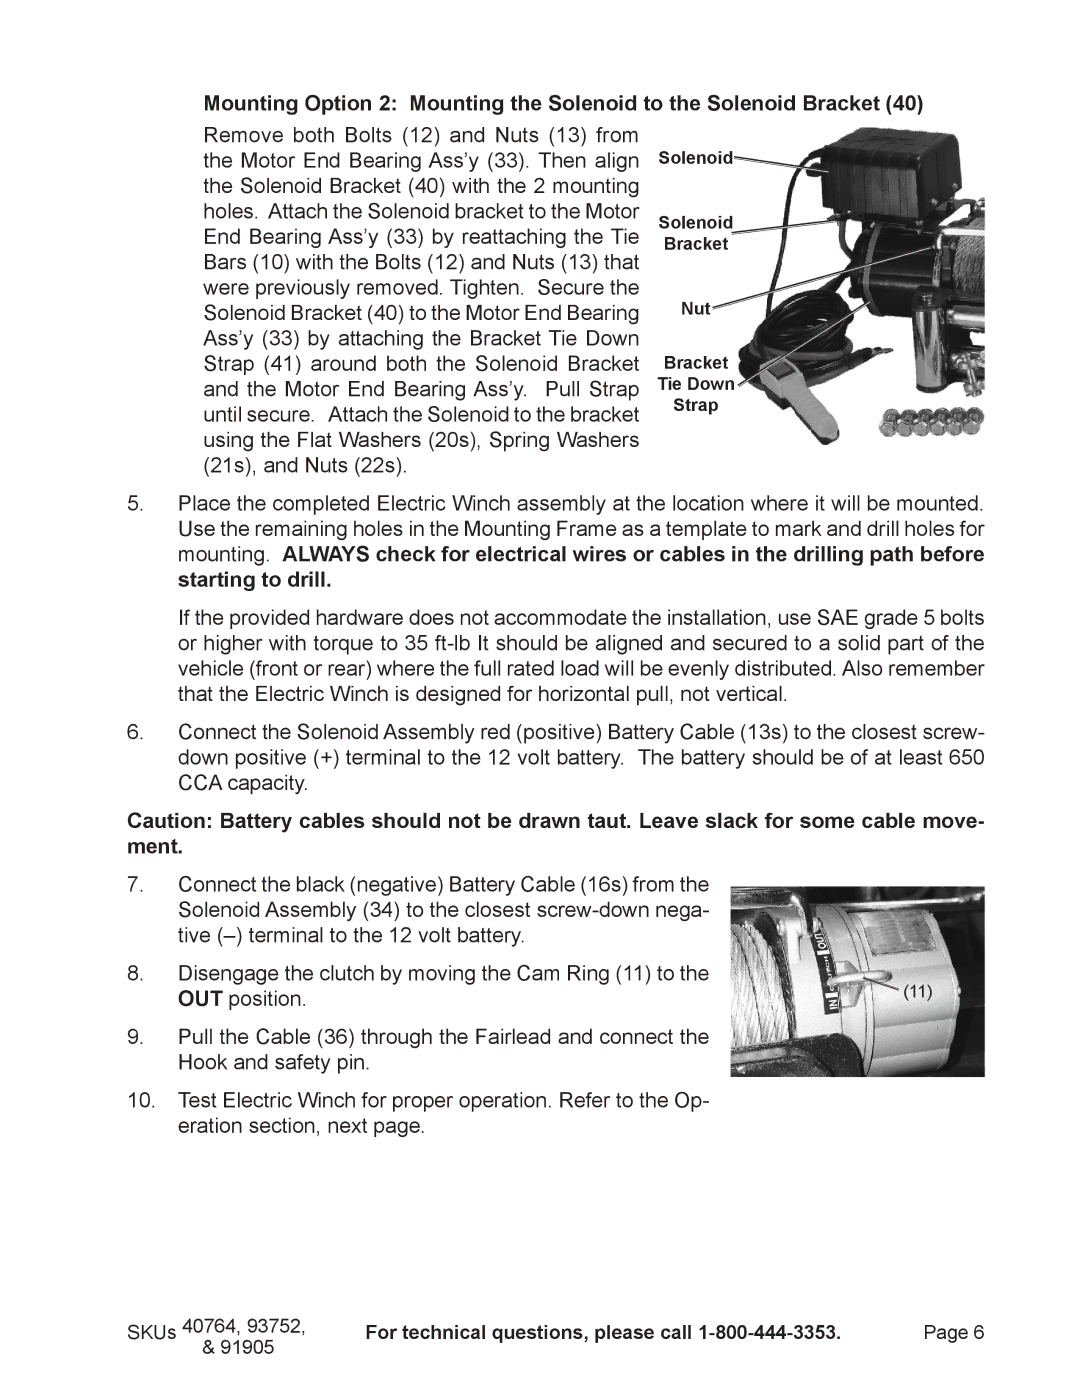
Mounting Option 2: Mounting the Solenoid to the Solenoid Bracket (40)
Remove both Bolts (12) and Nuts (13) from the Motor End Bearing Ass’y (33). Then align the Solenoid Bracket (40) with the 2 mounting holes. Attach the Solenoid bracket to the Motor End Bearing Ass’y (33) by reattaching the Tie Bars (10) with the Bolts (12) and Nuts (13) that were previously removed. Tighten. Secure the Solenoid Bracket (40) to the Motor End Bearing Ass’y (33) by attaching the Bracket Tie Down Strap (41) around both the Solenoid Bracket and the Motor End Bearing Ass’y. Pull Strap until secure. Attach the Solenoid to the bracket using the Flat Washers (20s), Spring Washers (21s), and Nuts (22s).
Solenoid
Solenoid Bracket
Nut
Bracket
Tie Down
Strap
5.Place the completed Electric Winch assembly at the location where it will be mounted. Use the remaining holes in the Mounting Frame as a template to mark and drill holes for mounting. ALWAYS check for electrical wires or cables in the drilling path before starting to drill.
If the provided hardware does not accommodate the installation, use SAE grade 5 bolts or higher with torque to 35
6.Connect the Solenoid Assembly red (positive) Battery Cable (13s) to the closest screw- down positive (+) terminal to the 12 volt battery. The battery should be of at least 650 CCA capacity.
Caution: Battery cables should not be drawn taut. Leave slack for some cable move- ment.
7. | Connect the black (negative) Battery Cable (16s) from the |
|
| Solenoid Assembly (34) to the closest |
|
| tive |
|
8. | Disengage the clutch by moving the Cam Ring (11) to the | (11) |
| OUT position. |
9.Pull the Cable (36) through the Fairlead and connect the Hook and safety pin.
10.Test Electric Winch for proper operation. Refer to the Op- eration section, next page.
SKUs 40764, 93752, | For technical questions, please call | Page 6 |
& 91905 |
|
|
