To Mount The Router Table On A Workbench:
1.![]() CAUTION! Make sure the Router Table is securely attached to a dry, flat, level, sturdy workbench surface capable of supporting the weight of the unit, accessories, and workpieces.
CAUTION! Make sure the Router Table is securely attached to a dry, flat, level, sturdy workbench surface capable of supporting the weight of the unit, accessories, and workpieces.
2.At the bottom of each of the four Legs (1B) of the Router Table are two 1/4” diameter mounting holes. (See Assy. Diagram B.)
3.With assistance, place the Router Table in the desired location on the workbench. Then use the mounting holes (eight total) in the Legs (1B) as a template to mark where eight 1/4” diameter holes are to be drilled through the workbench.
4.Temporarily remove the Router Table from the workbench. Then, using a 1/4” drill bit (not included), drill the
5.Place the Router Table back on the workbench and align the mounting holes in its Legs (1B) with the
6.Secure the Router Table to the workbench, using eight 1/4” diameter Bolts of appropriate length, eight Lock Washers, and eight Nuts (none included).
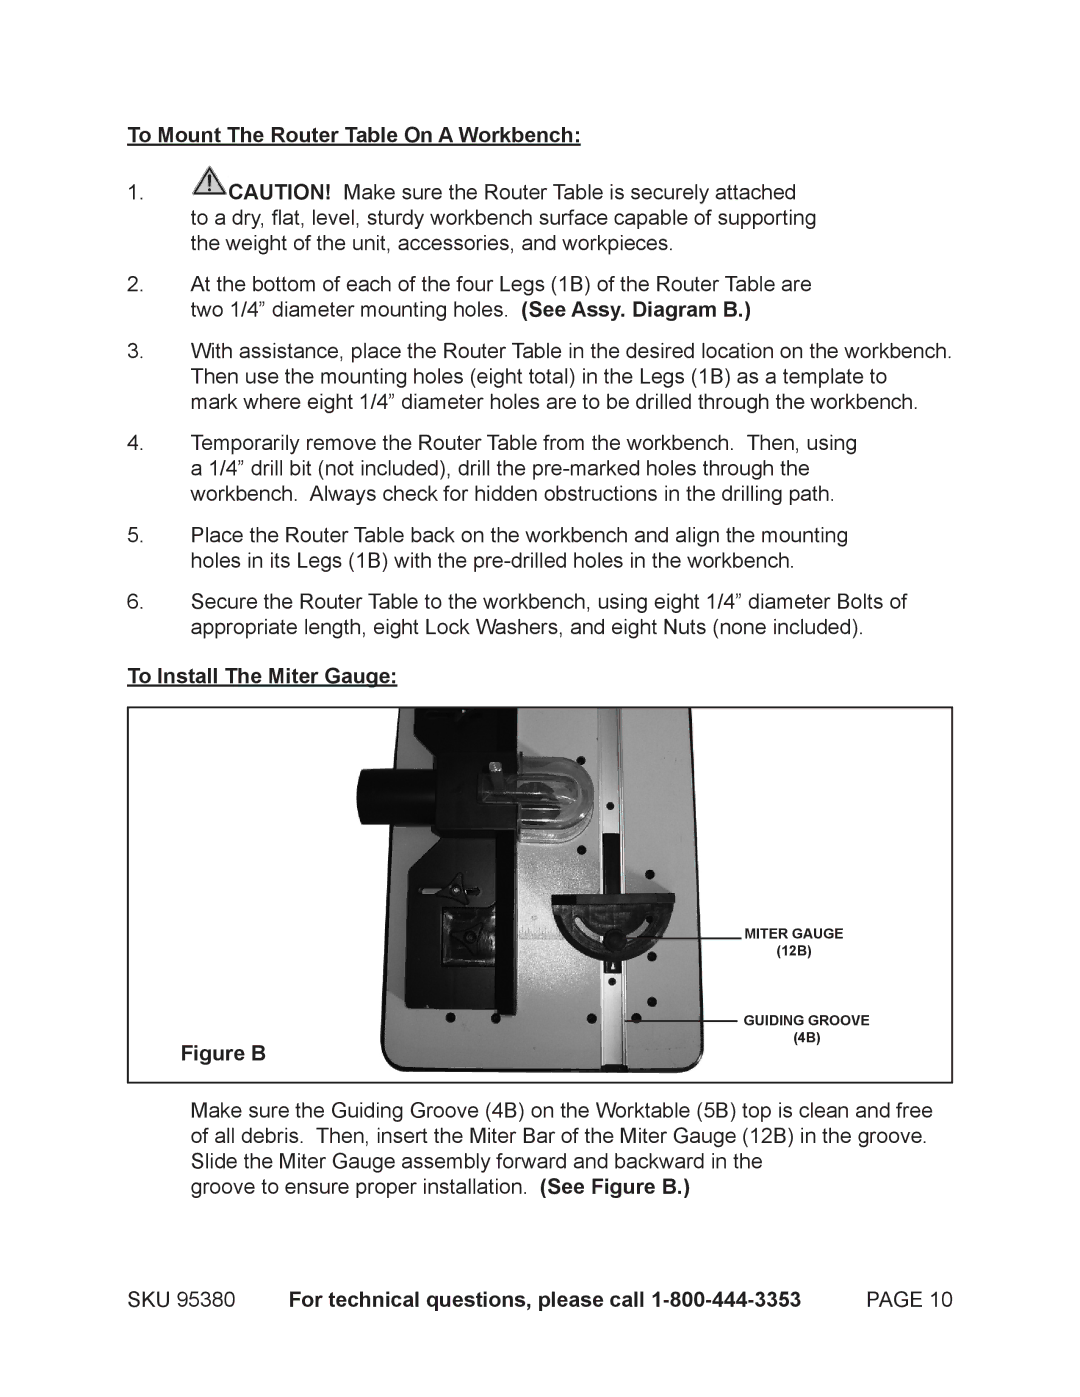
To Install The Miter Gauge:
Figure B
MITER GAUGE
(12B)
GUIDING GROOVE
(4B)
Make sure the Guiding Groove (4B) on the Worktable (5B) top is clean and free of all debris. Then, insert the Miter Bar of the Miter Gauge (12B) in the groove. Slide the Miter Gauge assembly forward and backward in the
groove to ensure proper installation. (See Figure B.)
SKU 95380 | For technical questions, please call | PAGE 10 |