
KSA-1004, FSA-1004 specifications
Chief Manufacturing has long been a trusted name in the audiovisual mounting and support solutions industry, and their FSA-1004 and KSA-1004 models are testaments to their innovative engineering and user-oriented design. These solutions cater to a wide range of applications, from commercial environments to educational settings, ensuring that audiovisual setups are both functional and aesthetically pleasing.The Chief FSA-1004 is a versatile and robust storage solution designed to accommodate a variety of audio-visual equipment. Its main feature is the expansive storage capacity, which allows users to organize and protect their equipment efficiently. Enhanced with cable management technology, this model prevents clutter and minimizes the risk of accidental disconnections or damage. Its adjustable shelves contribute to optimal organization, while its durable construction ensures longevity, making it ideal for frequent use in high-demand environments.
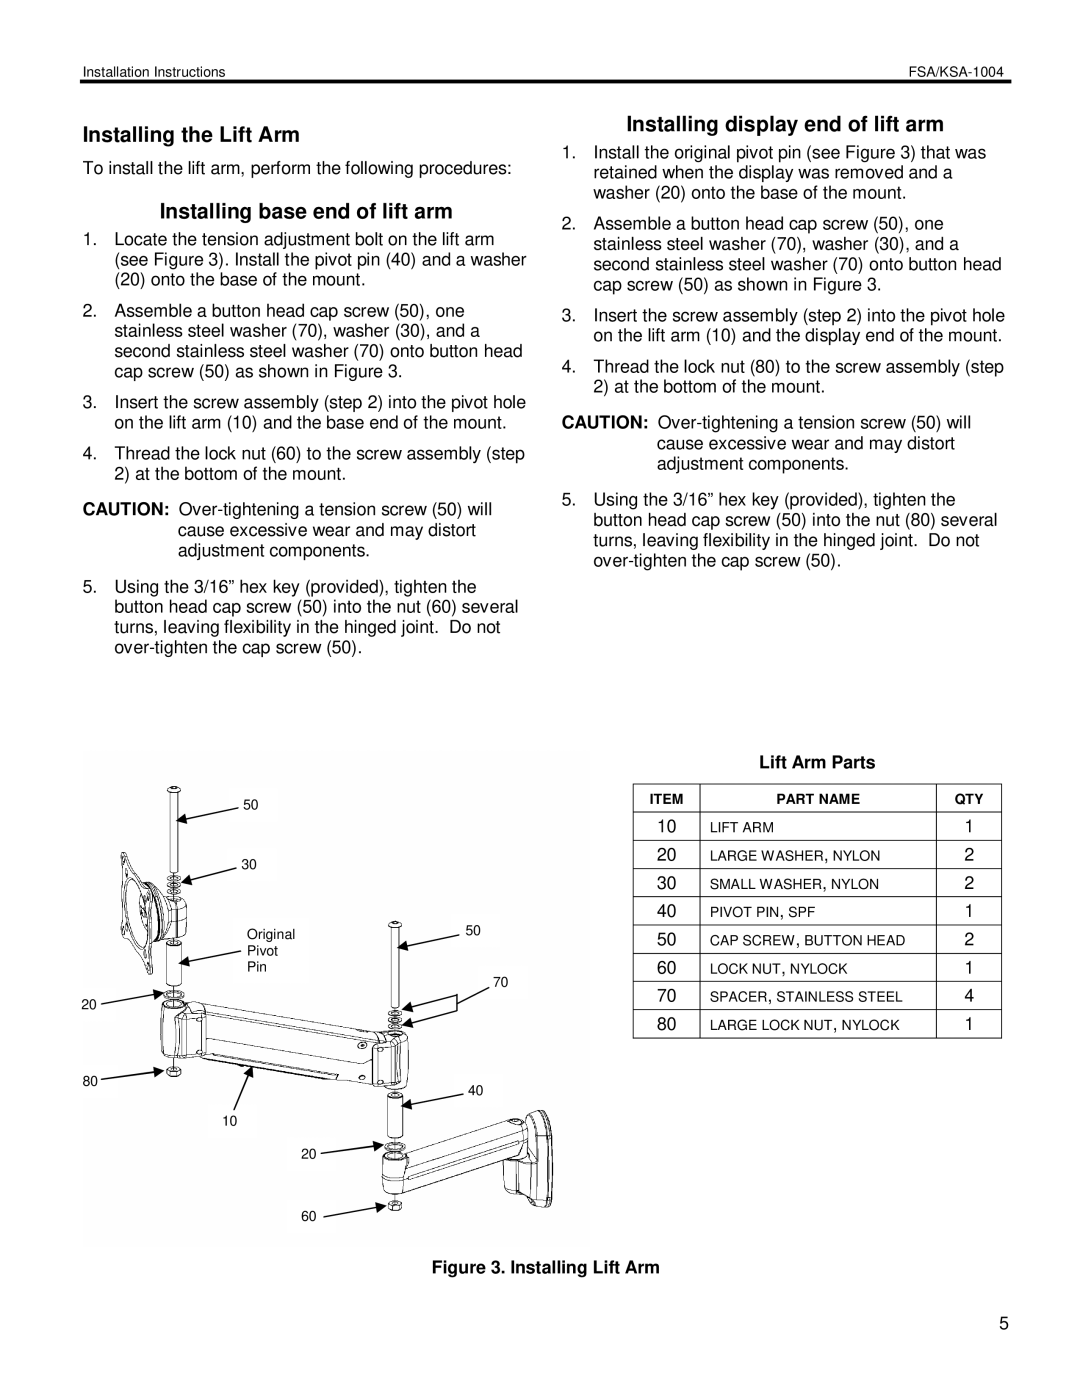
On the other hand, the KSA-1004 is designed for wall-mounting, providing an elegant solution for displaying visual equipment while saving valuable floor space. This model features an adaptable arm design that can accommodate a variety of display sizes and weights, promoting an ergonomic viewing experience. The KSA-1004 is engineered with a focus on stability and security, utilizing robust materials to support even the heaviest displays.
Both models incorporate advanced technologies to enhance usability and convenience. For instance, easy installation features ensure that both the FSA-1004 and KSA-1004 can be set up quickly and efficiently, reducing downtime and disruption in workspaces. The systems are designed with end users in mind, which means that adjustment features are intuitive, allowing users to modify settings or reconfigure equipment without the need for excessive tools or technical knowledge.
Another notable characteristic is the aesthetic design of both models, which ensures they blend seamlessly with any environment. The sleek lines and polished finishes not only add a modern touch but also make maintenance a breeze, as surfaces are easy to clean and maintain.
In conclusion, Chief Manufacturing’s FSA-1004 and KSA-1004 are exemplary products that showcase the company’s commitment to quality, innovation, and user satisfaction in the realm of audiovisual solutions. Whether in a corporate boardroom or a classroom, these models provide functionality, security, and style, making them excellent choices for various organizations looking to enhance their audiovisual capabilities.