
FSA-1017 specifications
The Chief Manufacturing FSA-1017 is a well-engineered solution designed for optimal performance and reliability in various applications, particularly within the realm of audiovisual installations. This versatile fixture is especially noted for its dedicated support to those who require flexibility and efficiency in their workspace.One of the standout features of the FSA-1017 is its robustness and durability. Crafted from high-quality materials, it withstands the rigors of frequent use while maintaining its structural integrity. The design of the FSA-1017 incorporates advanced engineering principles, allowing it to support a range of display weights and sizes, making it an excellent choice for both commercial and residential installations.
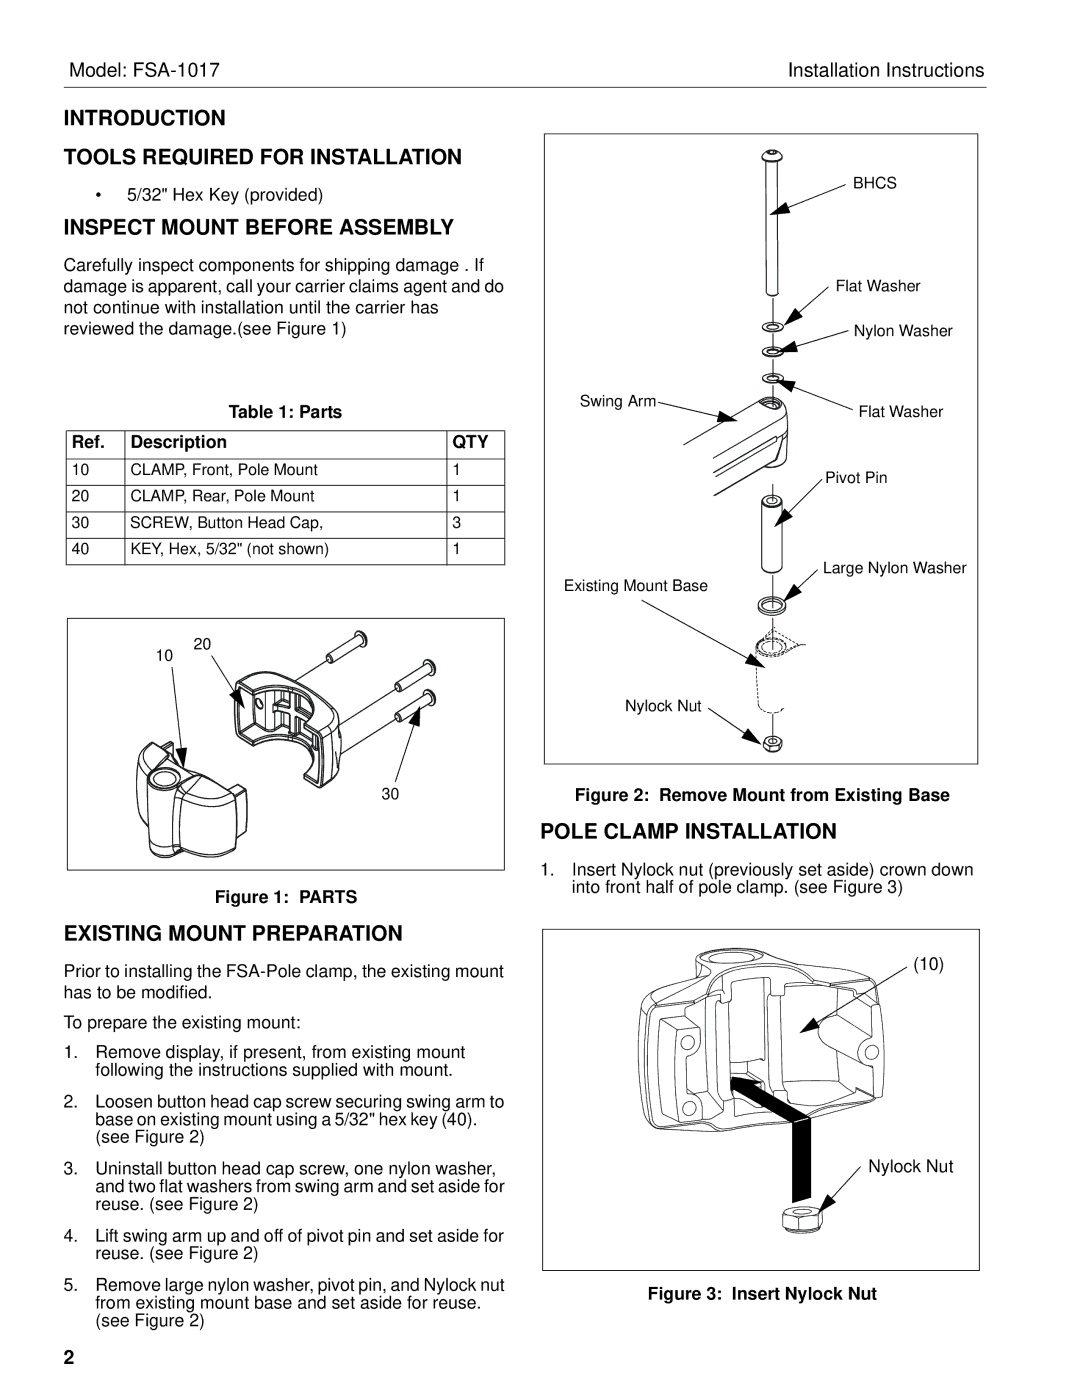
The FSA-1017 boasts a unique mounting system that provides seamless integration with a variety of audiovisual equipment. This system allows for quick adjustments and modifications, ensuring that users can easily reposition displays as needed. This adaptability is essential in environments where the layout may change frequently or where different presentation styles are used.
In addition to its mechanical features, the chief focus on user experience is evident in the FSA-1017’s design. The fixture incorporates cable management solutions, which help to keep installation areas tidy and organized. This not only enhances the aesthetic appeal but also prevents accidental disconnections or damages caused by tangled cables.
The integration of advanced technology is another hallmark of the Chief Manufacturing FSA-1017. It offers compatibility with various types of mounting solutions, including flat panel displays, projectors, and interactive screens. This broad compatibility makes it a flexible choice for users with diverse needs.
Moreover, the FSA-1017 is engineered for ease of installation. Clear instructions and a user-friendly assembly process allow for swift setup, reducing downtime during installation. This is particularly beneficial for contractors and AV professionals who must efficiently complete projects within tight timelines.
In summary, the Chief Manufacturing FSA-1017 is a testament to quality engineering, offering durability, adaptability, and innovative design features. Its focus on user experience and seamless compatibility with various audiovisual systems makes it an essential component for anyone looking to elevate their installation or presentation capabilities. Whether in a corporate boardroom, a classroom, or a home theater, the FSA-1017 is poised to deliver exceptional performance and long-lasting reliability.