Installation Instructions |
Steel Stud Installation Instructions (Option C)
Install the wall plate as follows:
WARNING: It is the responsibility of the installer to verify that the structure to which the mount is anchored will safely support five times the combined load of all attached components and equipment.
1.Determine a suitable mounting location and lift the wall plate (10) into place (refer to “WALL MOUNT PLATE PARTS” on page 3).
2.Drill a 1/2” hole at the desired location, making sure wall is at least 1/2” thick. If the wall is made with metal studs, it is recommended to install the anchor through the dry- wall and the metal stud (see Figure 4).
3.With plastic anchor (100) inserted in hole, slide finger grip together to turn end inside hole perpendicular to wall (see Figure 5).
4.Slide plastic ring of anchor to the surface of the wall (see Figure 6).
5.Split finger grip ends apart to break of plastic ends flush with plastic ring of anchor (see Figure 7).
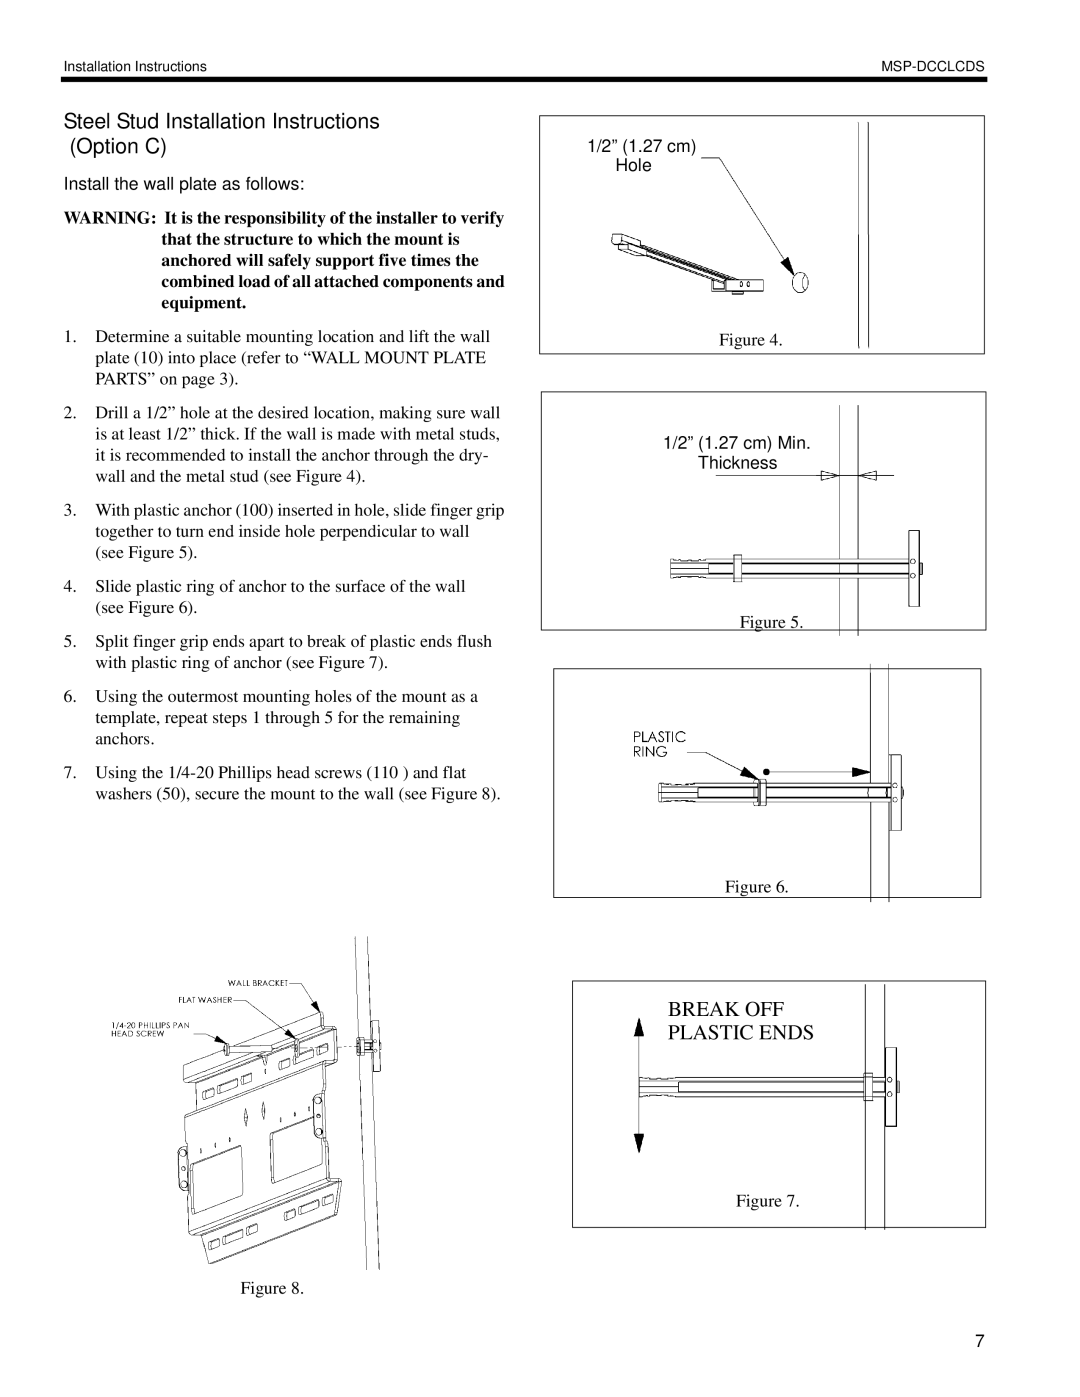
6.Using the outermost mounting holes of the mount as a template, repeat steps 1 through 5 for the remaining anchors.
7.Using the
1/2” (1.27 cm) Hole
Figure 4.
1/2” (1.27 cm) Min. Thickness
Figure 5.
Figure 6.
BREAK OFF
PLASTIC ENDS
Figure 7.
Figure 8.
7