RSM Elite Series Projector Mounts | Installation Instructions | |
2a | Example Only |
|
(Interface bracket | WARNING: IMPROPER INSTALLATION CAN | |
| varies dependent | |
| on projector model) | LEAD TO PROJECTOR FALLING RESULTING IN |
|
| SERIOUS PERSONAL INJURY OR DAMAGE TO |
|
| EQUIPMENT. DO NOT substitute hardware. Use only |
| 1 | the hardware provided by the manufacturer. |
|
| |
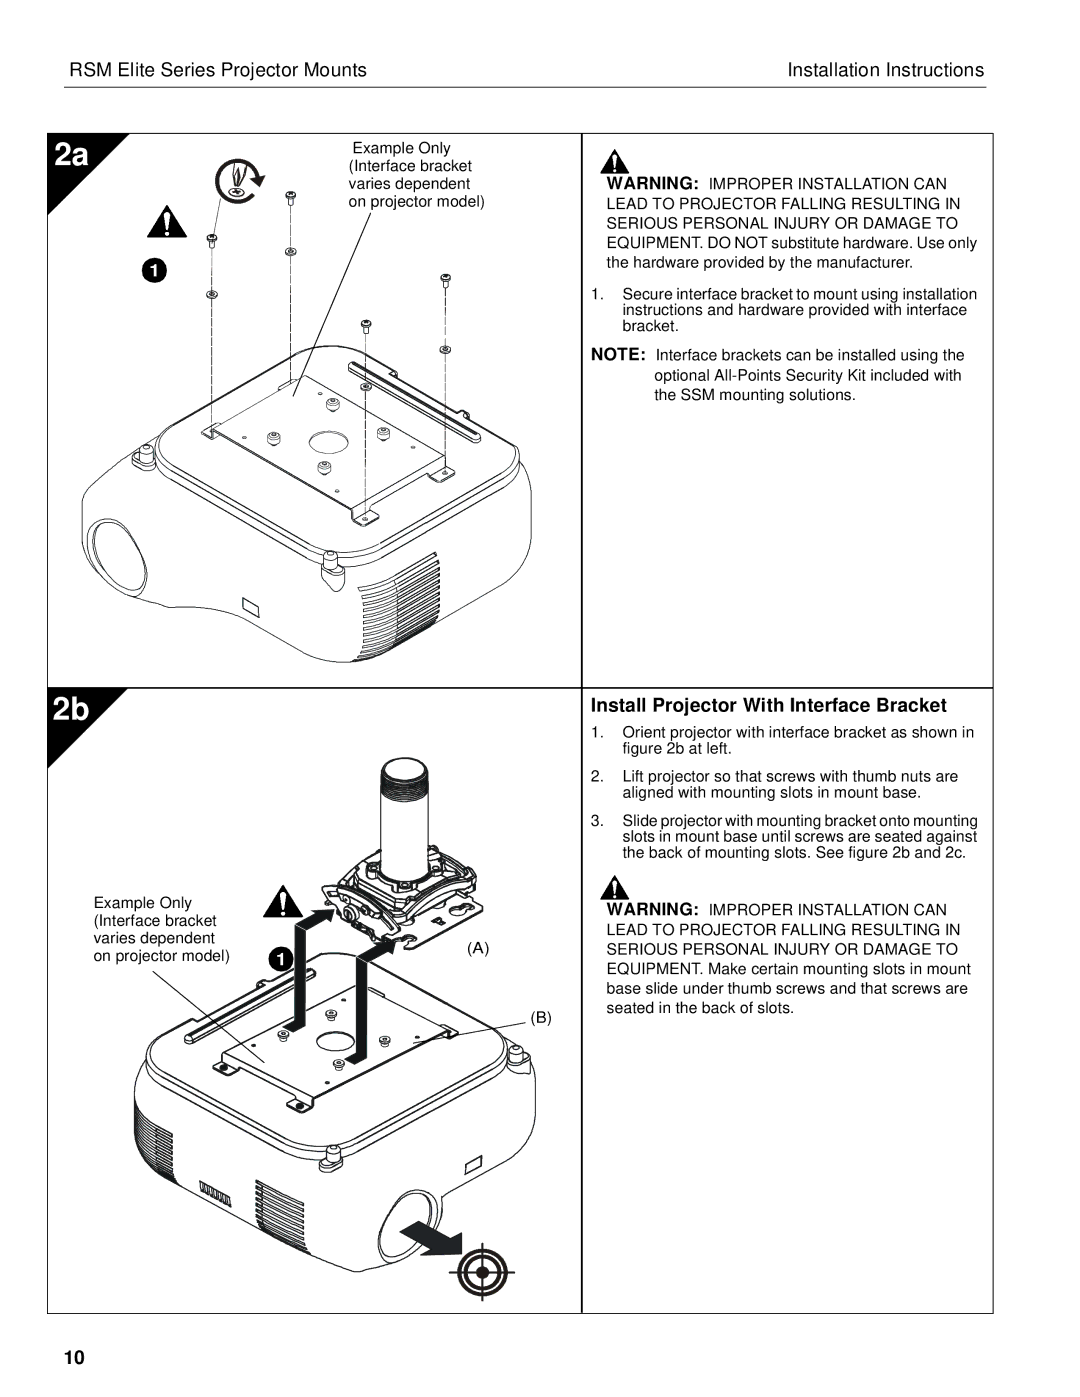
| 1. | Secure interface bracket to mount using installation |
|
| instructions and hardware provided with interface |
|
| bracket. |
| NOTE: Interface brackets can be installed using the | |
|
| optional |
|
| the SSM mounting solutions. |
2b |
|
|
| Install Projector With Interface Bracket |
|
|
|
| 1. Orient projector with interface bracket as shown in |
|
|
|
| figure 2b at left. |
|
|
|
| 2. Lift projector so that screws with thumb nuts are |
|
|
|
| aligned with mounting slots in mount base. |
|
|
|
| 3. Slide projector with mounting bracket onto mounting |
|
|
|
| slots in mount base until screws are seated against |
|
|
|
| the back of mounting slots. See figure 2b and 2c. |
Example Only |
|
|
| WARNING: IMPROPER INSTALLATION CAN |
(Interface bracket |
|
|
| |
|
|
| LEAD TO PROJECTOR FALLING RESULTING IN | |
varies dependent |
| (A) |
| |
|
| SERIOUS PERSONAL INJURY OR DAMAGE TO | ||
on projector model) | 1 |
| ||
|
| EQUIPMENT. Make certain mounting slots in mount | ||
|
|
|
| |
|
|
|
| base slide under thumb screws and that screws are |
|
|
| (B) | seated in the back of slots. |
|
|
|
|
10
