RSM Elite Series Projector Mounts | Installation Instructions |
1b
1
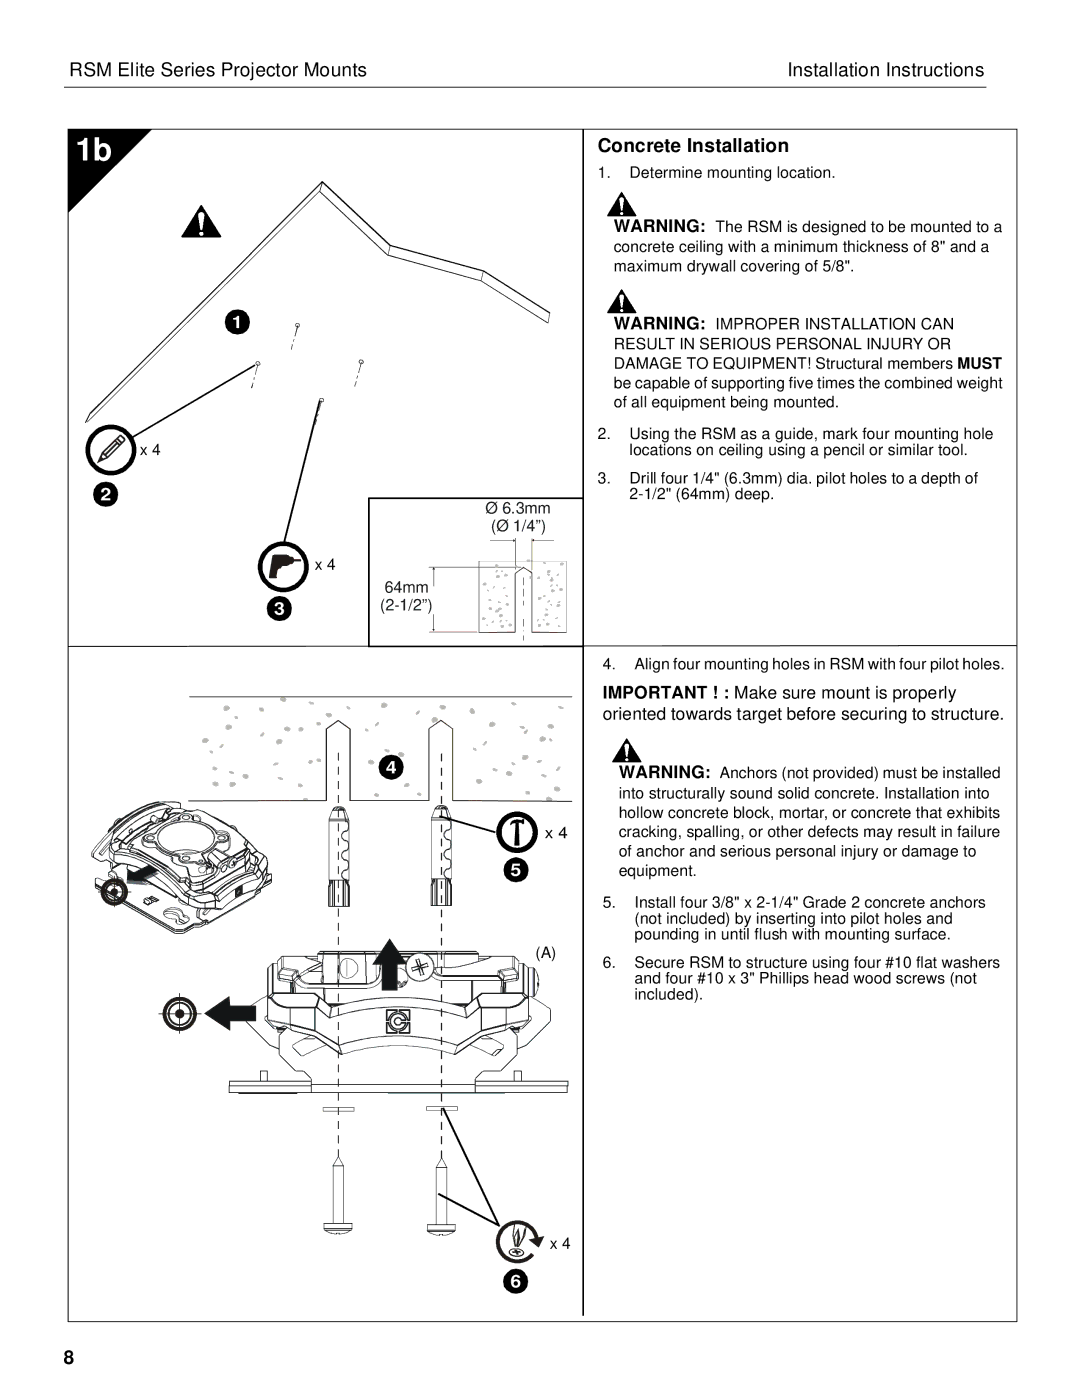
Concrete Installation
1.Determine mounting location.
WARNING: The RSM is designed to be mounted to a concrete ceiling with a minimum thickness of 8" and a maximum drywall covering of 5/8".
WARNING: IMPROPER INSTALLATION CAN RESULT IN SERIOUS PERSONAL INJURY OR DAMAGE TO EQUIPMENT! Structural members MUST be capable of supporting five times the combined weight of all equipment being mounted.
x 4
2
x 4
3
Ø 6.3mm (Ø 1/4”)
64mm 
(2-1/2”)
2.Using the RSM as a guide, mark four mounting hole locations on ceiling using a pencil or similar tool.
3.Drill four 1/4" (6.3mm) dia. pilot holes to a depth of
4.Align four mounting holes in RSM with four pilot holes.
IMPORTANT ! : Make sure mount is properly oriented towards target before securing to structure.
4
x 4
5
(A)
WARNING: Anchors (not provided) must be installed into structurally sound solid concrete. Installation into hollow concrete block, mortar, or concrete that exhibits cracking, spalling, or other defects may result in failure of anchor and serious personal injury or damage to equipment.
5.Install four 3/8" x
6.Secure RSM to structure using four #10 flat washers and four #10 x 3" Phillips head wood screws (not included).
x 4
6
8