Replacing the Cover
Replacing the Cover
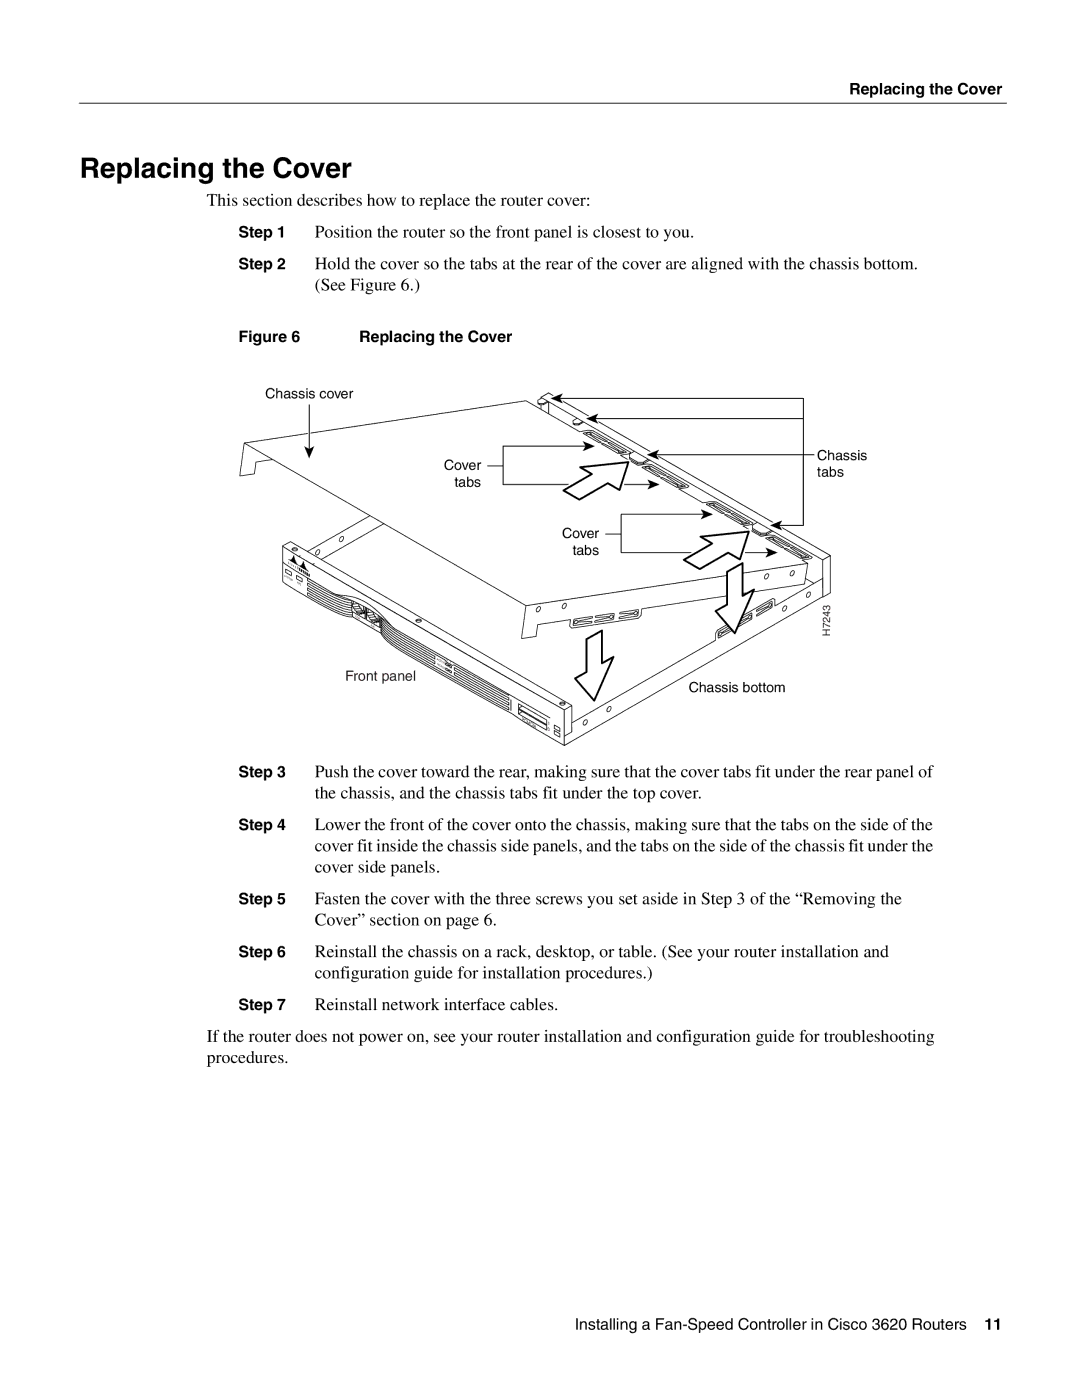
This section describes how to replace the router cover:
Step 1 Position the router so the front panel is closest to you.
Step 2 Hold the cover so the tabs at the rear of the cover are aligned with the chassis bottom. (See Figure 6.)
Figure 6 Replacing the Cover
Chassis cover
SYSTEM
RPS
CON
AUX
Front panel
Cover | Chassis | |
tabs | ||
tabs | ||
| ||
| Cover | |
| tabs |
H7243
ACT | 0 | 1 |
IVE |
| |
REA |
|
|
DY |
|
|
Chassis bottom
PCMCIA | 1 |
| 0 |
Step 3 Push the cover toward the rear, making sure that the cover tabs fit under the rear panel of the chassis, and the chassis tabs fit under the top cover.
Step 4 Lower the front of the cover onto the chassis, making sure that the tabs on the side of the cover fit inside the chassis side panels, and the tabs on the side of the chassis fit under the cover side panels.
Step 5 Fasten the cover with the three screws you set aside in Step 3 of the “Removing the Cover” section on page 6.
Step 6 Reinstall the chassis on a rack, desktop, or table. (See your router installation and configuration guide for installation procedures.)
Step 7 Reinstall network interface cables.
If the router does not power on, see your router installation and configuration guide for troubleshooting procedures.
Installing a