Contents
Product Number MEM-S2-512MB=, MEM-MSFC2-512MB=, MEM-S3-1GB=
Contents
MEM-MSFC3-1GB=
Safety Overview
Warnung WICHTIGE SICHERHEITSHINWEISE
Varning! VIKTIGA SÄKERHETSANVISNINGAR
Este símbolo de aviso significa perigo. Você se encontra em uma situação em que há risco de lesões corporais. Antes de trabalhar com qualquer equipamento, esteja ciente dos riscos que envolvem os circuitos elétricos e familiarize-se com as práticas padrão de prevenção de acidentes. Use o número da declaração fornecido ao final de cada aviso para localizar sua tradução nos avisos de segurança traduzidos que acompanham o dispositivo
78-15538-02
Safety Overview
78-15538-02
Required Tools
Installing the SP and RP Memory Upgrade Kit
Removing the Supervisor Engine
Vertical slots
Horizontal slots
Opening the Ejector Levers Horizontal Chassis Shown
Ejector lever Captive installation screw
91525
Removing the Module from the Chassis Horizontal Chassis Shown
Removing and Installing the DRAM DIMMs
DRAM DIMM
DRAM DIMM Location on the Supervisor Engine
Handling a DIMM
28580
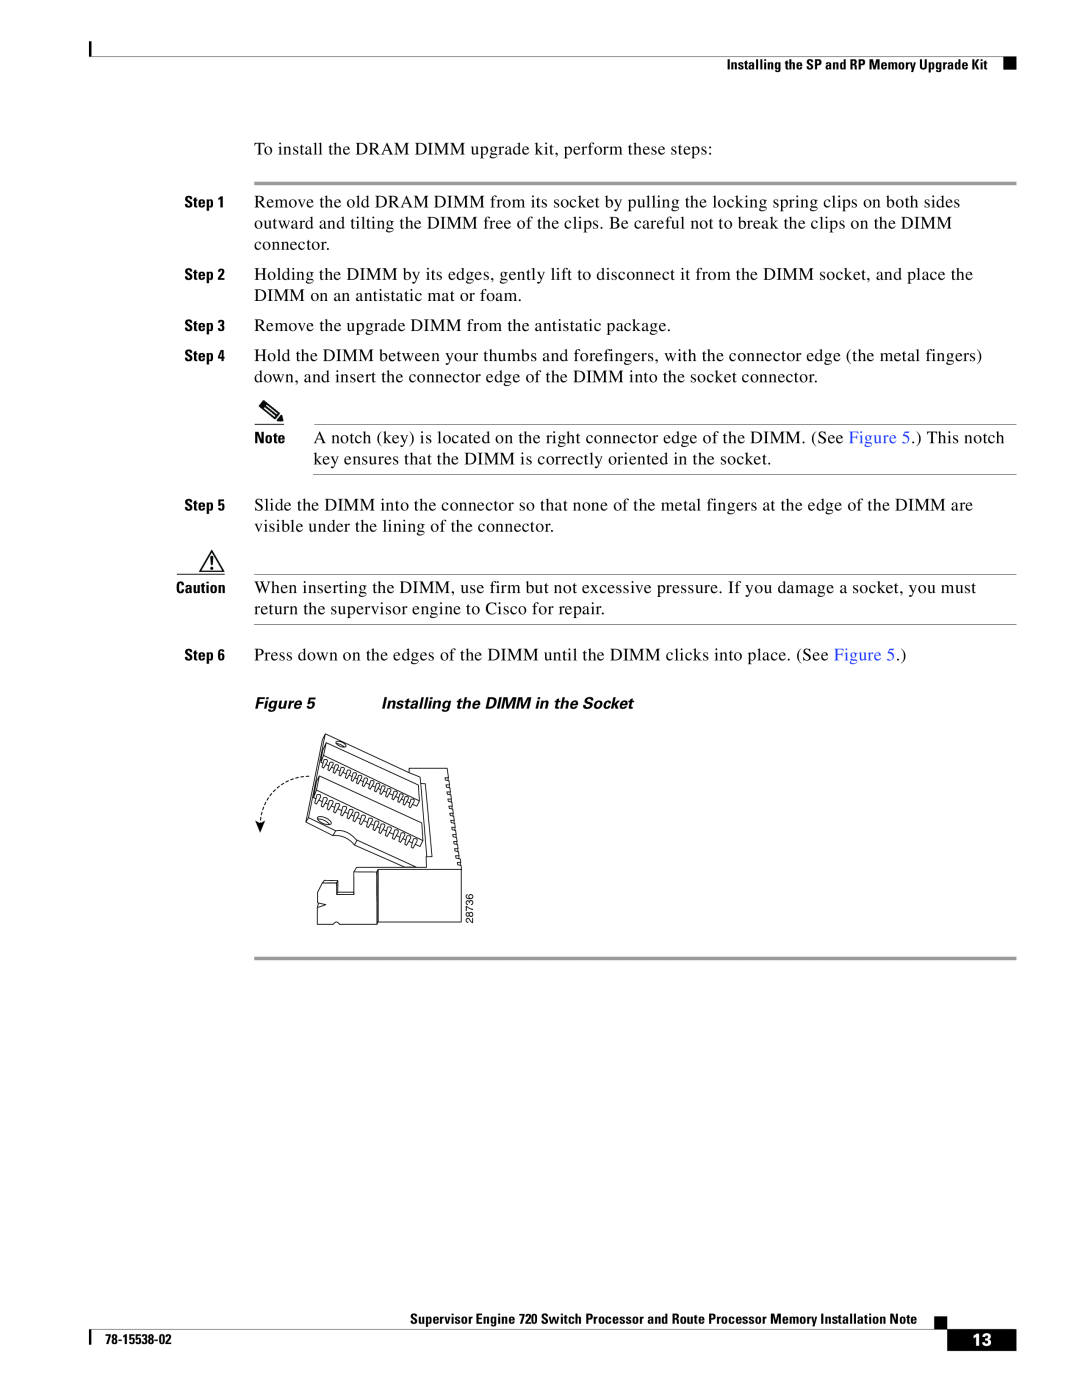
To install the DRAM DIMM upgrade kit, perform these steps
Installing the Supervisor Engine
Figure 6 Positioning the Module in a Horizontal Slot Chassis
WS-SUP72 SUPERVISOR 720 WITH INTEGRATED SWITCH FABRIC
Insert module
between slot guides
f. Verify that the STATUS LED is lit
1mm Gap between the module EMI gasket and the module above it
Press down
Clearing the EMI Gasket in a Horizontal Slot Chassis
91528
Insert module between slot guides
Positioning the Module in a Vertical Slot Chassis
Press left Press left
Gap between the module EMI gasket and the module above it 1mm
Statement 1029-Blank Faceplates and Cover Panels
Translated Safety Warnings
Warnung Blanke Faceplates und Abdeckungen haben drei wichtigen Funktionen 1 Sie schützen vor gefährlichen Spannungen und Strom innerhalb des Chassis 2 sie halten elektromagnetische Interferenzen EMI zurück, die andere Geräte stören könnten 3 sie lenken den kühlenden Luftstrom durch das Chassis. Das System darf nur betrieben werden, wenn alle Karten, Faceplates, Voder- und Rückabdeckungen an Ort und Stelle sind
Advarsel Blanke frontplader og sidepaneler tjener tre vigtige formål de forhinder udsættelse for farlig spænding og strøm inde i chassiset, de isolerer elektromagnetisk interferens EMI, der kan forstyre andet udstyr, og de leder en strøm af kølig luft gennem chassiset. Betjen ikke systemet medmindre alle kort, frontplader, sidepaneler og bagpaneler er på plads
Statement 1030-Equipment Installation
Advarsel Bare opplært og kvalifisert personell skal foreta installasjoner, utskiftninger eller service på dette utstyret
Statement 1034-Backplane Voltage
Aviso O sistema em funcionamento emite tensão ou energia elétrica perigosa no painel traseiro. Seja cauteloso ao fazer a manutenção
Cisco.com
Obtaining Documentation
Product Documentation DVD
Ordering Documentation
Documentation Feedback
Reporting Security Problems in Cisco Products
Cisco Product Security Overview
Cisco Technical Support & Documentation Website
Obtaining Technical Assistance
Definitions of Service Request Severity
Submitting a Service Request
Obtaining Additional Publications and Information
2003-2005 Cisco Systems, Inc. All rights reserved