SR224, SR216 specifications
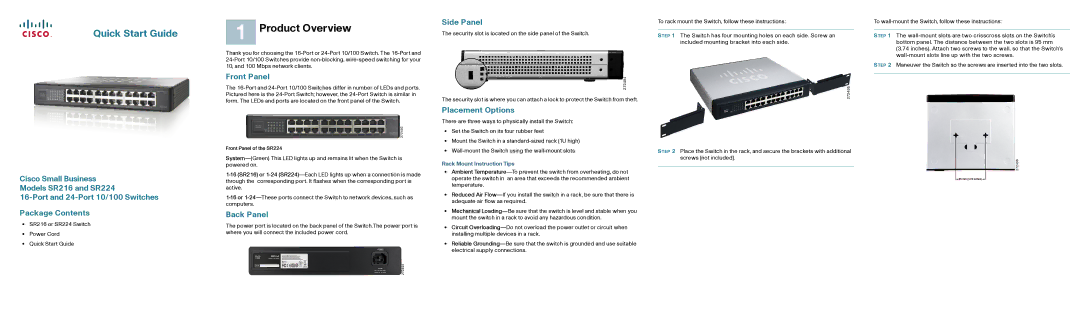
Cisco Systems has long been a leading player in the networking industry, known for its wide range of products that cater to various networking needs. Among these, the Cisco SR216 and SR224 switches are noteworthy for their performance and features suitable for small to medium-sized businesses.The Cisco SR216 is a 16-port switch that offers a combination of reliability and efficiency. With its layer 2 switching capabilities, this model provides a cost-effective solution for connecting devices within a network. One of its standout features is the non-blocking architecture, ensuring that it can handle maximum capacity without performance degradation. It supports auto-sensing ports, allowing devices to connect seamlessly at either 10/100 Mbps.
On the other hand, the Cisco SR224 is an evolution of the SR216, boasting 24 ports. This switch maintains similar layer 2 functionality with an enhanced port count, making it ideal for growing networks. Like the SR216, the SR224 exhibits non-blocking performance, ensuring that all connected devices can communicate efficiently without traffic bottlenecks.
Both switches are equipped with features such as port mirroring, which allows administrators to monitor network traffic, and VLAN support, enabling network segmentation for better security and management. Additionally, they feature a sturdy design suited for rack-mounted installations, which maintain organization and improve cooling in data center environments.
Power consumption is also a critical consideration for modern networking devices, and both the SR216 and SR224 are designed with energy efficiency in mind. They comply with IEEE standards for efficient power usage, which is essential in reducing operational costs while supporting uptime and performance.
Moreover, the installation of these switches is straightforward, with a simple plug-and-play design that minimizes setup time and complexity. Users appreciate the intuitive management capabilities available through Cisco's various software solutions, allowing for easy network monitoring and configuration updates.
In essence, the Cisco SR216 and SR224 switches combine essential networking features, robust performance, and scalability, making them suitable solutions for small to medium-sized business environments looking to enhance their networking capabilities without incurring excessive costs. As organizations continue to expand, these switches provide the flexibility and reliability necessary to support everyday operations.