15.Hold with indicator – to put a call on hold, LCD will display “Hold”
16.Mute with indicator – to mute transmitter, LCD will display “Mic Muted”
17.Visual ringer and speakerphone indicators
18.Telephone keypad
19.- to review upward from the oldest CALLER ID record.
20.- to review downward from the newest CALLER ID record.
21.Delete button – to delete one or all CALLER ID records, or Message light.
22.Dial button – to dial number displayed or to accept entry
23.Index card
24.Handset tab
25.Hook switch
Installation
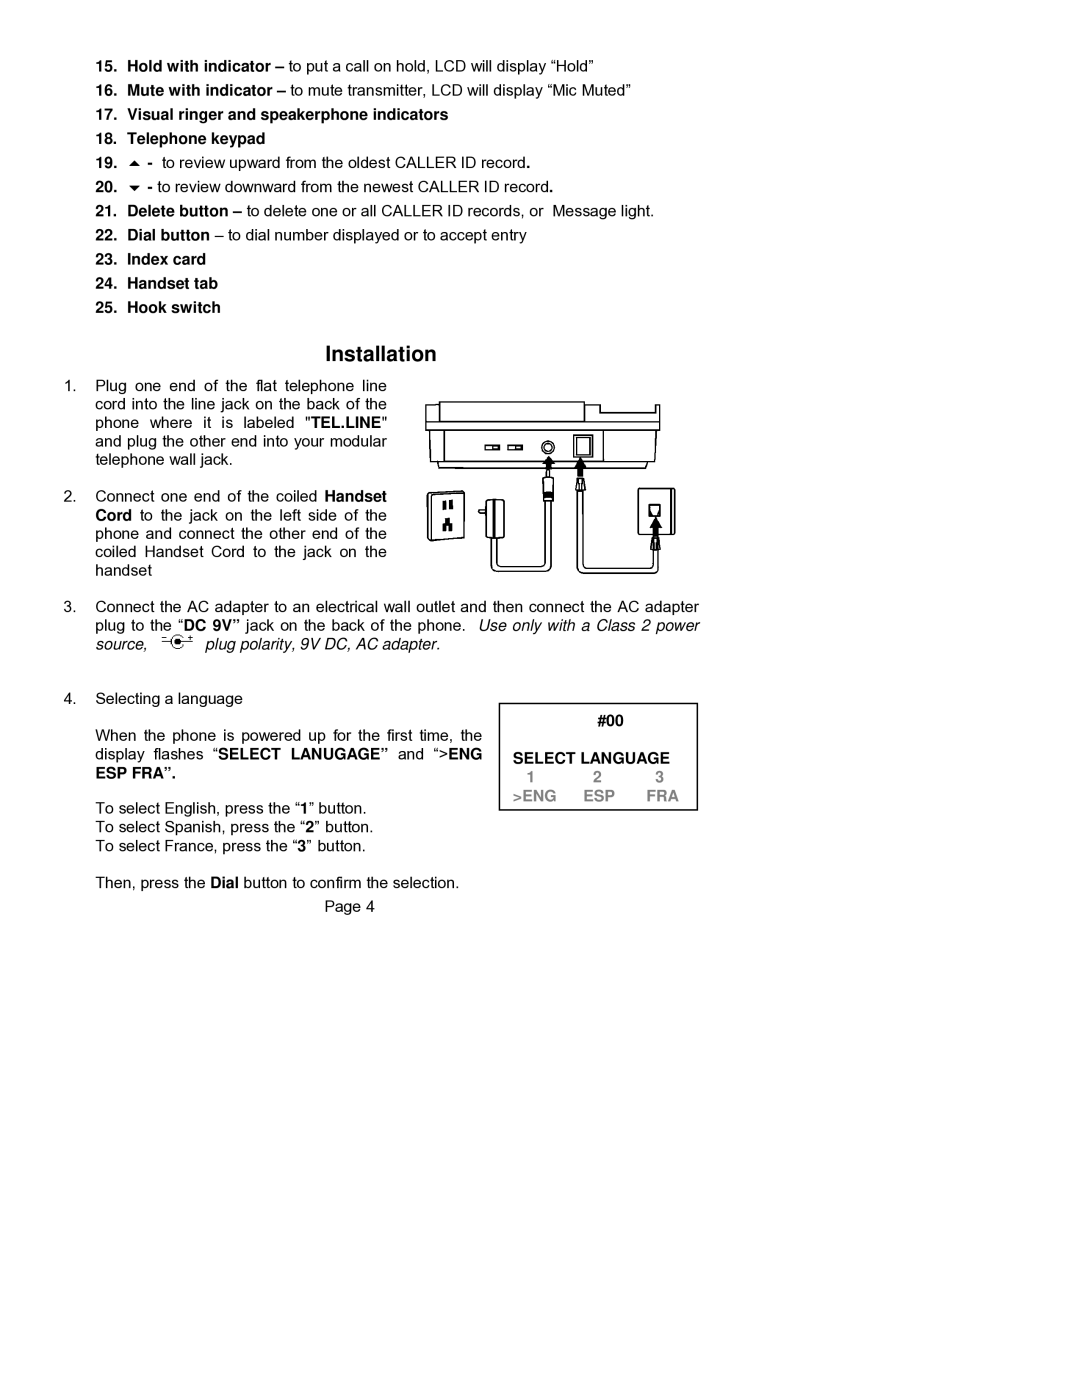
1.Plug one end of the flat telephone line cord into the line jack on the back of the phone where it is labeled "TEL.LINE" and plug the other end into your modular telephone wall jack.
2.Connect one end of the coiled Handset Cord to the jack on the left side of the phone and connect the other end of the coiled Handset Cord to the jack on the handset
3.Connect the AC adapter to an electrical wall outlet and then connect the AC adapter plug to the “DC 9V” jack on the back of the phone. Use only with a Class 2 power
source,  plug polarity, 9V DC, AC adapter.
4.Selecting a language
When the phone is powered up for the first time, the display flashes “SELECT LANUGAGE” and “>ENG
ESP FRA”.
To select English, press the “1” button. To select Spanish, press the “2” button. To select France, press the “3” button.
Then, press the Dial button to confirm the selection.
Page 4
#00
SELECT LANGUAGE
1 2 3 >ENG ESP FRA
