Installing the RocketRAID 2220 driver during a fresh Windows 2000/XP/2003 installation
1.After booting from the Windows 2000/XP/2003
2.The setup procedure will continue, and will later instruct you to press the "S" key to specify additional adapters. Press the "S" key as instructed.
3.Next, the setup program will prompt for the insertion of the driver diskette. Please insert the driver diskette, and then press ENTER to continue.
4.The next window will display several driver options. Please select the RocketRAID 2220 Controller for the corresponding operating system, and press ENTER to continue.
1 - Installing the RAID Management Console/ Interface Overview
To install the RAID software, locate the setup.exe file located on the floppy diskette labeled "DISK 1" (or the Disk1 folder, if the software was downloaded).
Double click this file to start the Installation Wizard.
There is no need to restart the system after installing the software.
To start the software, double
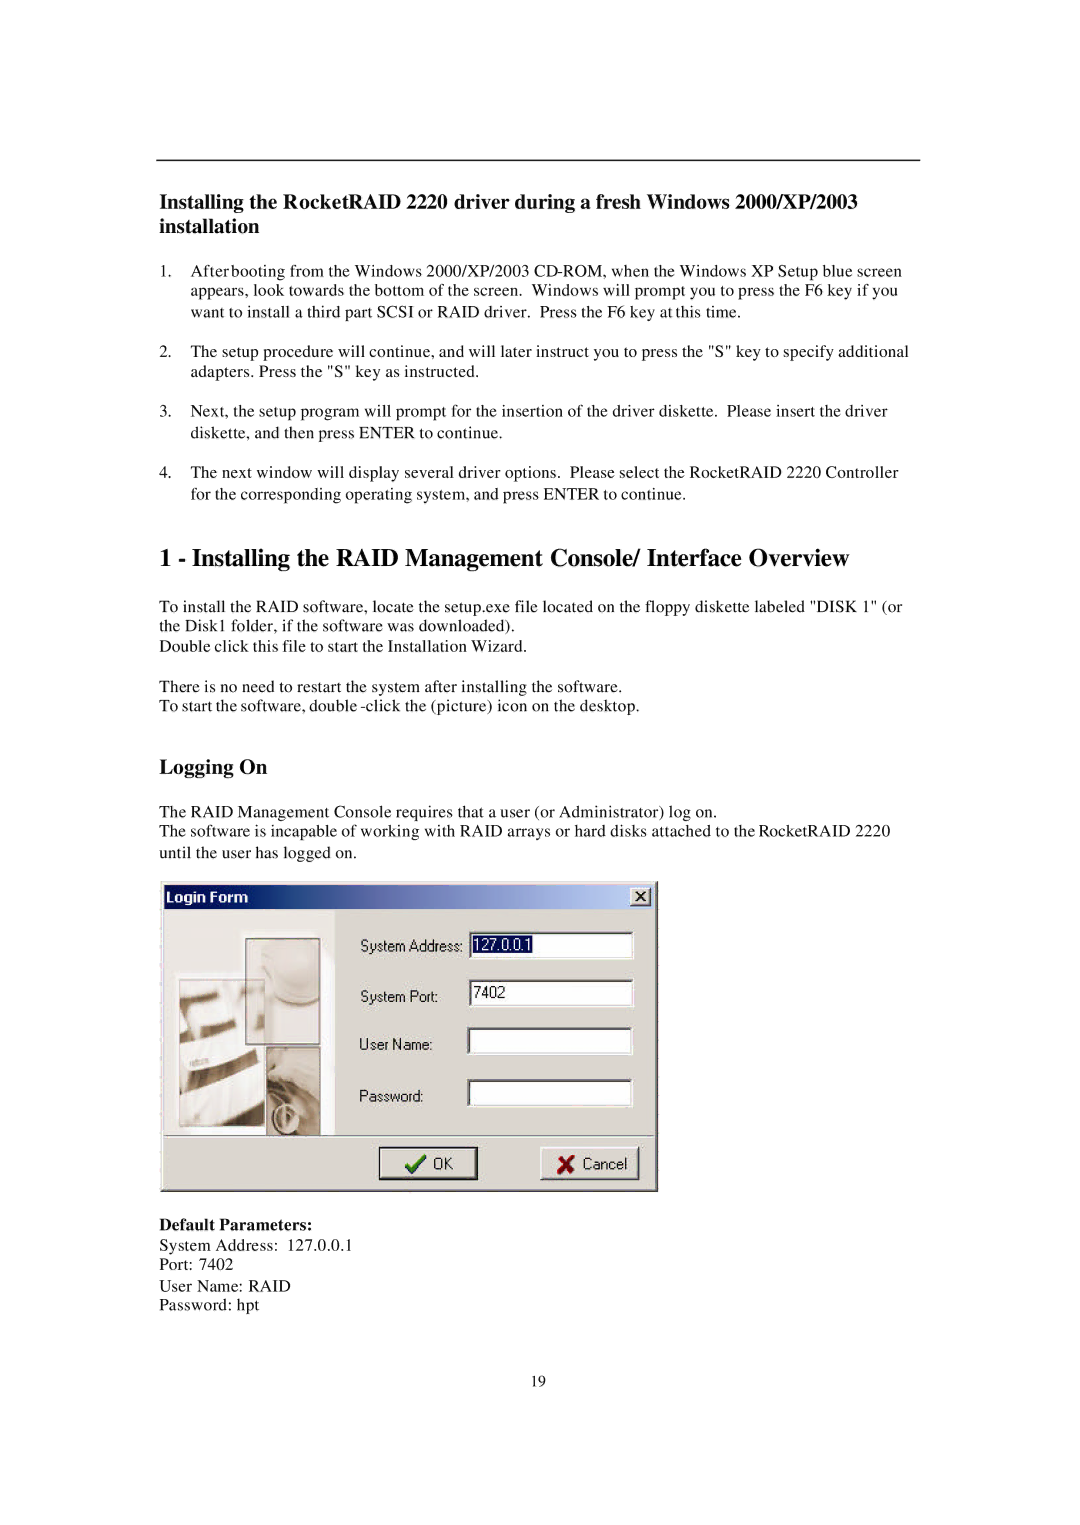
Logging On
The RAID Management Console requires that a user (or Administrator) log on.
The software is incapable of working with RAID arrays or hard disks attached to the RocketRAID 2220 until the user has logged on.
Default Parameters:
System Address: 127.0.0.1
Port: 7402
User Name: RAID
Password: hpt
19