Power Requirements
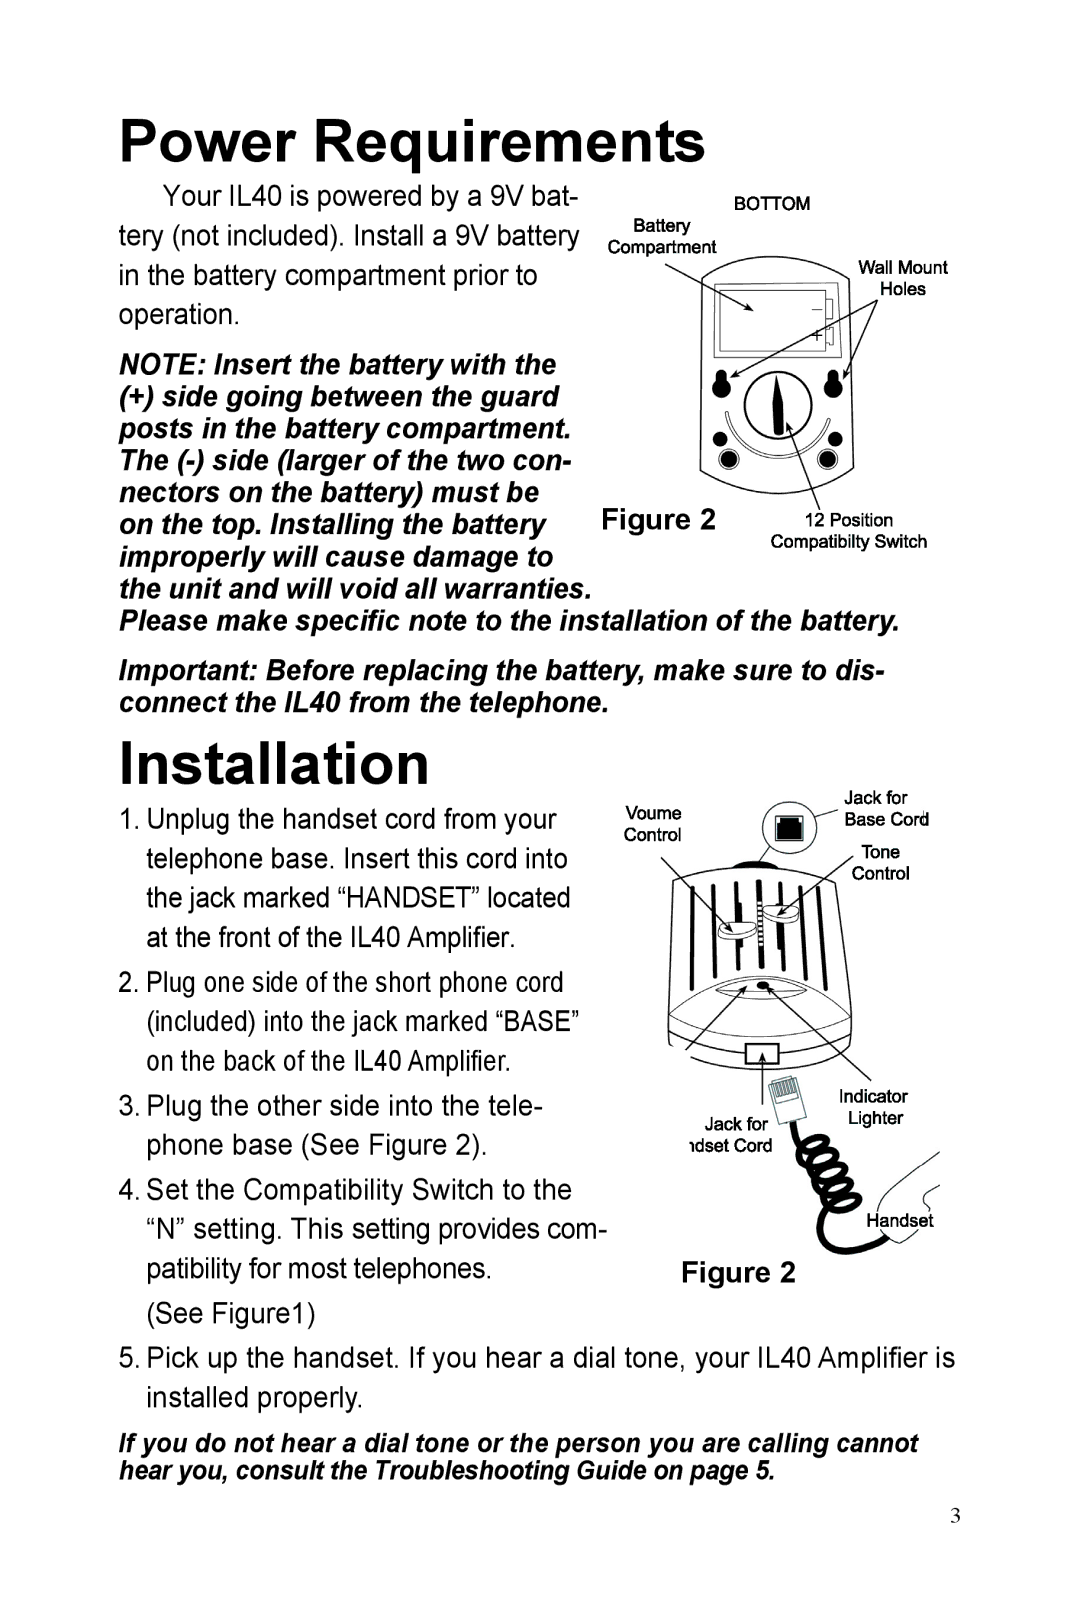
Your IL40 is powered by a 9V bat- tery (not included). Install a 9V battery in the battery compartment prior to operation.
NOTE: Insert the battery with the
(+)side going between the guard posts in the battery compartment. The
nectors on the battery) must be on the top. Installing the battery improperly will cause damage to the unit and will void all warranties.
Please make specific note to the installation of the battery.
Important: Before replacing the battery, make sure to dis- connect the IL40 from the telephone.
Installation
1. Unplug the handset cord from your |
|
telephone base. Insert this cord into |
|
the jack marked “HANDSET” located |
|
at the front of the IL40 Amplifier. |
|
2. Plug one side of the short phone cord |
|
(included) into the jack marked “BASE” |
|
on the back of the IL40 Amplifier. |
|
3. Plug the other side into the tele- |
|
phone base (See Figure 2). |
|
4. Set the Compatibility Switch to the |
|
“N” setting. This setting provides com- |
|
patibility for most telephones. | Figure 2 |
(See Figure1) |
|
5.Pick up the handset. If you hear a dial tone, your IL40 Amplifier is installed properly.
If you do not hear a dial tone or the person you are calling cannot hear you, consult the Troubleshooting Guide on page 5.
3