6620 specifications
The Closet Maid 6620 is a versatile and highly functional storage solution designed to help you maximize space and keep your belongings organized. This closet organizer is particularly popular due to its thoughtful design and practicality, making it a perfect addition to any bedroom, hallway, or laundry room.One of the standout features of the Closet Maid 6620 is its customizable modular design. It comes in various configurations that allow you to tailor the system to your specific needs. Whether you require more hanging space for clothes, shelves for shoes, or drawers for accessories, the 6620 can be adjusted to accommodate your storage requirements. This flexibility means that you can easily expand or rearrange the system as your needs change over time.
The Closet Maid 6620 is constructed from high-quality, durable materials that ensure longevity and stability. The shelves are typically made from sturdy engineered wood, which can support a significant amount of weight, making them ideal for storing heavy items such as shoes, bags, and folded clothing. Additionally, the finish is often designed to resist scratches and provide easy maintenance, which helps keep your closet looking neat and tidy.
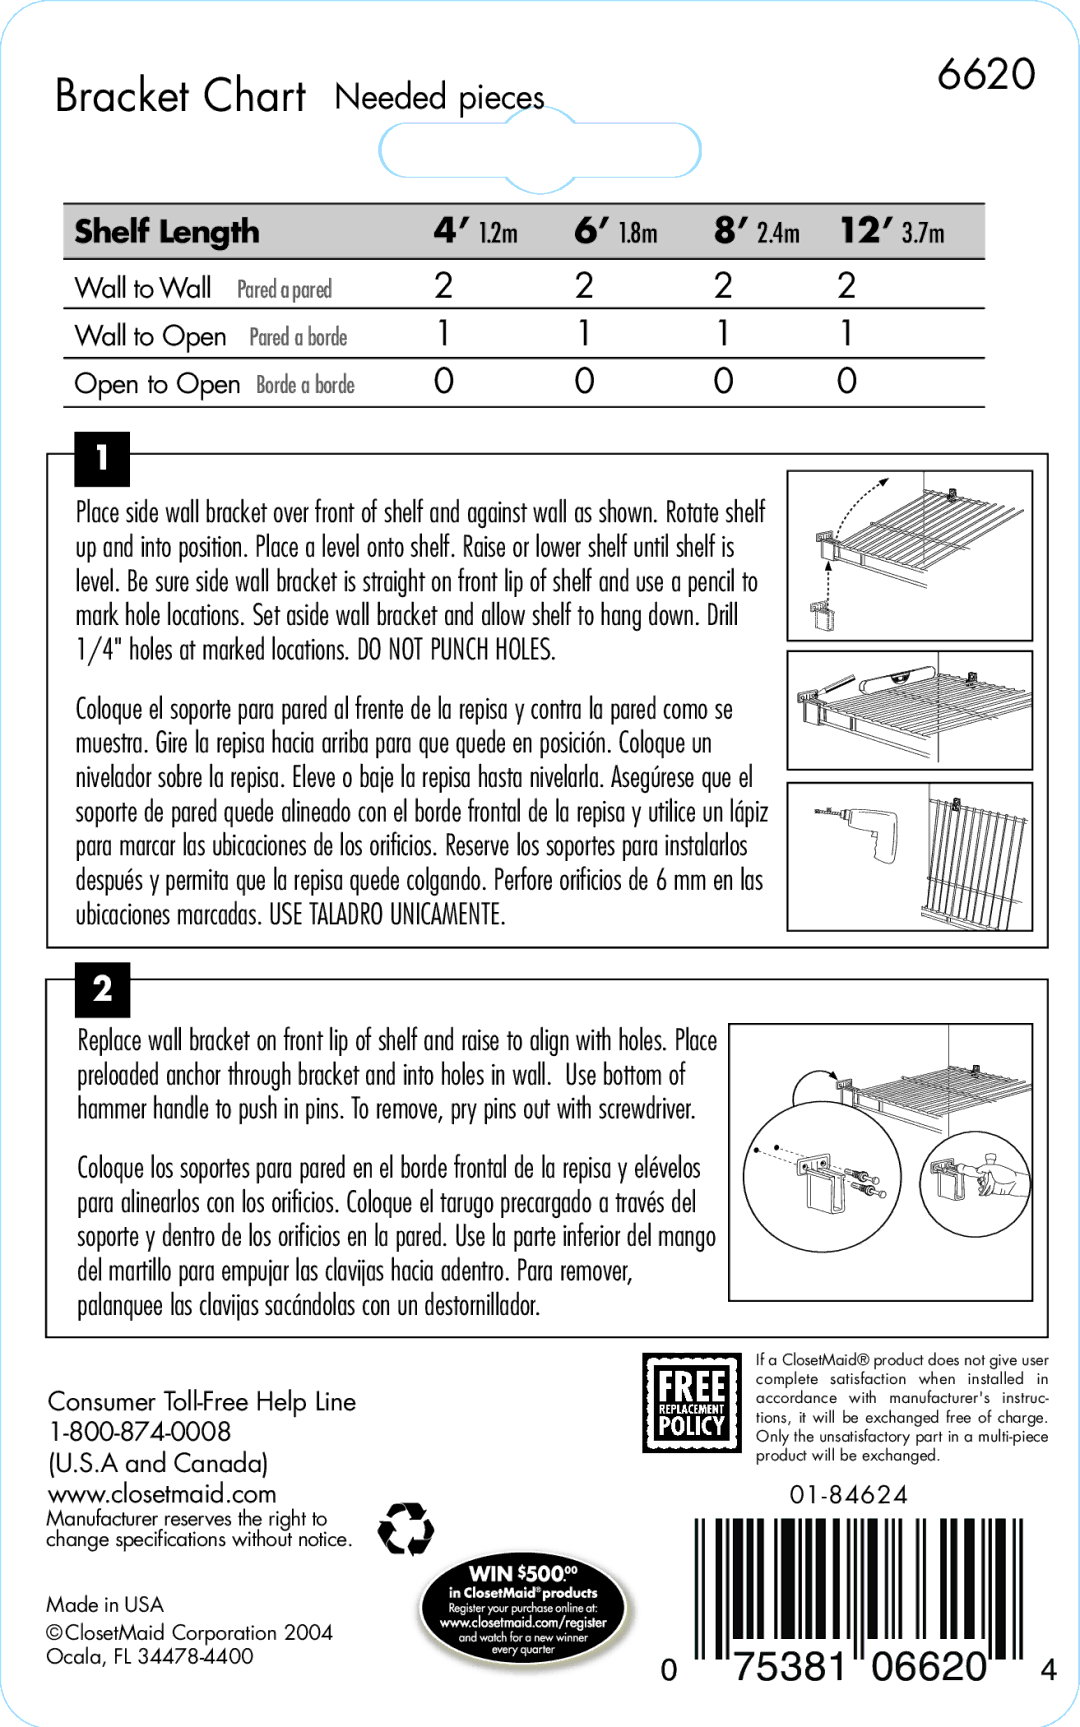
Another noteworthy feature of the Closet Maid 6620 is its installation process. The system usually comes with detailed instructions and all necessary hardware, enabling a straightforward setup that can be completed in a few hours. Its wall-mounted design maximizes floor space, making it perfect for smaller areas, while the open shelves allow for easy access to all your belongings.
In terms of aesthetics, the Closet Maid 6620 is available in various finishes such as white, espresso, or oak. This variety allows homeowners to choose a look that complements their existing decor. The clean lines and minimalist style ensure that the organizer isn't just functional, but also visually appealing.
Overall, the Closet Maid 6620 offers a blend of practical features, robust construction, and aesthetic appeal. Its modular system, durable materials, and easy installation make it a top choice for anyone looking to enhance their home storage solutions. With the Closet Maid 6620, users can create a well-organized, functional space that meets their specific storage needs.