S16TS, S25TS specifications
Closet Maid S16TS and S25TS are innovative storage solutions designed to optimize space and enhance organization in various environments, from homes to offices. These modular storage systems are designed to be versatile and functional, catering to diverse organizational needs.One of the primary features of Closet Maid S16TS is its sleek design, which allows it to fit seamlessly into any room decor. Its compact size makes it ideal for small spaces, as it can be easily incorporated into closets, bedrooms, or utility areas. The S25TS model, on the other hand, offers expanded capacity, making it a suitable choice for larger areas requiring more storage. Both models are constructed from durable materials, ensuring longevity and the ability to withstand daily use.
A standout technology feature of the S16TS and S25TS is their customizable shelving systems. Users can adjust the height of the shelves to create personalized arrangements that accommodate various items, such as clothing, shoes, accessories, and other household goods. This flexibility allows for optimal use of vertical space, which is crucial in maximizing storage efficiency.
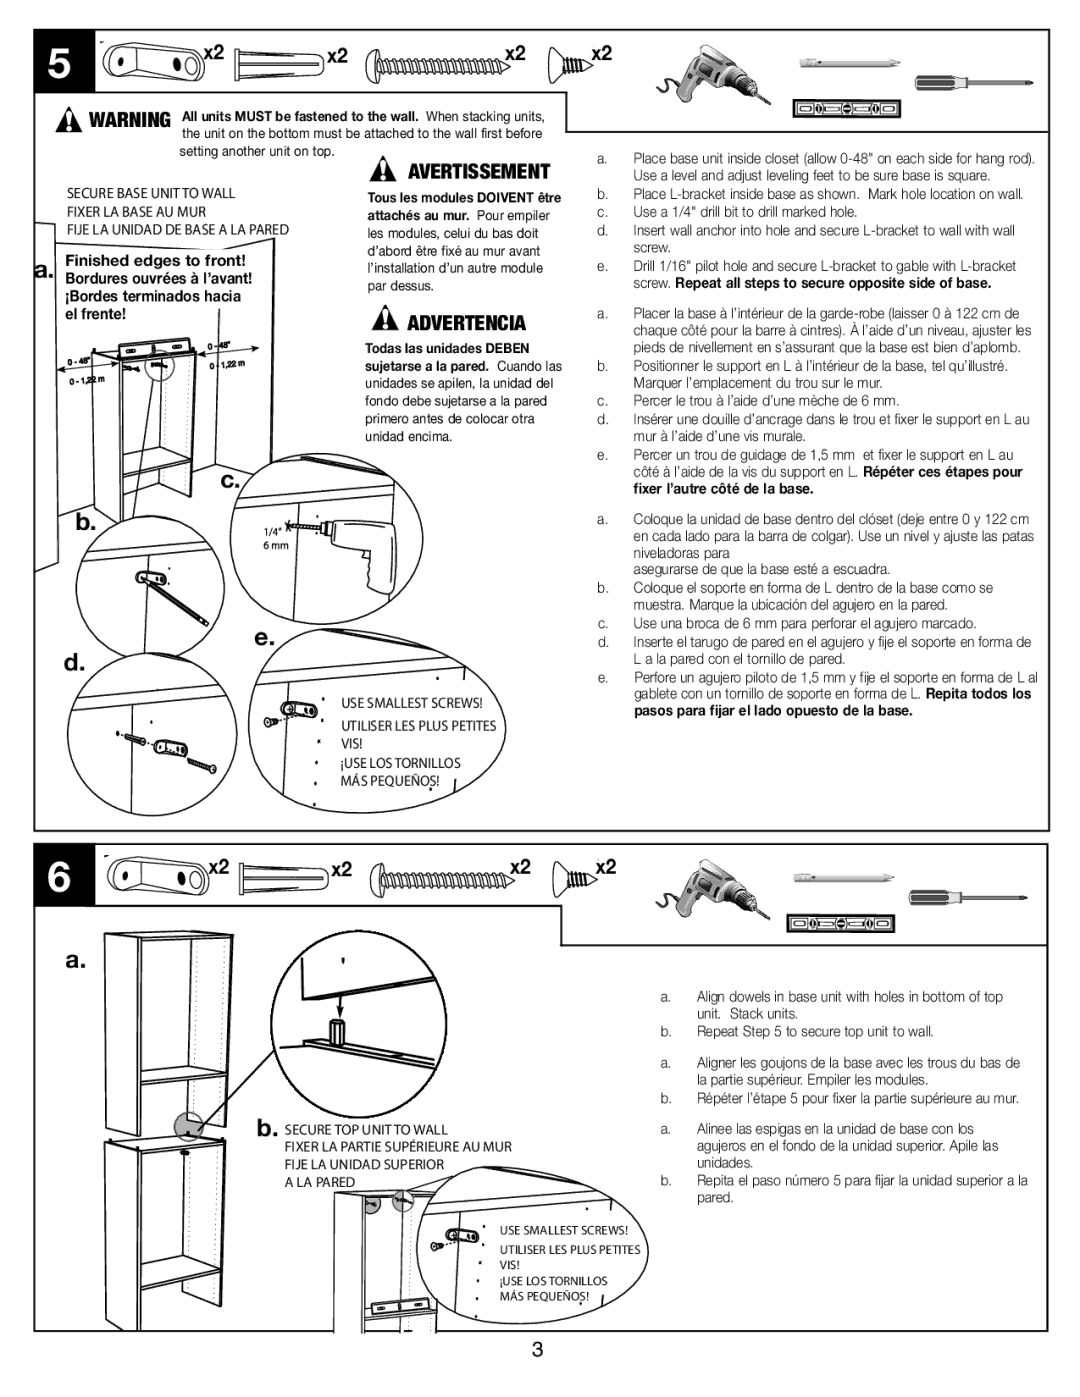
The easy installation process is another key characteristic. Both models come with user-friendly instructions and all necessary hardware, making it possible for individuals to set them up without professional assistance. This feature empowers users to take charge of their organization projects and make adjustments as needed.
Furthermore, the S16TS and S25TS incorporate a thoughtful design that promotes airflow, helping to keep stored items fresh. The open shelving design minimizes dust accumulation, making maintenance a breeze.
In terms of aesthetics, both models are available in multiple finishes, allowing users to match their storage solutions to their personal style. Whether someone prefers a classic white finish or a modern wood grain, there’s an option that can enhance the look of any space.
Overall, Closet Maid S16TS and S25TS offer an effective blend of functionality, durability, and style. Their ergonomic design, adjustable shelving, ease of installation, and variety of finishes make them an excellent choice for anyone looking to improve organization in their living or working environment. By choosing the right model according to space requirements, users can achieve a clutter-free and efficient storage solution that adapts to their unique lifestyle needs.

