Operation
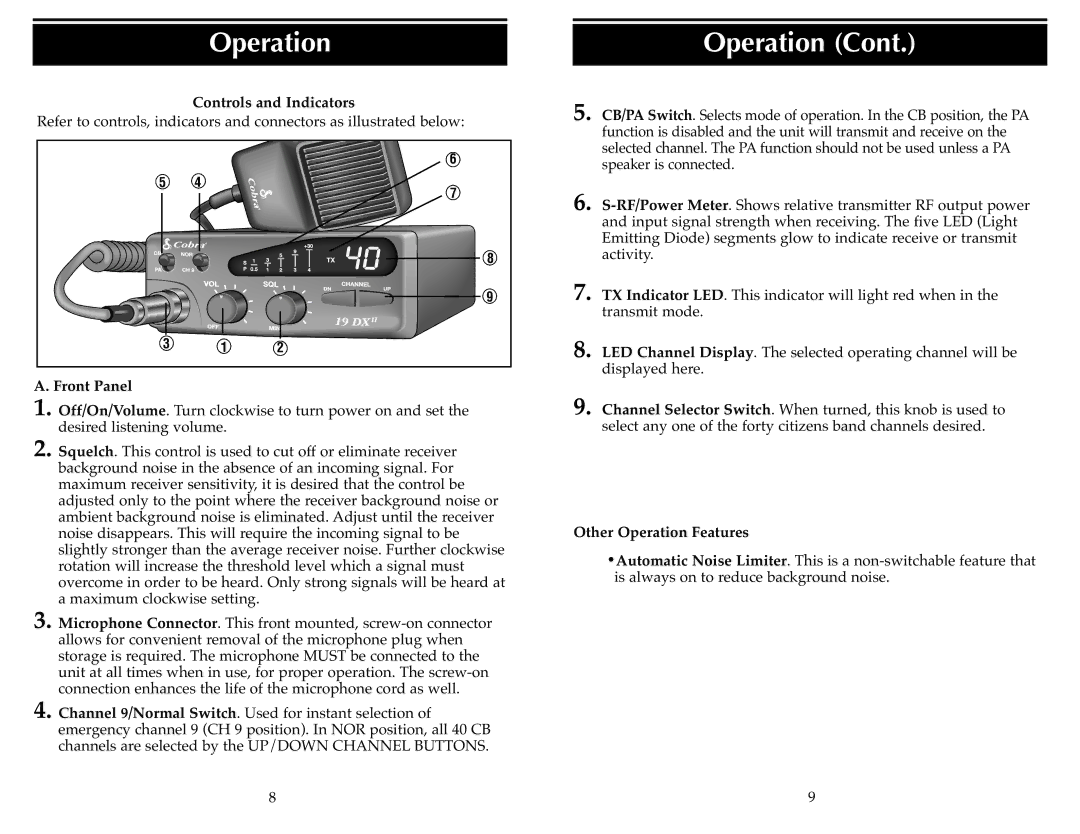
Controls and Indicators
Refer to controls, indicators and connectors as illustrated below:
|
| 6 |
5 | 4 | 7 |
|
| |
|
| 8 |
|
| 9 |
3 | 1 | 2 |
A. Front Panel
1.
2. Squelch. This control is used to cut off or eliminate receiver background noise in the absence of an incoming signal. For maximum receiver sensitivity, it is desired that the control be adjusted only to the point where the receiver background noise or ambient background noise is eliminated. Adjust until the receiver noise disappears. This will require the incoming signal to be slightly stronger than the average receiver noise. Further clockwise rotation will increase the threshold level which a signal must overcome in order to be heard. Only strong signals will be heard at a maximum clockwise setting.
3. Microphone Connector. This front mounted,
4. Channel 9/Normal Switch. Used for instant selection of emergency channel 9 (CH 9 position). In NOR position, all 40 CB channels are selected by the UP/DOWN CHANNEL BUTTONS.
8
Operation (Cont.)
5. CB/PA Switch. Selects mode of operation. In the CB position, the PA function is disabled and the unit will transmit and receive on the selected channel. The PA function should not be used unless a PA speaker is connected.
6.
7. TX Indicator LED. This indicator will light red when in the transmit mode.
8. LED Channel Display. The selected operating channel will be displayed here.
9. Channel Selector Switch. When turned, this knob is used to select any one of the forty citizens band channels desired.
For a “RAPID” change of channels, depress and hold the desired button (up and down). This allows all 40 channels to be covered in about 6 seconds.
Other Operation Features
•Automatic Noise Limiter. This is a
9