
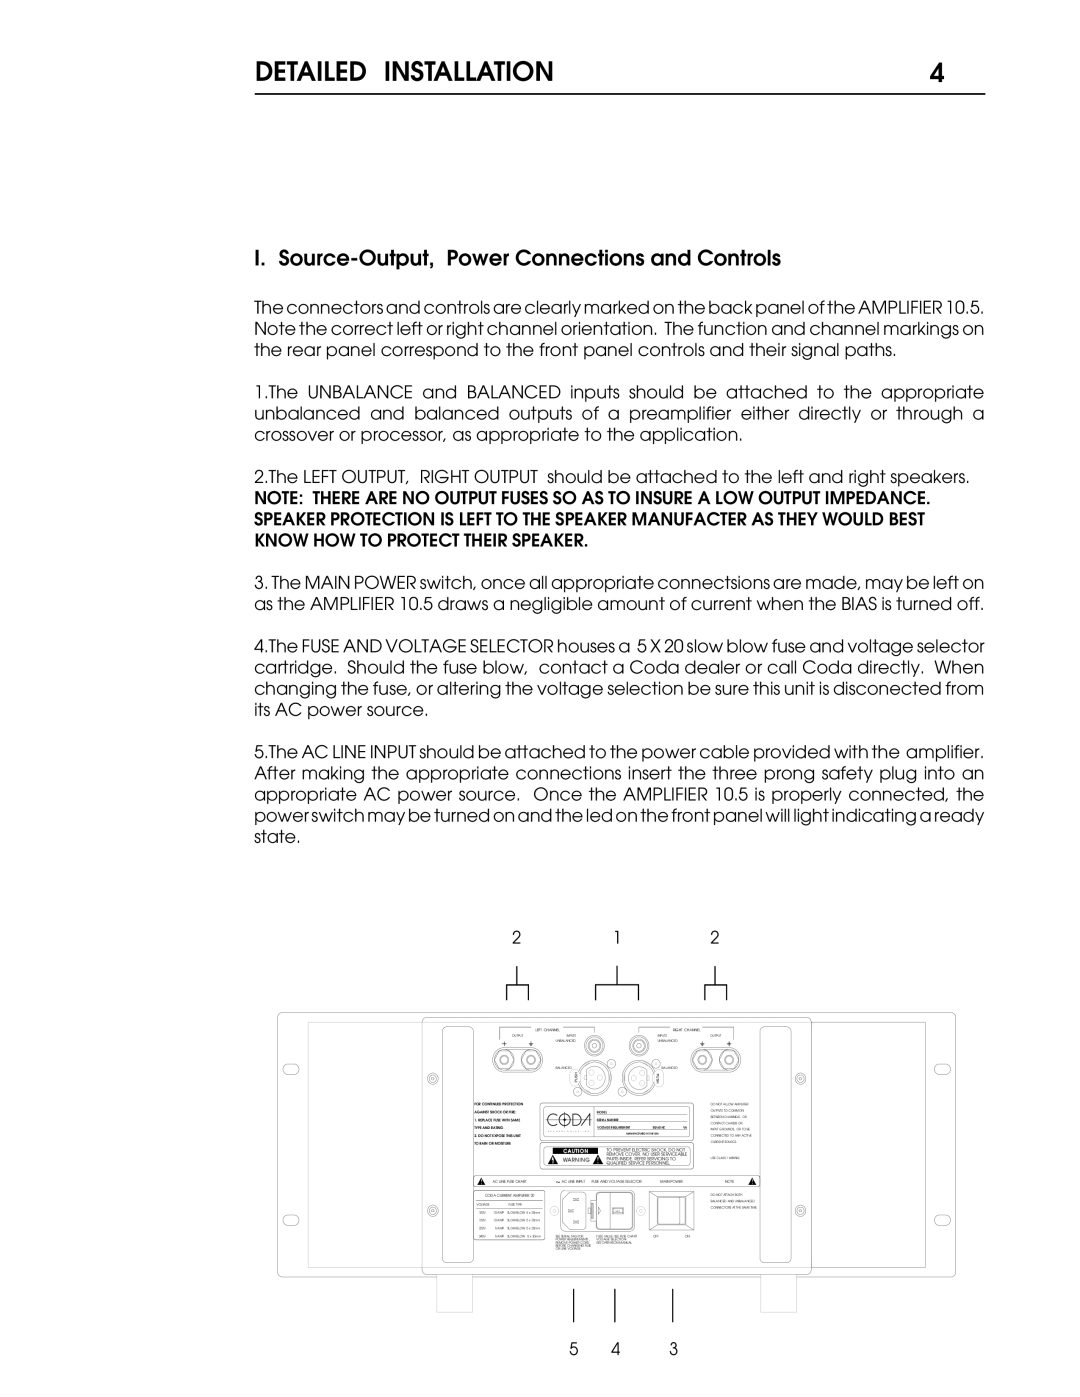
10.5 specifications
Coda 10.5 is a robust web development application that has evolved to meet the growing needs of developers and designers. This latest release brings a host of new features, enhancements, and improvements that significantly streamline the workflow for front-end development.One of the standout features of Coda 10.5 is its enhanced code editing capabilities. The syntax highlighting has been improved for various programming languages, making it easier for users to read and write code. The new autocomplete function allows for smoother coding by suggesting completions for functions and methods, helping developers save time and reduce errors.
Another exciting addition is the integration of a powerful built-in terminal. This feature enables developers to execute command-line operations directly within the Coda interface, eliminating the need to switch between multiple applications and enhancing productivity. The terminal supports various command-line tools, offering flexibility for developers who prefer using the command line for version control, deployment, and testing.
Coda 10.5 has also amplified its support for modern web technologies. The updated version is fully compatible with HTML5, CSS3, and the latest JavaScript frameworks. This ensures that developers can create responsive and interactive web applications without worrying about compatibility issues. Furthermore, the enhanced live preview feature allows users to see real-time updates as they make changes to their code, providing immediate feedback and making the development process more intuitive.
In addition, Coda 10.5 introduces improved collaboration tools. The built-in file sharing and version control system enables teams to work together seamlessly. Users can share files and track changes easily, making it simple to coordinate with team members and manage projects effectively.
The interface of Coda 10.5 has been polished for a more streamlined user experience. It now features customizable layouts and panels, allowing users to tailor the workspace to their preferences. This flexibility enhances focus and efficiency, essential for creative projects.
In conclusion, Coda 10.5 emerges as an essential tool for modern web developers. With enhanced code editing, built-in terminal functionality, updated support for web technologies, improved collaboration features, and an optimized user interface, Coda 10.5 stands out as a comprehensive solution for both seasoned developers and newcomers alike. Its continuous evolution reflects the changing landscape of web development, ensuring that users have the tools they need to succeed.