Fig. 8
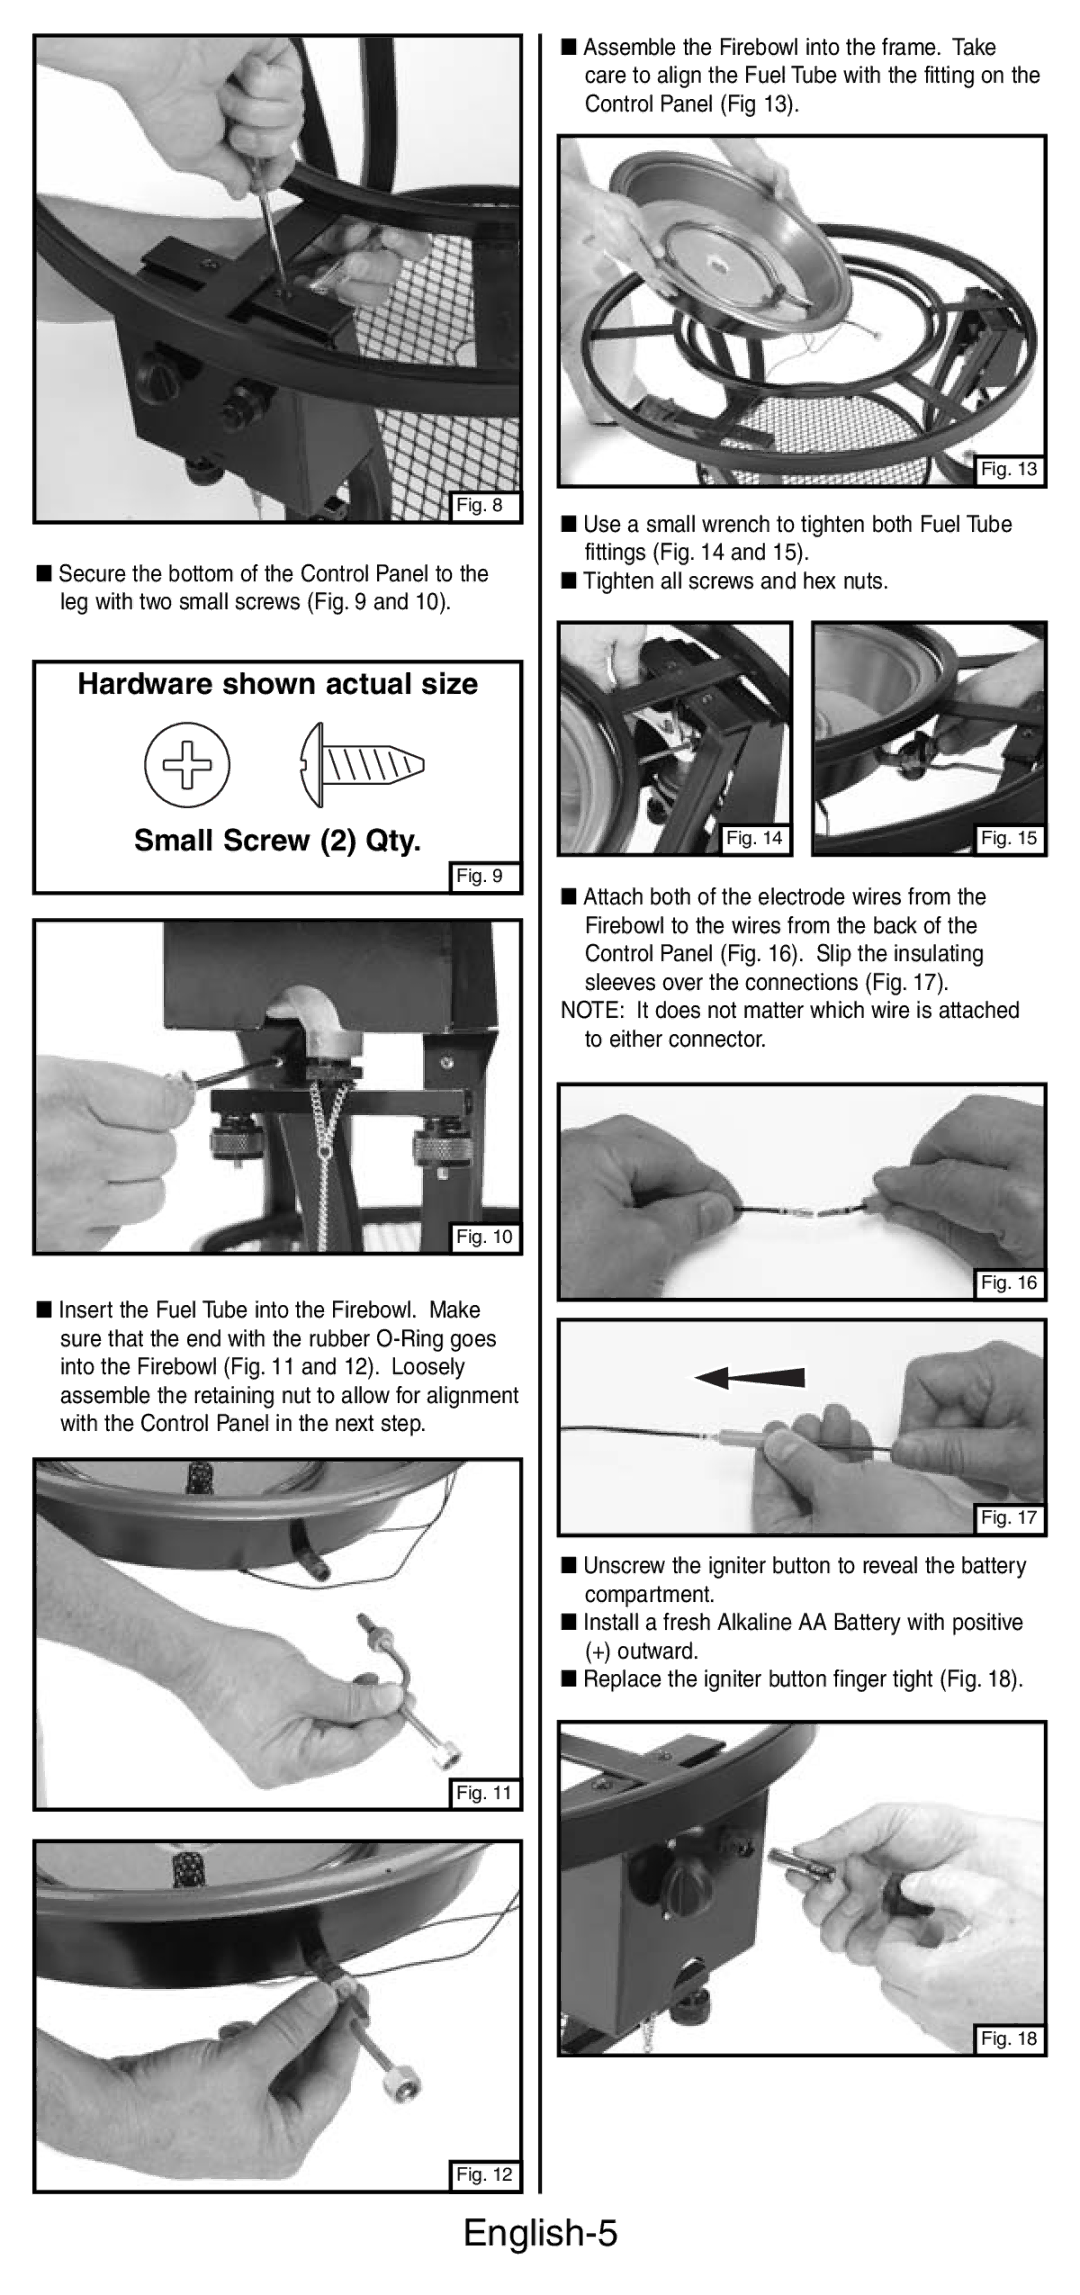
■Secure the bottom of the Control Panel to the leg with two small screws (Fig. 9 and 10).
Hardware shown actual size
Small Screw (2) Qty.
Fig. 9
Fig. 10
■Insert the Fuel Tube into the Firebowl. Make sure that the end with the rubber
Fig. 11
Fig. 12
■Assemble the Firebowl into the frame. Take care to align the Fuel Tube with the fitting on the Control Panel (Fig 13).
Fig. 13
■Use a small wrench to tighten both Fuel Tube fittings (Fig. 14 and 15).
■Tighten all screws and hex nuts.
|
|
|
|
|
| Fig. 14 |
|
| Fig. 15 |
■Attach both of the electrode wires from the Firebowl to the wires from the back of the Control Panel (Fig. 16). Slip the insulating sleeves over the connections (Fig. 17).
NOTE: It does not matter which wire is attached to either connector.
Fig. 16
Fig. 17
■Unscrew the igniter button to reveal the battery compartment.
■Install a fresh Alkaline AA Battery with positive
(+) outward.
■Replace the igniter button finger tight (Fig. 18).
Fig. 18