In Case of Grease Fire
Follow These Steps:
1.Shut off the gas at the burner valve(s) and stay away!
2.Allow the fire to burn itself out.
3.Once the fire is out and the appliance has cooled, shut off the L.P. cylinder valve.
4.Clean all parts and inspect for damage. Parts to check for damage are the L.P. cylinder, cylinder valve, regulator, gas supply hose, burner valve(s) and burner(s).
5.If any of the above mentioned components are damaged, seek replacement from Coleman before operating the grill again by calling
Note:
•Some
•Avoid excessive
•Cook with the lid down and continually monitor cooking food to avoid grease fires and
•Trimming excess fat from meat will reduce grease fires and flare- ups. Cook fatty meat in smaller amounts over indirect heat on a low setting.
•Be sure to follow the instructions in the section titled “Care, Maintenance, and Cleaning”.
Cooking Methods
Direct Method:
•The heat source is directly below the food.
•Use for browning meat or cooking hot dogs and hamburgers, but check food frequently.
•Use for skillet and
•Cook roasts, turkey or duck on low heat. Place meat with water in a foil pan with a corrugated bottom. Replenish water as needed.
Indirect Method:
•Light only one side of the grill and place food on the opposite side for cooking.
•Allow food to cook at a lower temperature which increases tenderness and reduces grease
•It is a good method for cooking foods that burn easily (vegetables, fish, etc.).
•Cook casseroles in ovenware or foil pans much like cooking in a conventional oven.
•Also try placing a pan of water above the lit burner side to help meat retain its juices. Replenish the water as needed.
Rear Infrared Burner Method:
•Light only the Rear Infrared Burner.
•Place food on the rotisserie accessory (sold separately).
•Allows food to cook slowly and evenly.
22
Care, Maintenance and Cleaning
DRIP TRAY
The drip tray is located below the grill, inside the cart, and should be cleaned periodically to prevent heavy buildup of debris.
NOTE: Allow the drip tray to cool before attempting to clean.
Important: Do not leave the grill outside during inclement weather unless it is covered (cover sold separately). Rain water can collect inside of the grill, the grill cart or the drip tray if left uncovered. If the drip tray is not cleaned after use and the grill is left uncovered, the drip tray will fill with water causing grease and water to spill into the grill cart. We recommend cleaning and storing the drip tray after every use.
COOKING GRATES
The cooking grates can be cleaned immediately after cooking is completed and after turning off the grill. Wear a barbecue mitt and scrub the cooking grates with a damp cloth. If the grill is allowed to cool down, cleaning the grates will be easier if removed from the grill and cleaned with a mild detergent.
STAINLESS STEEL
After initial usage, areas of the grill may discolor from the intense heat given off by the burners, this is normal and not considered a defect.
Purchase a mild stainless steel cleaner and rub in the direction of the grain of the metal. Specks of grease can gather on the surface of the stainless steel and bake on to the surface and give a worn appearance. For removal, use an
NOTE: Always scrub in the direction of the grain.
IGNITER ACCESS:
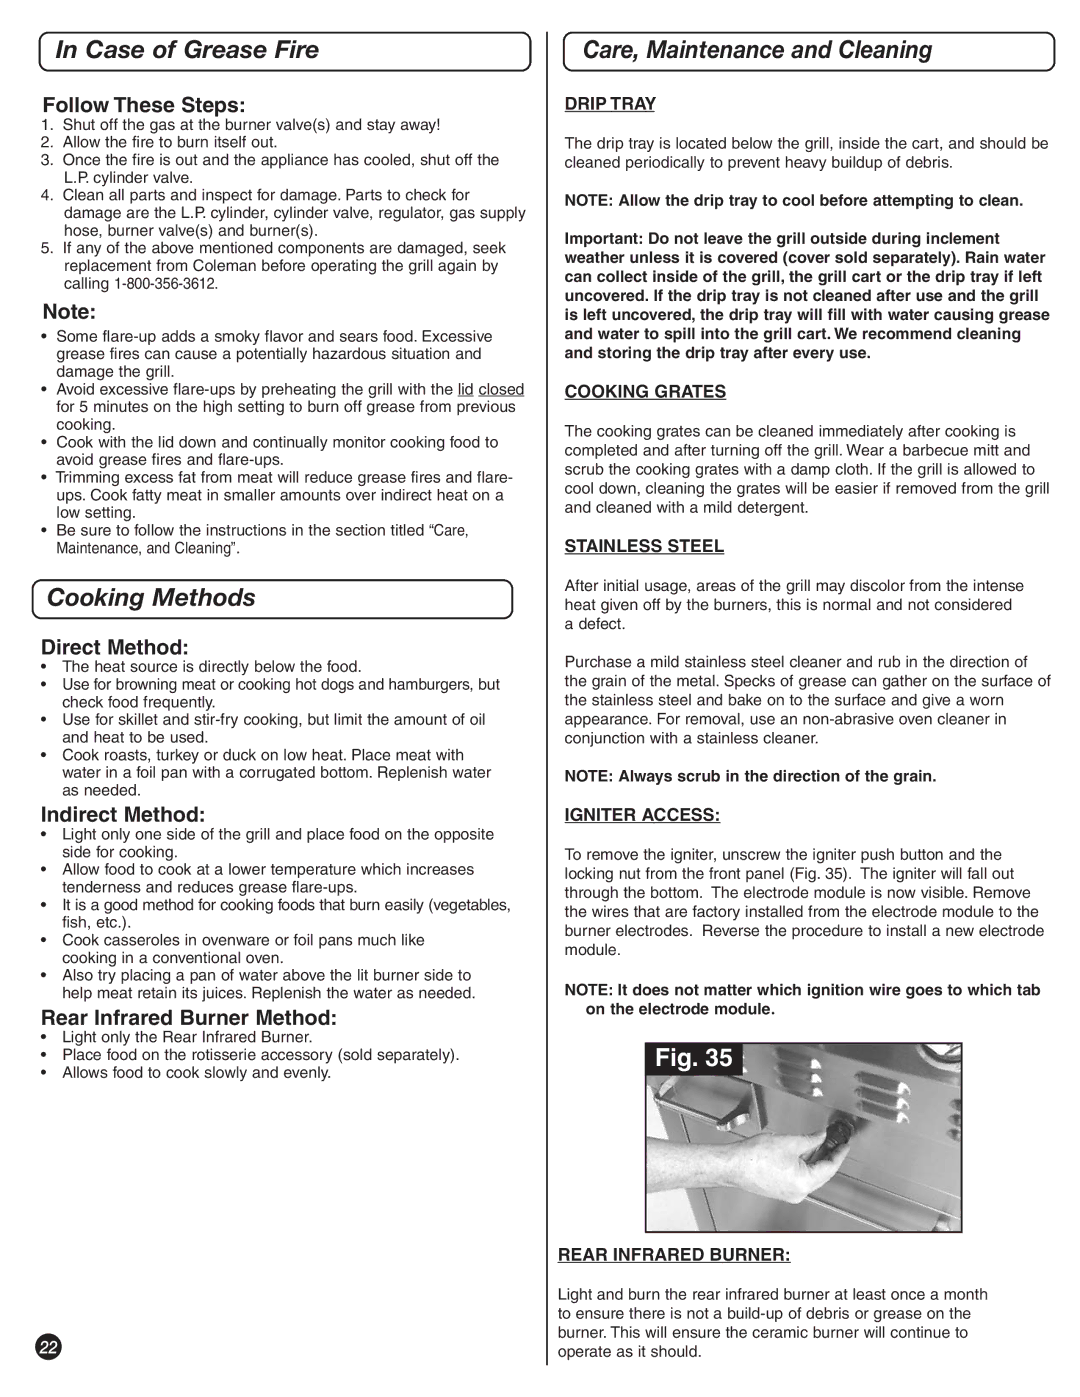
To remove the igniter, unscrew the igniter push button and the locking nut from the front panel (Fig. 35). The igniter will fall out through the bottom. The electrode module is now visible. Remove the wires that are factory installed from the electrode module to the burner electrodes. Reverse the procedure to install a new electrode module.
NOTE: It does not matter which ignition wire goes to which tab on the electrode module.
Fig. 35
REAR INFRARED BURNER:
Light and burn the rear infrared burner at least once a month to ensure there is not a