POSITIONINGTHETABLE AND WORKPtECE

(FIG. AA AND BB)

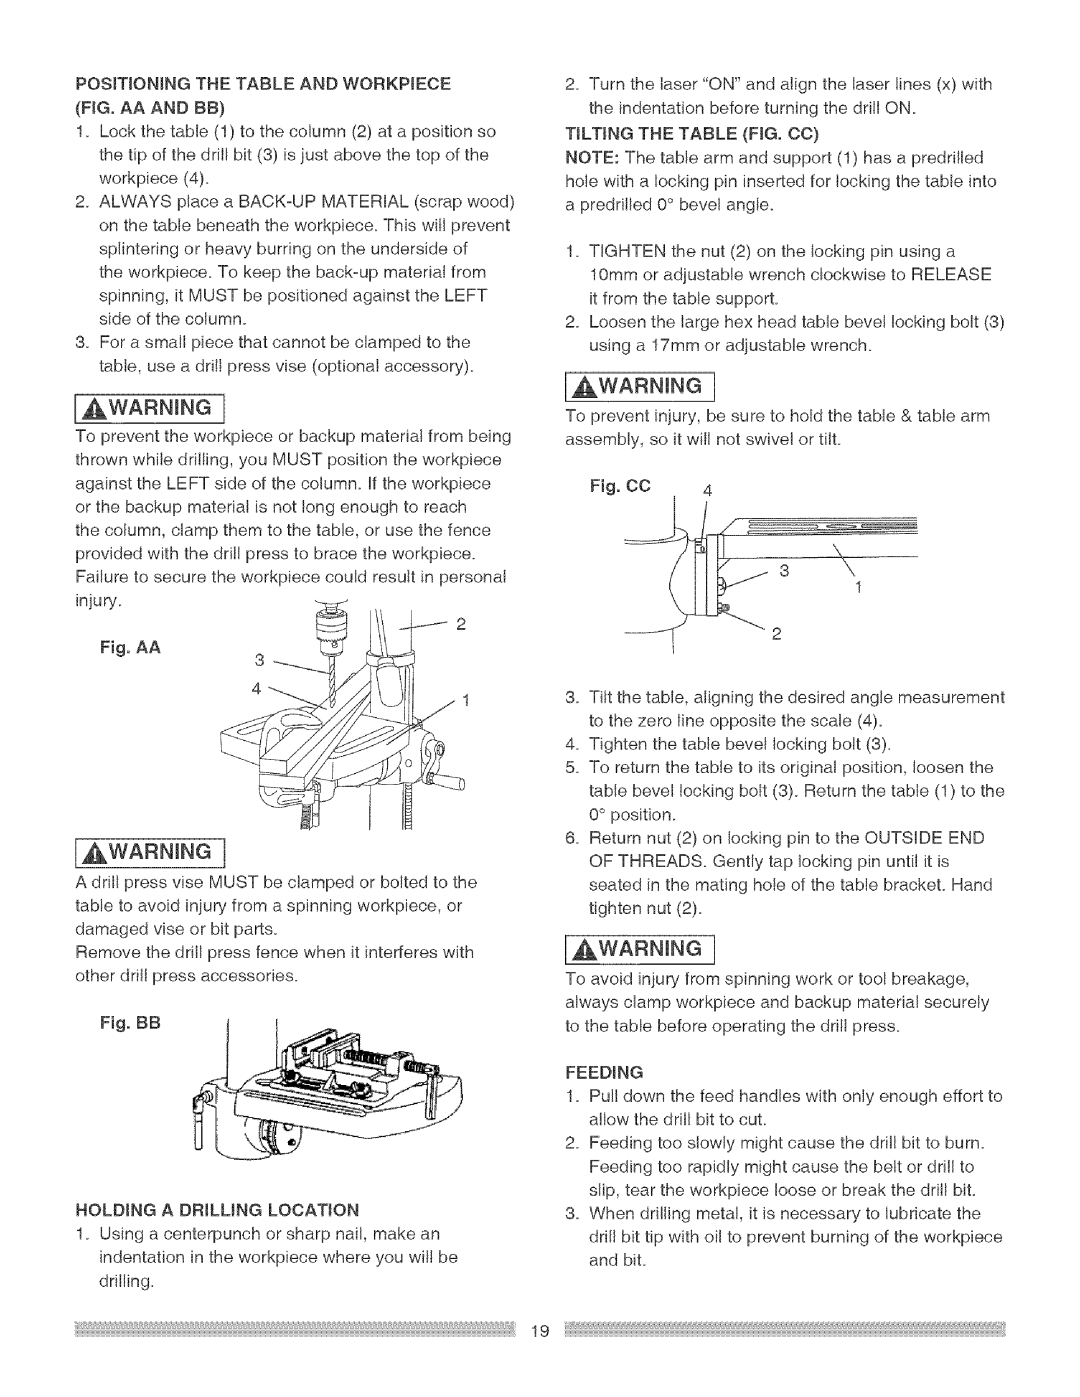
1.Lock the table (1) to the column (2) at a position so the tip of the drill bit (3) is just above the top of the workpiece (4).

2.ALWAYS place a BACK-UP MATERIAL (scrap wood) on the table beneath the workpiece. This will prevent splintering or heavy burring on the underside of

the workpiece. To keep the back-up material from spinning, it MUST be positioned against the LEFT side of the column.

3.For a small piece that cannot be clamped to the table, use a drill press vise (optional accessory).

[ WARNING I

To prevent the workpiece or backup material from being thrown while drilling, you MUST position the workpiece against the LEFT side of the column. If the workpiece or the backup material is not long enough to reach

the column, clamp them to the table, or use the fence provided with the drift press to brace the workpiece. Failure to secure the workpiece could result in personal

injury.

Fig. AA

3 ---.._

,

_ 2

4

[_WARNING I

A dritl press vise MUST be clamped or bolted to the table to avoid injury from a spinning workpiece, or damaged vise or bit parts.

Remove the drill press fence when it interferes with other dril! press accessories.

Fig. BB

HOLDING A DRILLING LOCATION

I. Usinga centerpunchorsharpnail,make an

indentationtheworkpieoewhere you willbe

drilling.

2.Turn the laser "ON" and align the laser lines (x) with the indentation before turning the drill ON.

TILTING THE TABLE (FIG. CO)

NOTE: The table arm and support (1) has a predrilled hole with a locking pin inserted for locking the table into a predrilled 0° bevel angle.

1.TIGHTEN the nut (2) on the locking pin using a 10mm or adjustable wrench clockwise to RELEASE it from the table support.

2.Loosen the large hex head table bevel locking bolt (3) using a 17ram or adjustable wrench.

IAWARNINGI

To preventinjury,be suretoholdthetable& tablearm

assembly,so itwillnotswivelortilt.

Fig. CO 4

(

2

3.Tiltthe table, aligning the desired angle measurement to the zero line opposite the scale (4).

4.Tighten the table bevel locking bolt (3).

5.To return the table to its origina! position, loosen the table bevel locking bolt (3). Return the table (1) to the 0° position.

6.Return nut (2) on locking pin to the OUTSIDE END OF THREADS. Gently tap locking pin until it is seated in the mating hole of the table bracket. Hand tighten nut (2).

IAWARN N¢I

To avoid injury from spinning work or tool breakage, always clamp workpiece and backup material securely to the table before operating the drilI press.

FEEDING

1.Pulldown the feed handles with only enough effort to allow the drift bit to cut.

2.Feeding too slowly might cause the drill bit to burn. Feeding too rapidly might cause the belt or drill to slip, tear the workpiece loose or break the drill bit.

3.When drilling meta!, it is necessary to lubricate the

drill bit tip with oil to prevent burning of the workpiece and bit.

19

Page 19
Image 19
Craftsman 137.219 operating instructions Positioningthetable and WORKPtECE, Tilting the Table FIG. CO, Feeding

137.219 specifications

The Craftsman 137.219 is a versatile and powerful table saw that appeals to both DIY enthusiasts and professional woodworkers alike. Known for its durability and precision, this tool is designed to deliver high-quality cuts while ensuring user safety and convenience.

One of the standout features of the Craftsman 137.219 is its robust 15-amp motor, which provides ample power to cut through various types of wood, including harder materials. This high-performance motor ensures consistent and smooth operation, making it ideal for both detailed work and heavy-duty projects.

The saw features a 10-inch blade, which is perfect for making a wide range of cuts, from ripping to crosscutting. The blade can be easily adjusted for height and angle, allowing users to execute bevel cuts up to 45 degrees. This adaptability makes the Craftsman 137.219 suitable for a wide variety of applications, whether for furniture making or home improvement tasks.

Safety is a top priority with the Craftsman 137.219. It comes with a sturdy blade guard that provides protection during use, and an anti-kickback mechanism to help prevent accidents. The push stick included with the saw ensures that users can keep their hands at a safe distance from the blade while making precise cuts.

Additionally, the table is made from high-quality materials, ensuring stability and minimizing vibrations during operation. The large tabletop provides ample workspace, accommodating larger workpieces and offering sufficient support for detailed cutting tasks.

Another noteworthy characteristic is the included fence system, which allows for easy and accurate alignment, ensuring that cuts are straight and true. The fence can be adjusted smoothly, making repetitive cuts a breeze, thereby increasing efficiency in any woodworking project.

The compact design and built-in wheels make the Craftsman 137.219 portable, allowing woodworkers to move it easily between work sites. This feature is particularly useful for contractors and remodelers who need to transport their tools frequently.

Overall, the Craftsman 137.219 combines power, safety, and versatility, making it an excellent choice for anyone looking to enhance their woodworking capabilities. Whether you are a seasoned professional or a passionate hobbyist, this table saw is designed to meet and exceed your expectations while delivering precision and reliability in every cut.