BLADE INSTALLATION AND REMOVAL
This saw is designed to use all
plug from power source BEFORE assembling parts, making adjustments I I ,_ WARNING: To prevent personal injury, ALWAYS disconnect the
or changing blades.
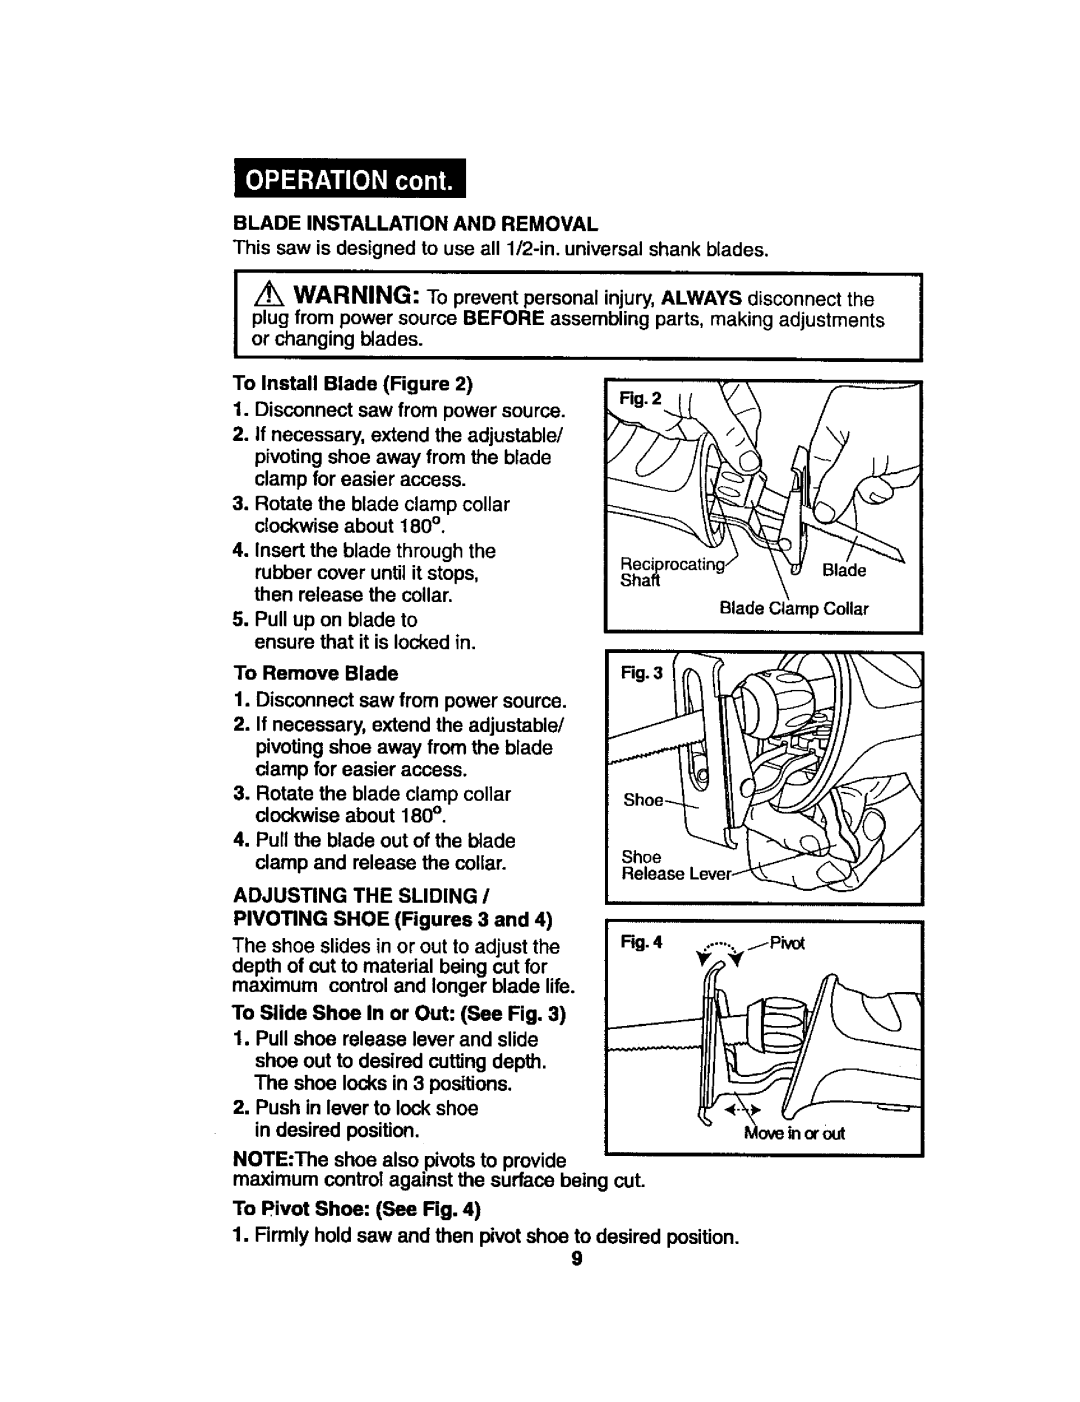
To Install Blade (Figure 2) | ...2.1 |
1. Disconnect saw from power source. |
2.If necessary, extend the adjustable/ pivoting shoe away from the blade clamp for easier access.
3.Rotate the blade clamp collar clockwise about 180 °.
4.Insert the blade through the
rubber | cover | until it stops, | _ting_ | Blade | |
then release | the | collar. |
| Blade Clamp Collar | |
5. Pull up | on blade | to |
| ||
|
| ||||
ensure | that | it is locked in. |
|
| |
To Remove | Blade | Fig.3 |
| |
1. | Disconnect saw from power source. |
| ||
|
| |||
2. | If necessary, extend the adjustable/ |
|
| |
| pivoting shoe away from the blade |
|
| |
| clamp for easier access. |
|
| |
3. | Rotate the blade clamp collar |
|
| |
| clockwise about 180°. |
|
| |
4. | Pull the blade out of the blade |
|
| |
| clamp and release the collar. | Shoe | _ ,_*_'_Y/J/ | |
| Release kever_ |
| ||
ADJUSTING | THE SLIDING / |
| ||
|
| |||
PIVOTING SHOE (Figures 3 and 4)
The shoe slides in or out to adjust the depth of cut to material being cut for maximum control and longer blade life.
To Slide Shoe In or Out: (See Fig. 3) 1, Pull shoe release lever and slide
shoe out to desired cutting depth. The shoe locks in 3 positions.
2.Push in lever to lock shoe in desired position.
NOTE:The shoe also pivots to provide maximum control against the surface being cut.
To Pivot Shoe: (See Fig. 4)
1.Firmly hold saw and then pivot shoe to desired position. 9